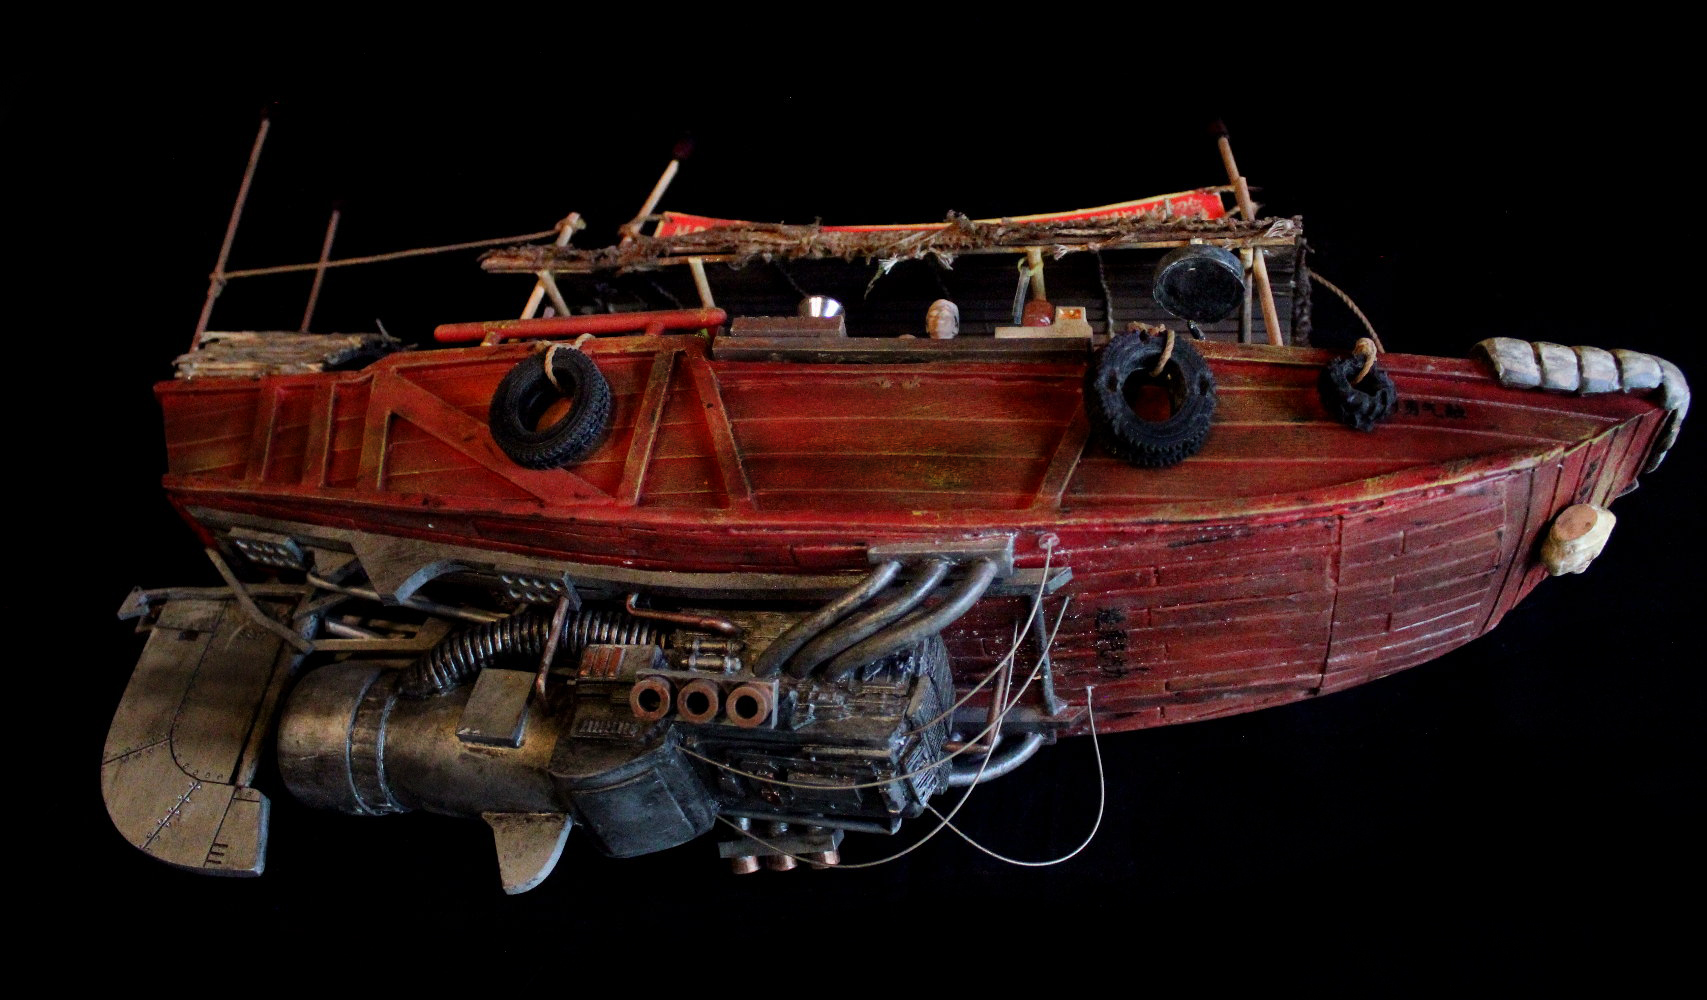
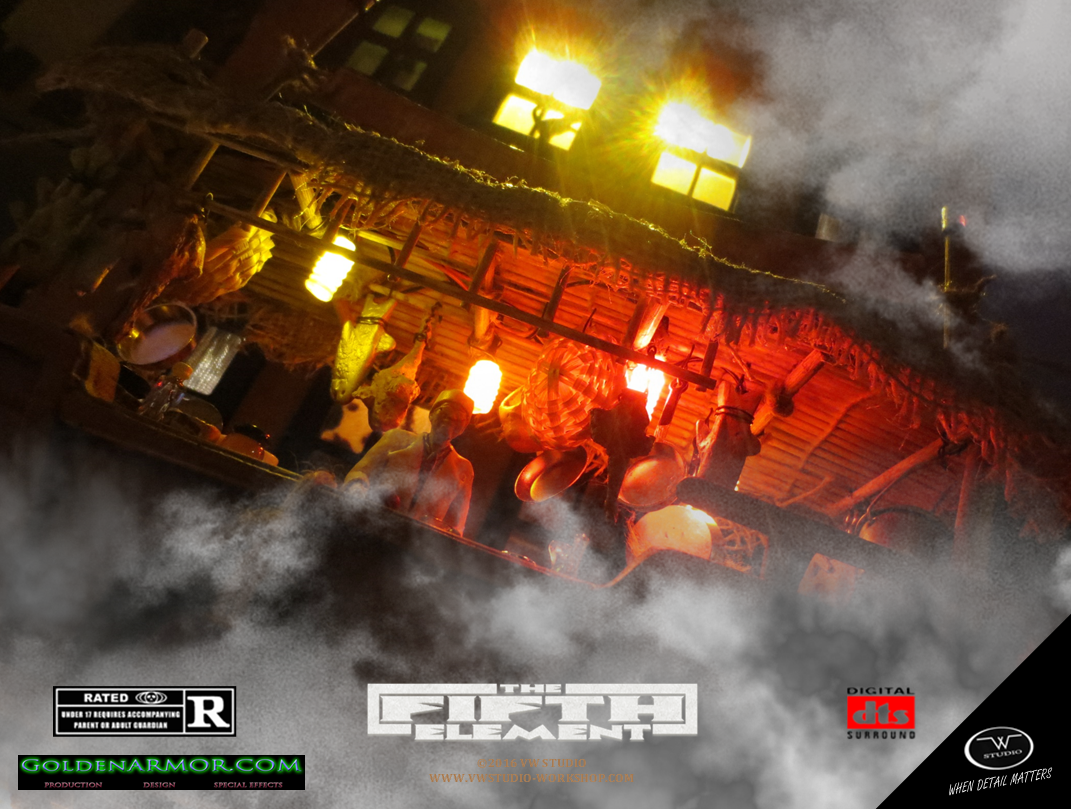
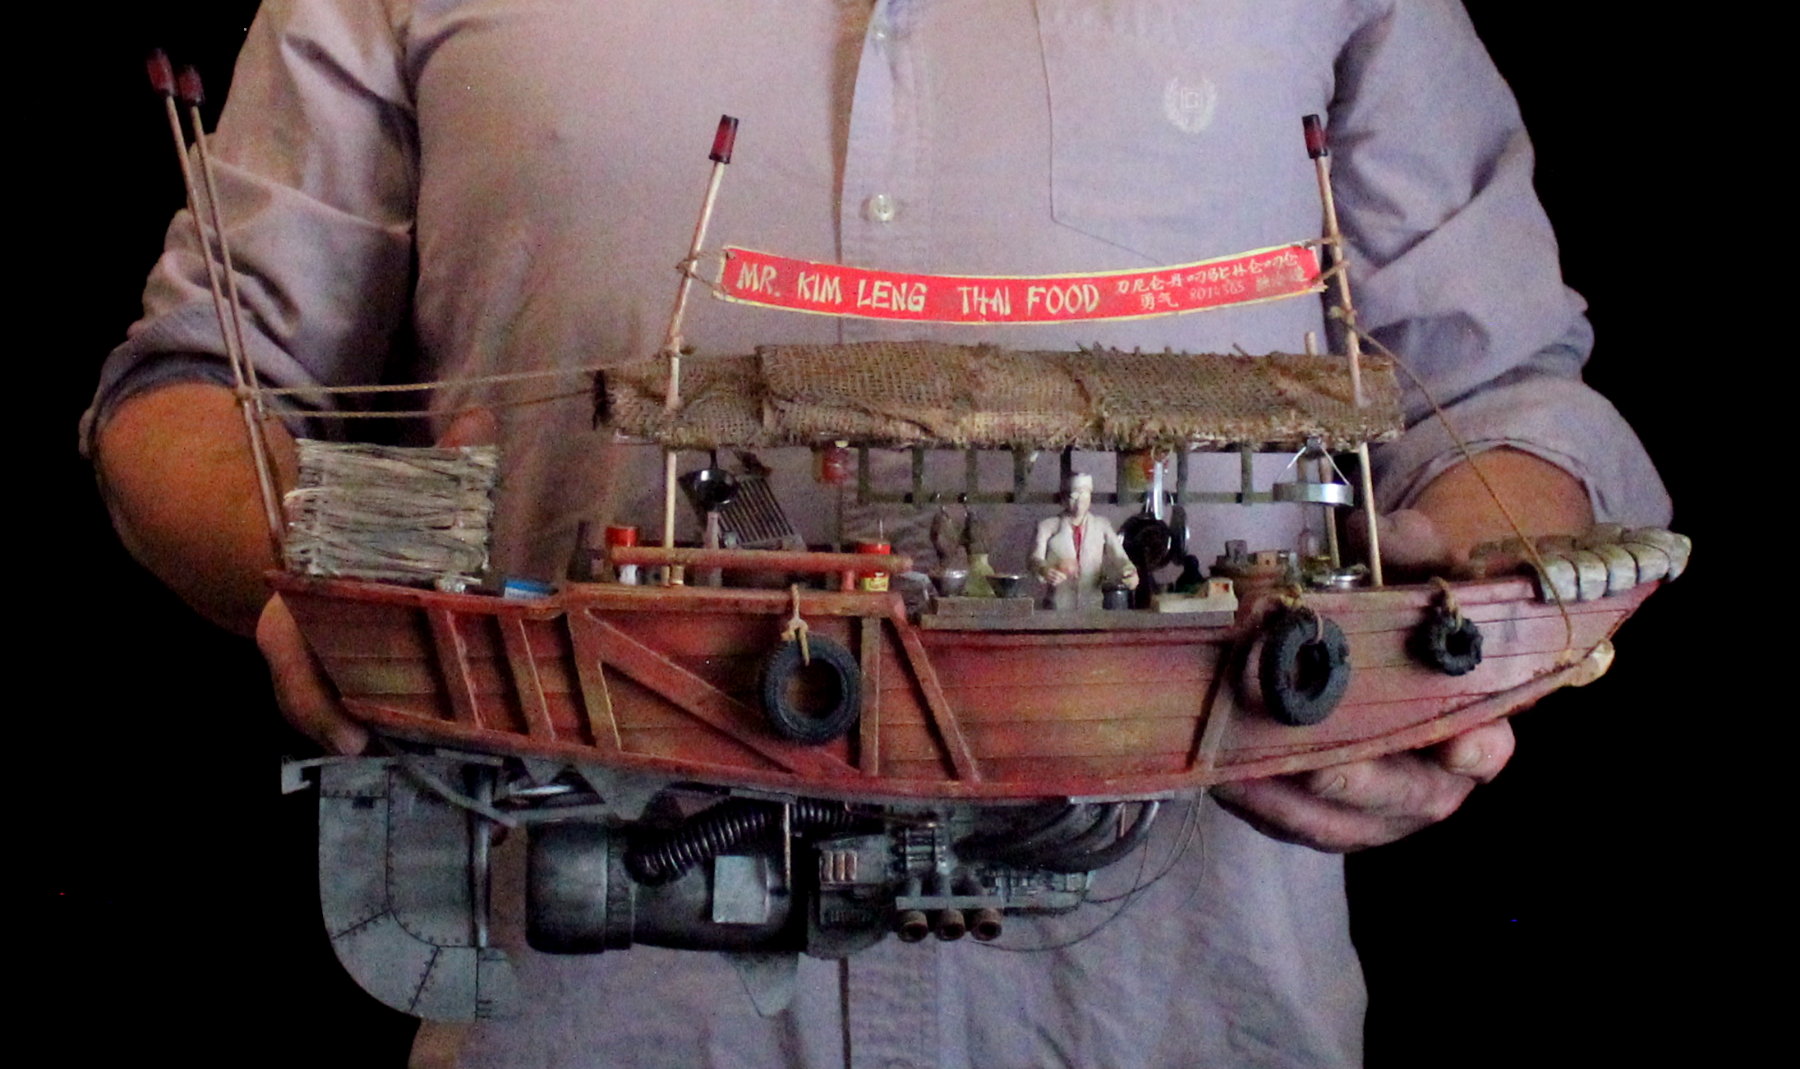
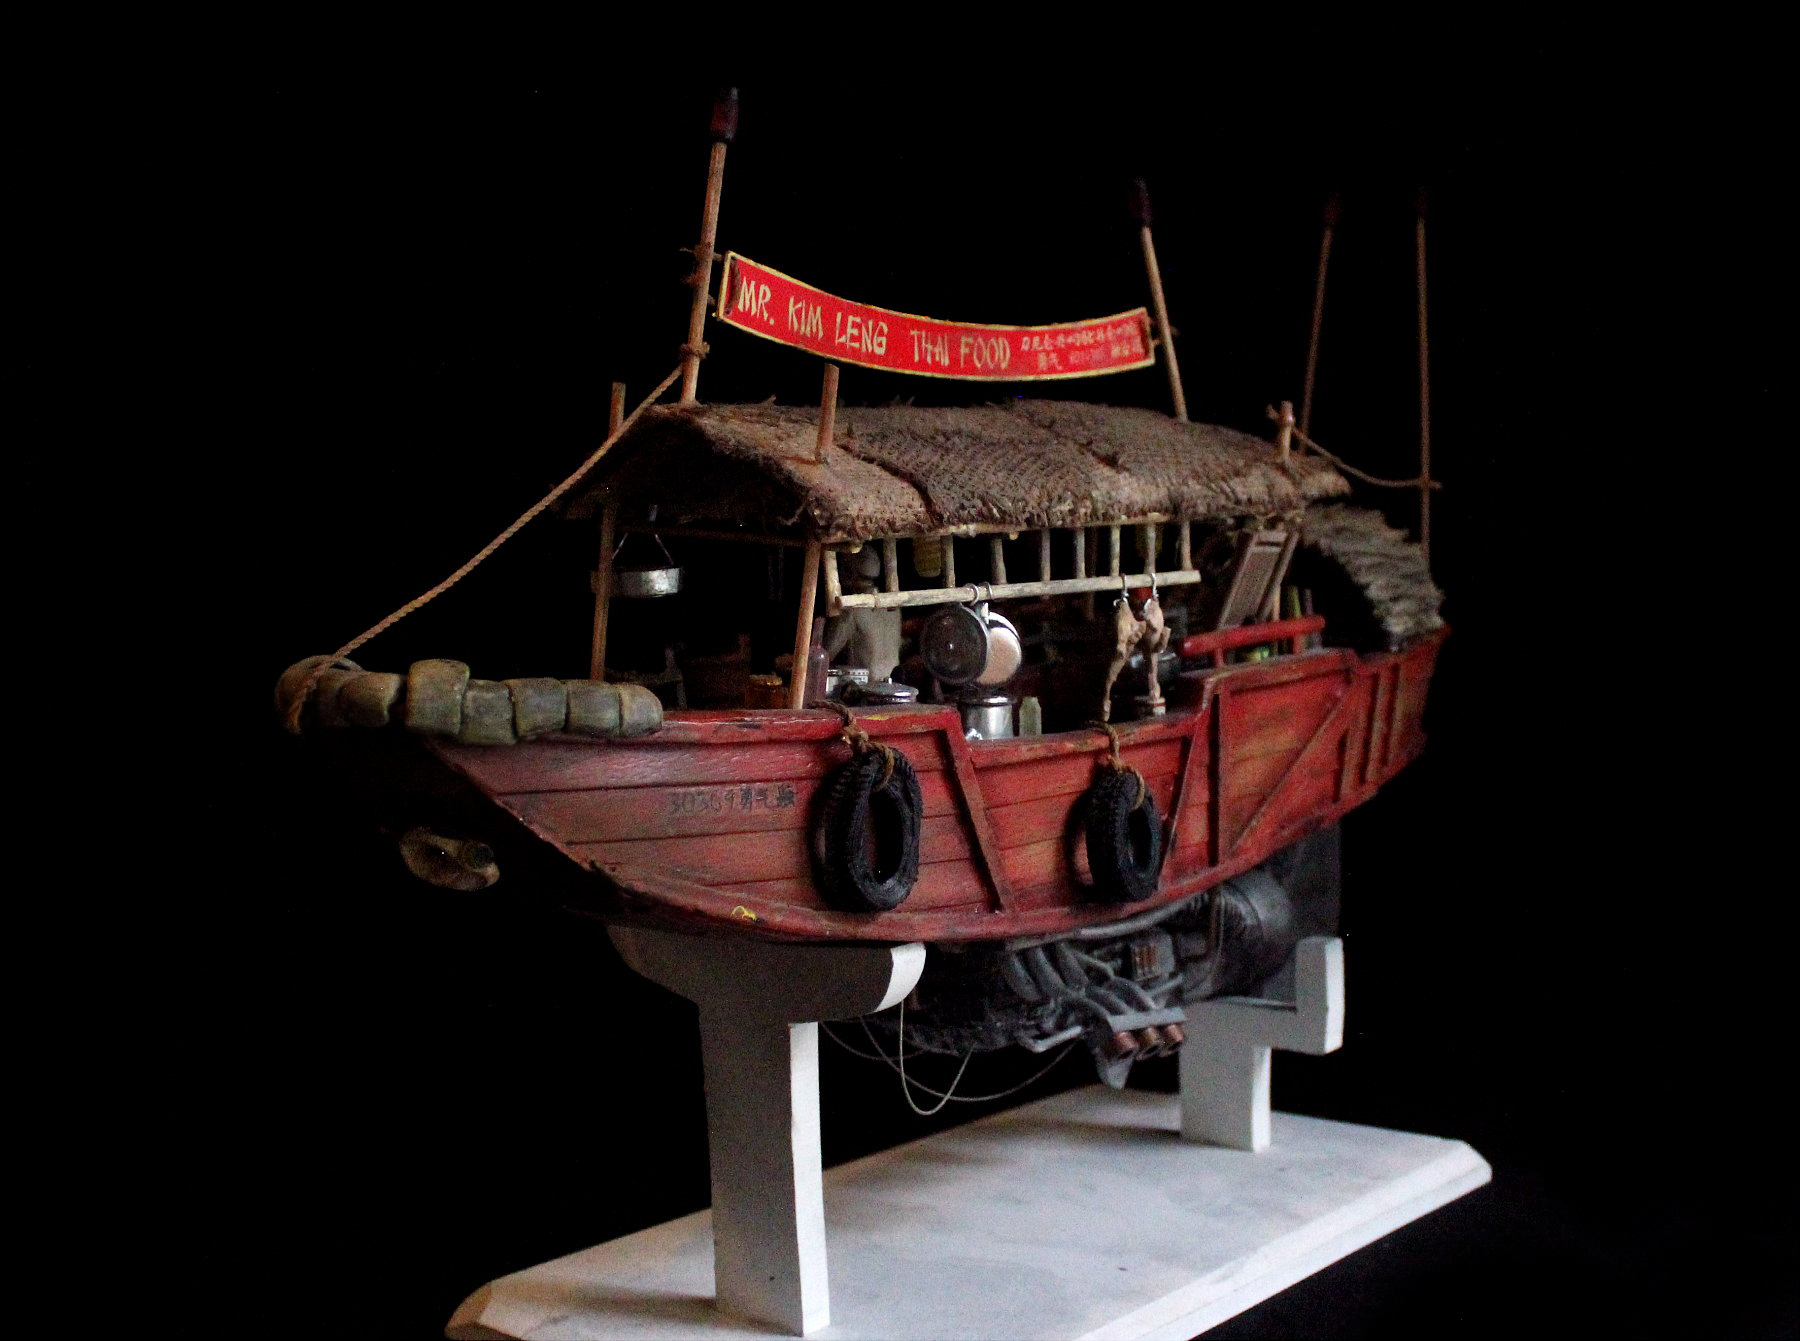
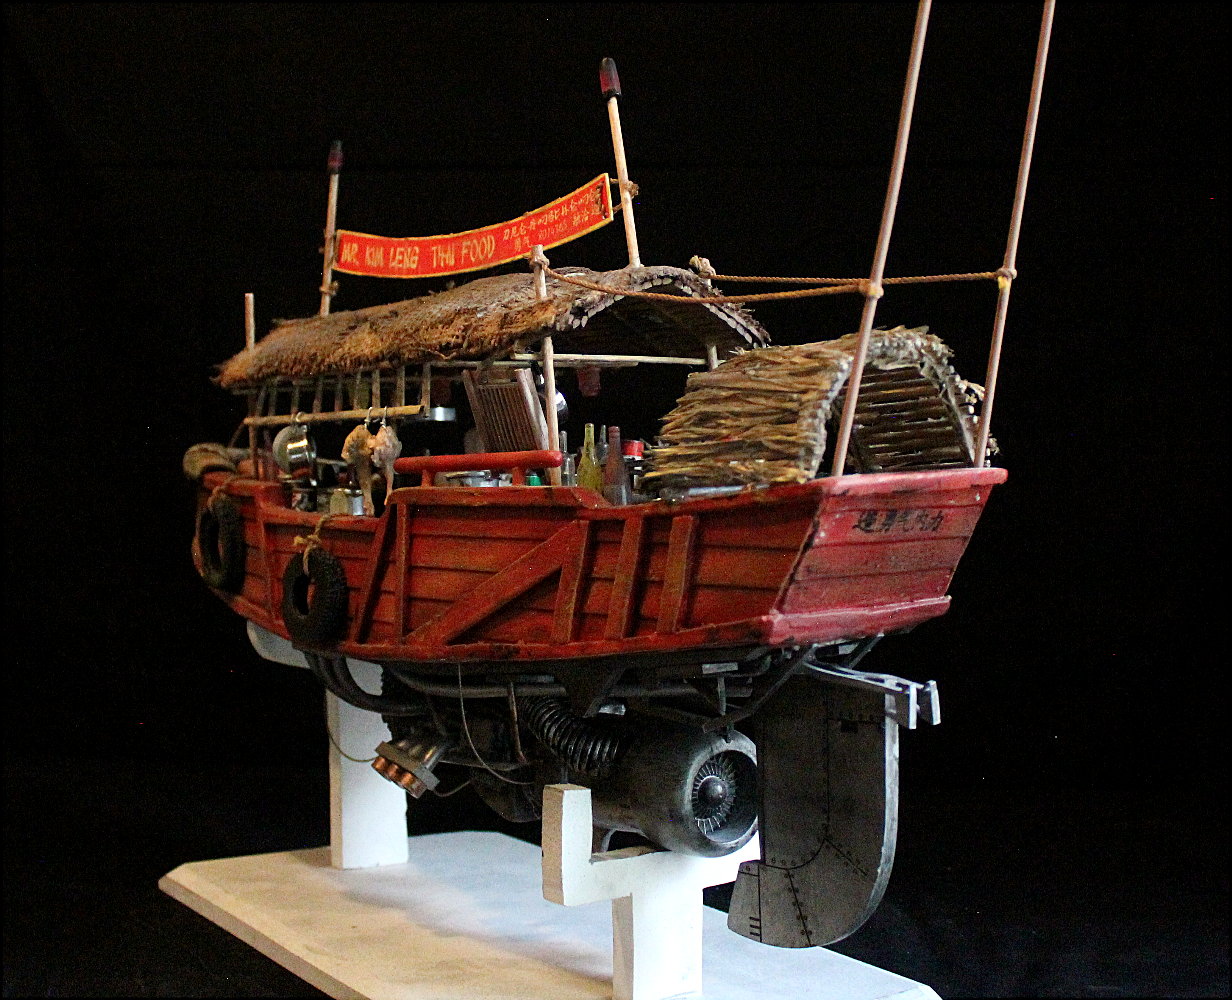
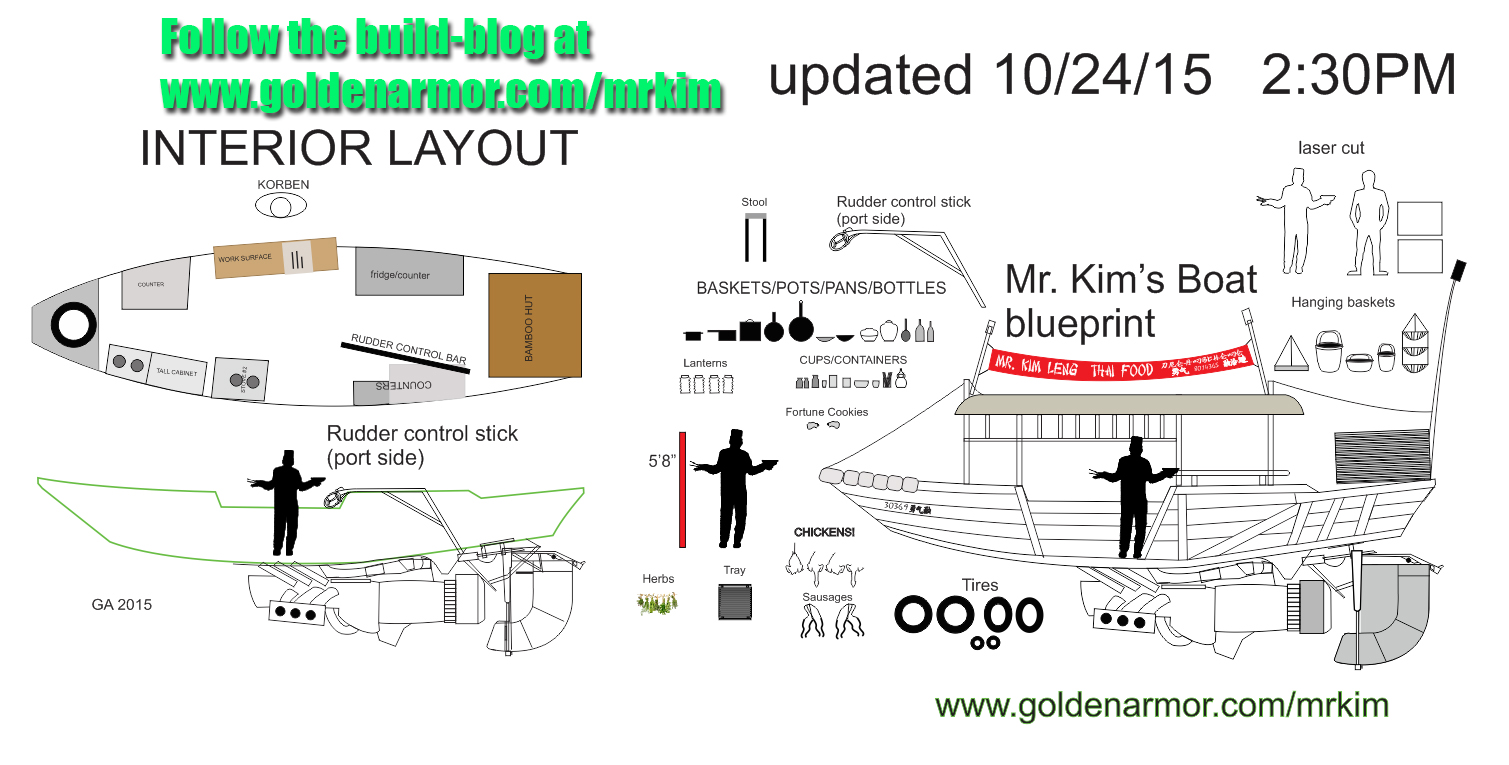
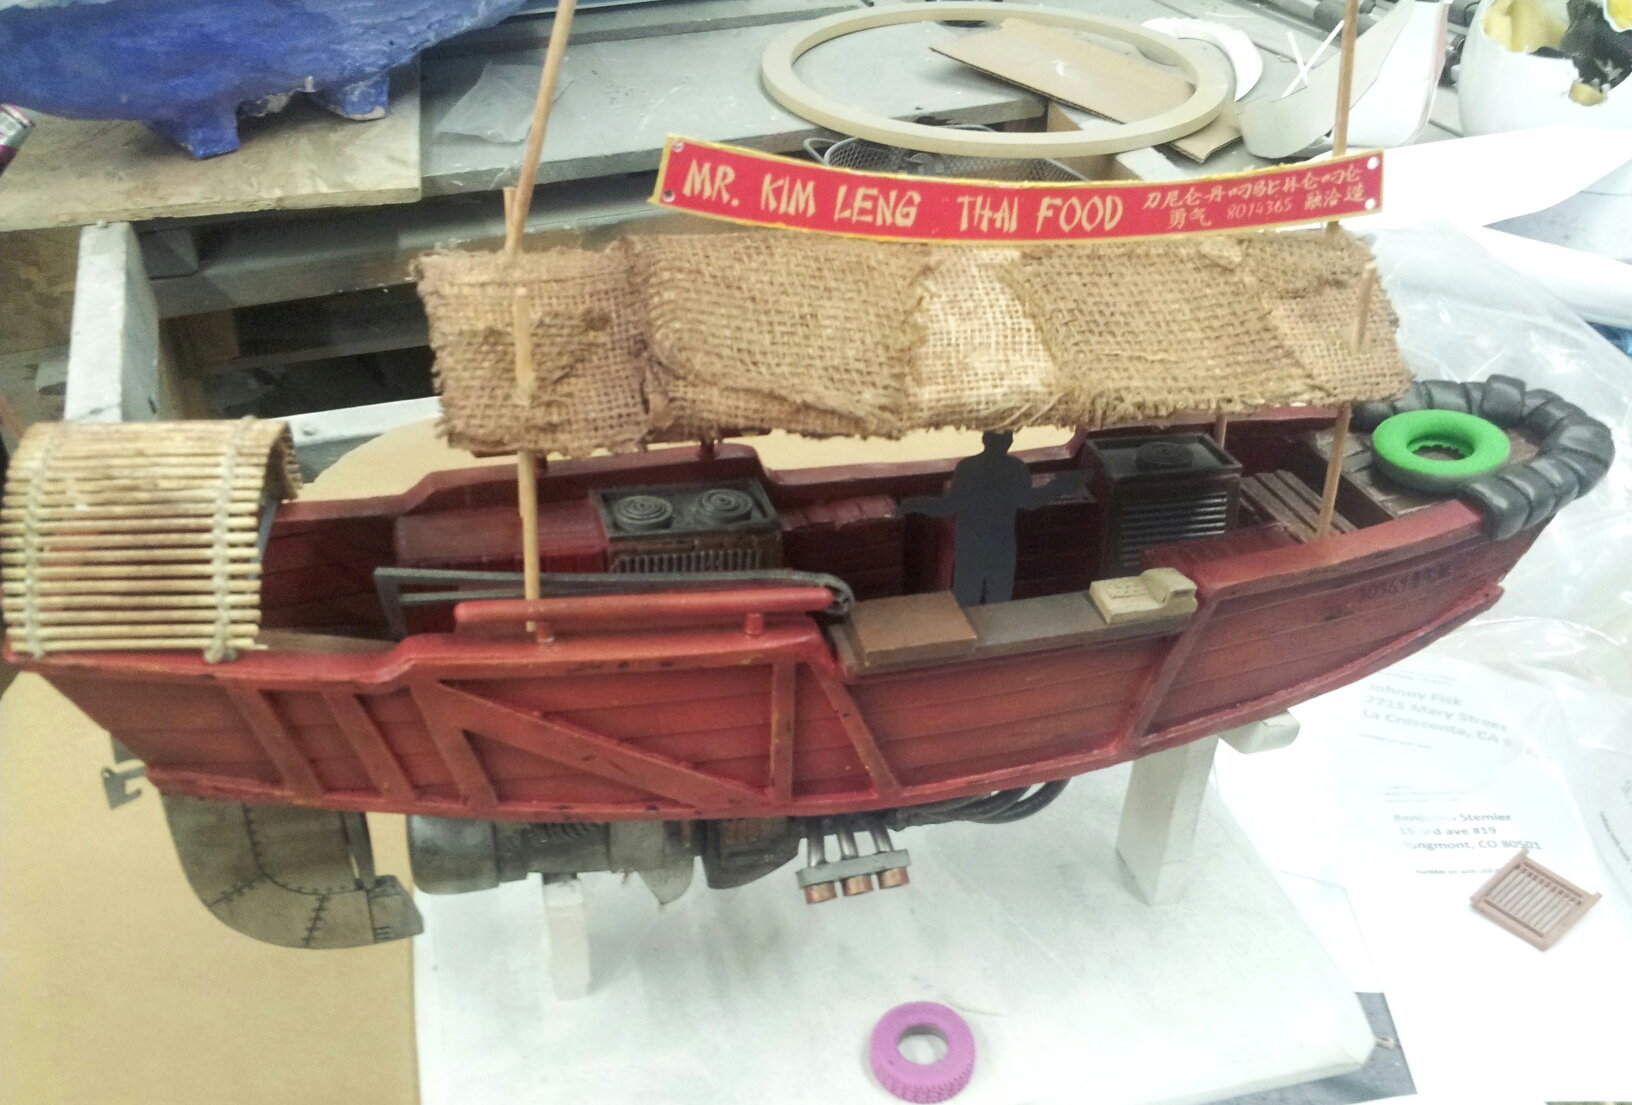
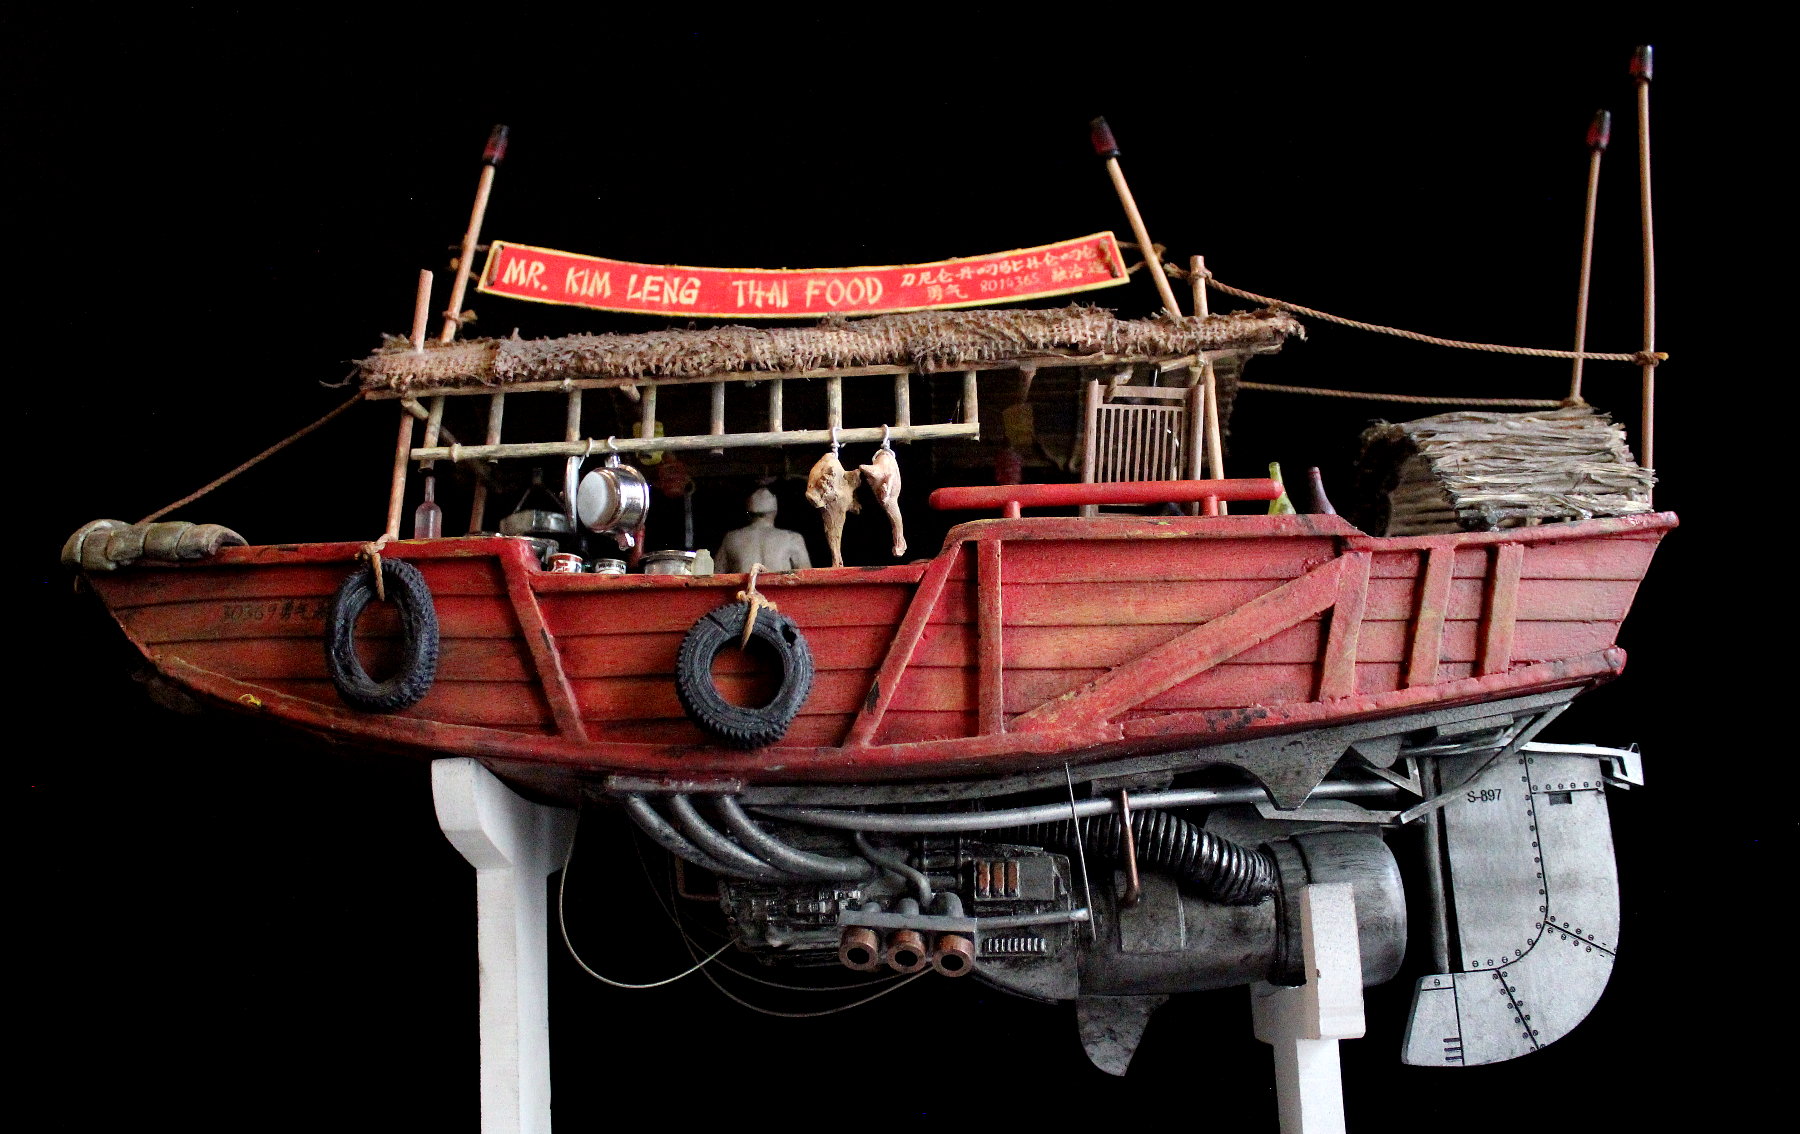
Mr. Kim's Boat from The Fifth Element
Mr. Kim's Boat!! What a remarkable surprise in one of my fave movies. The boat itself, an antinque from a long gone era, floats proudly among the manhattan traffic. What a wonderfull blend of ancient 13th century chinese nautical tech mixed with future tech!
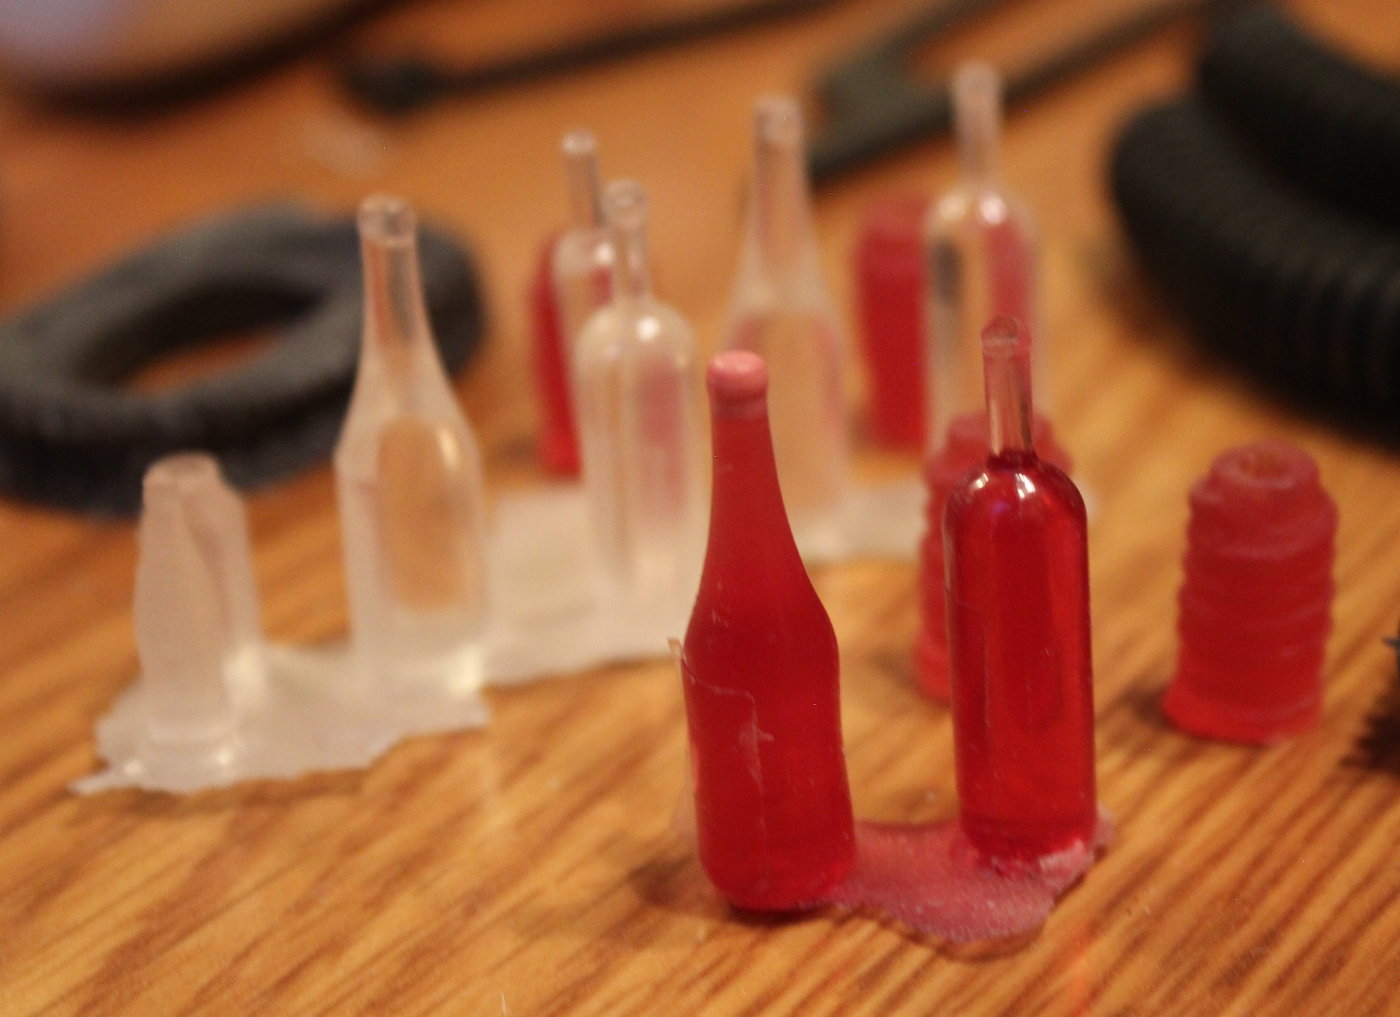
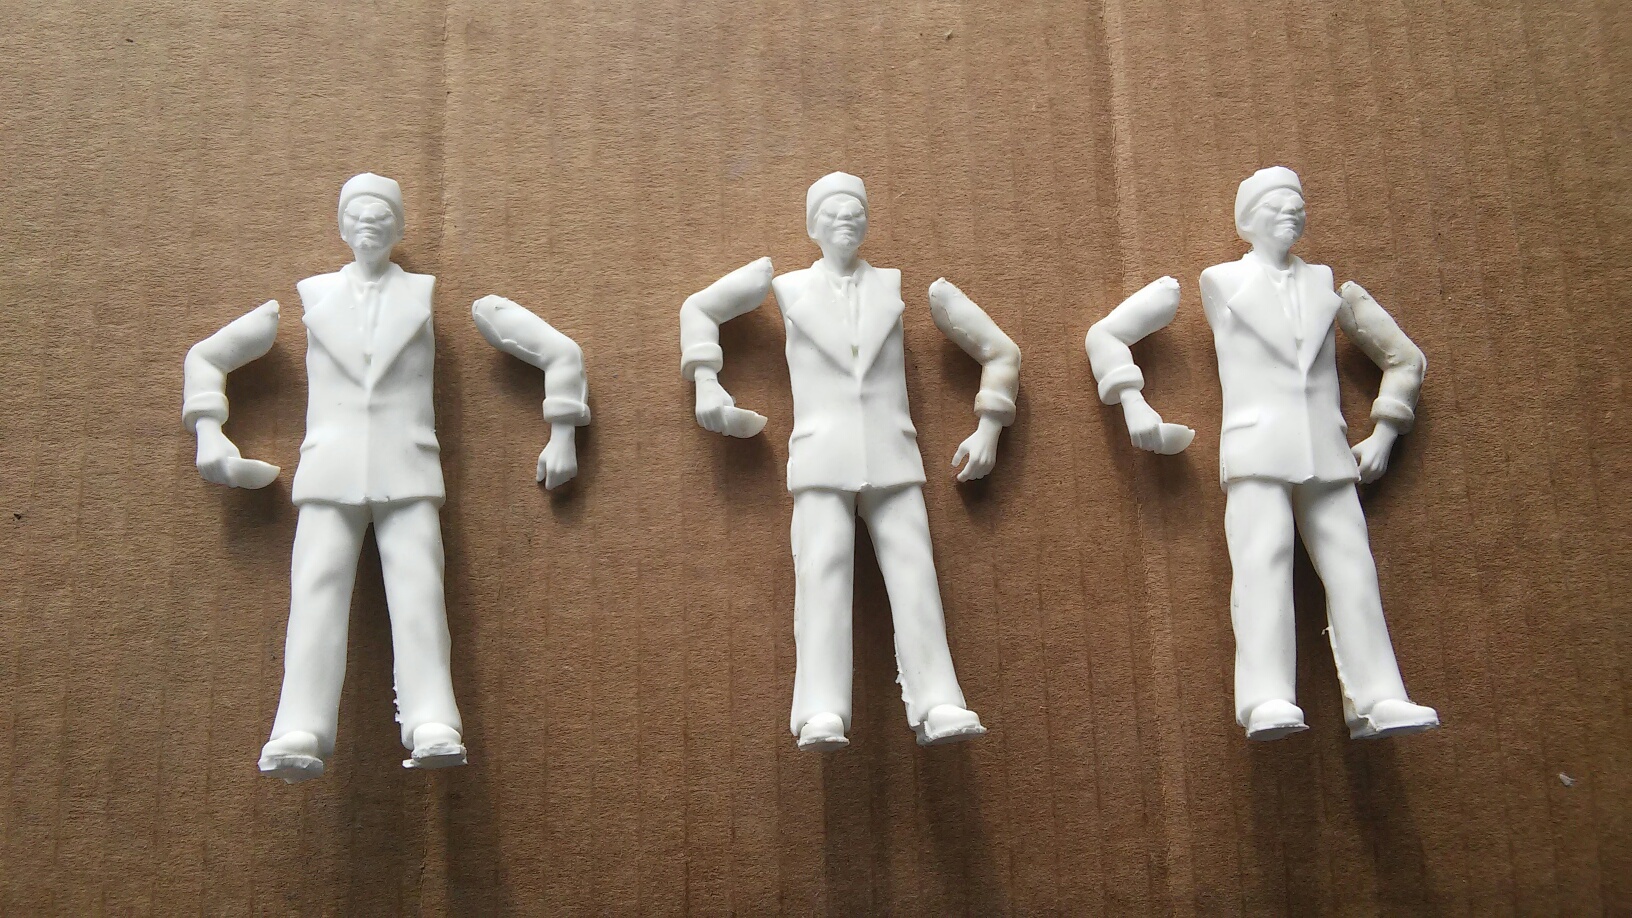
**2026 UPDATE! In all kit orders, the Mr. Kim figure itself, plus the lanterns, ducks, fish and bottles are now provided as RESIN 3D-PRINTED PARTS. THE ENGINE (3 PARTS) is now updated as a hyper detailed, hyper clean 3D resin print!
See below for photos.
ATTENTION!: THE BUYNOW BUTTONS CALCULATE FOR U.S. DESTINATIONS. If you are overseas, special arrangements need to be made. Email first.
WECOME TO THE Mr. Kim Boat Project!!
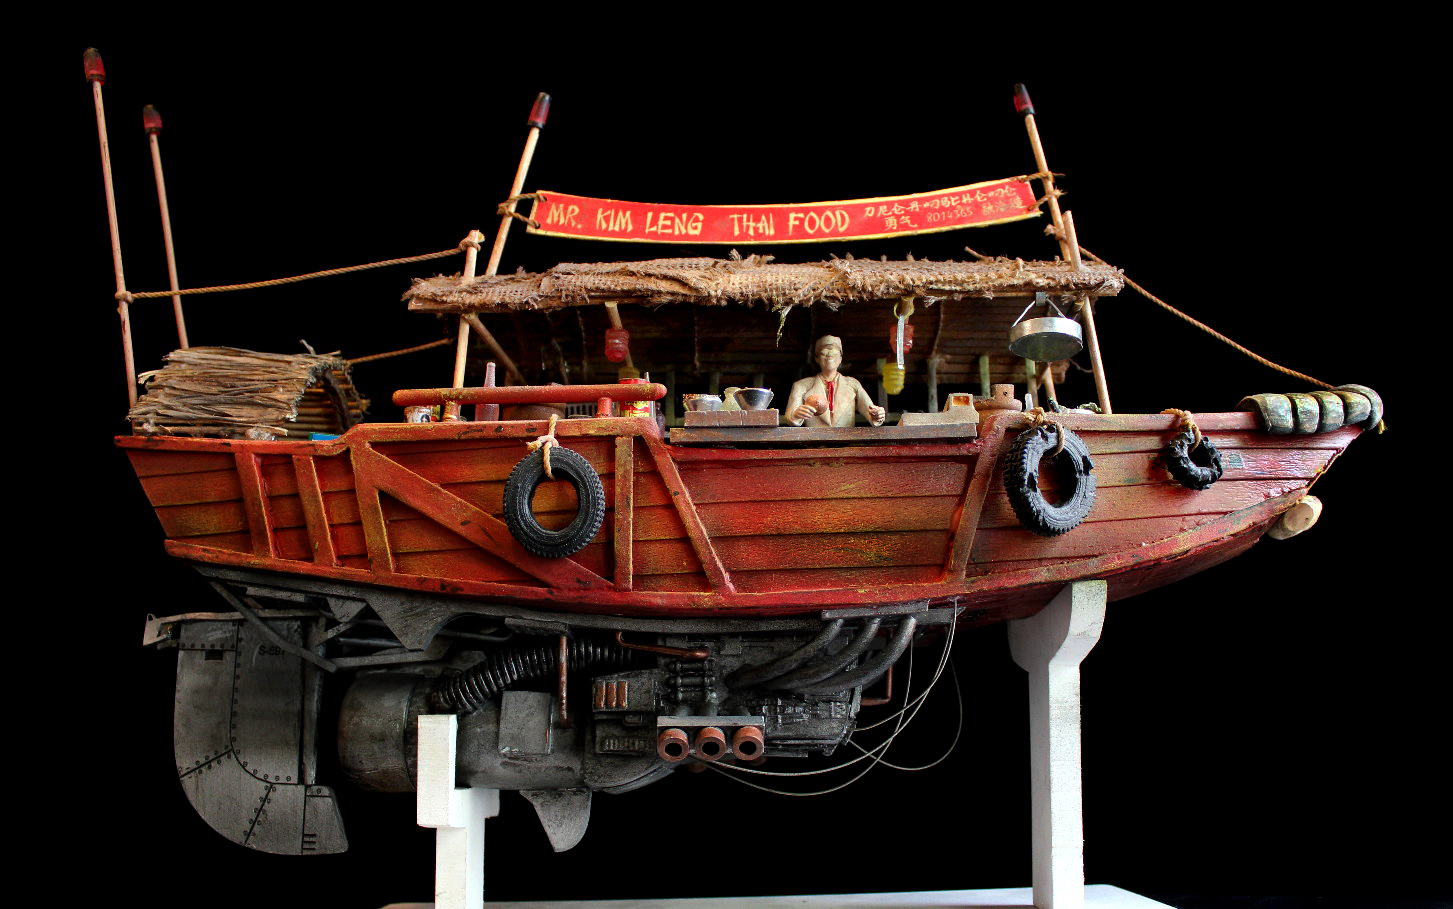
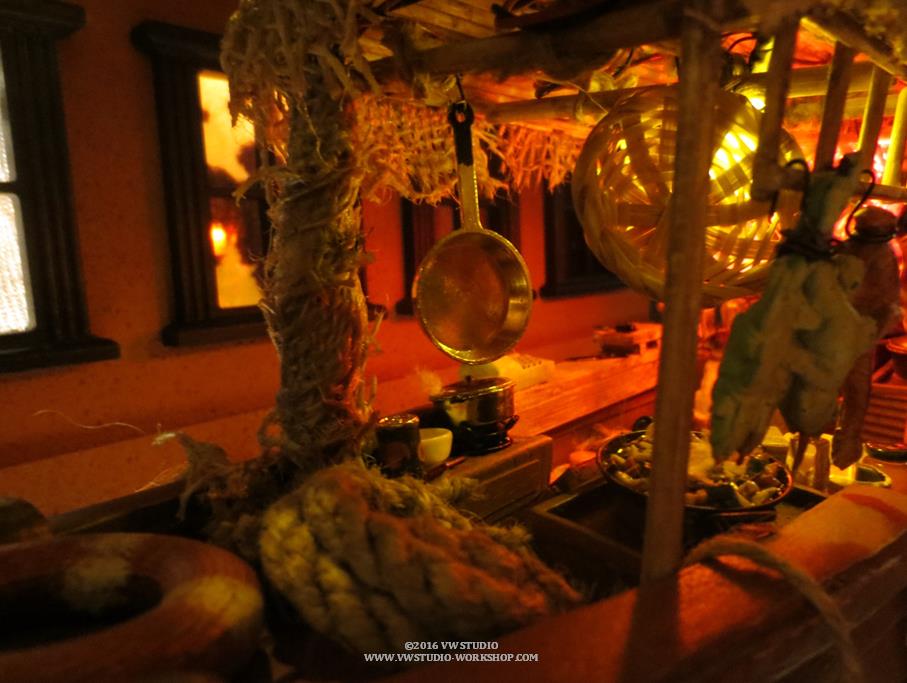
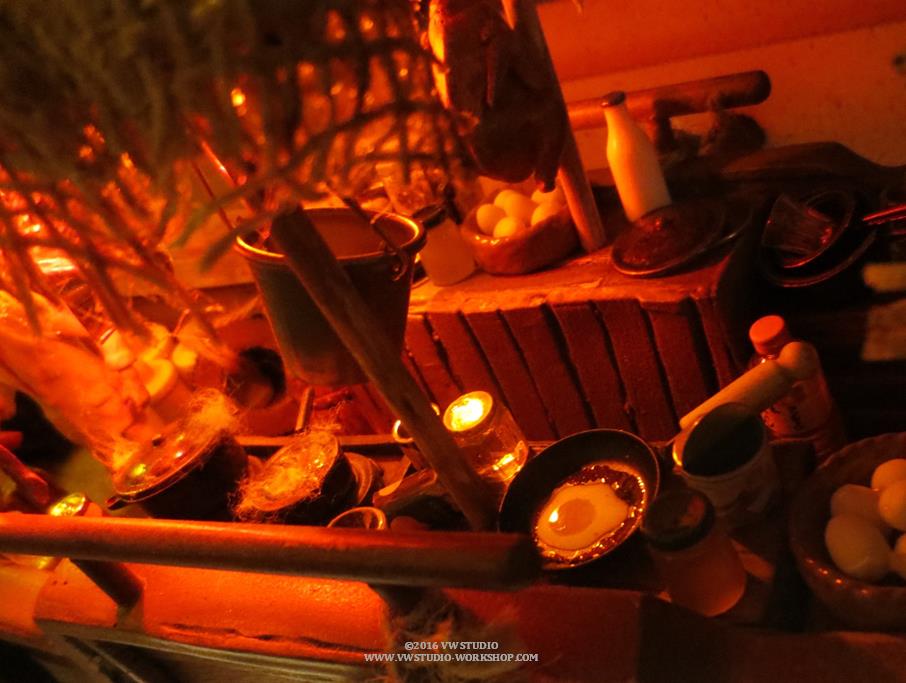
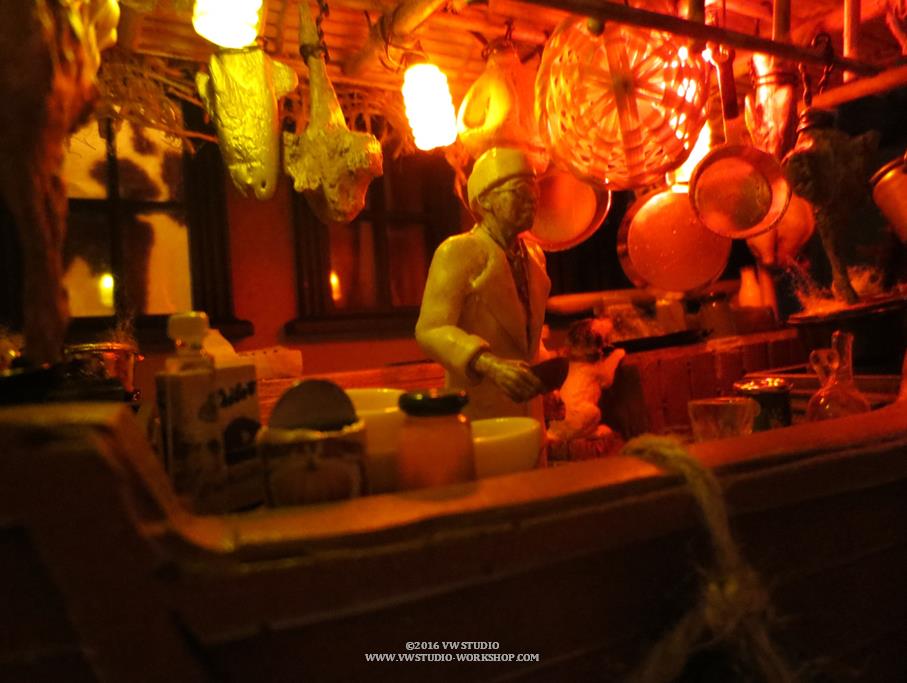
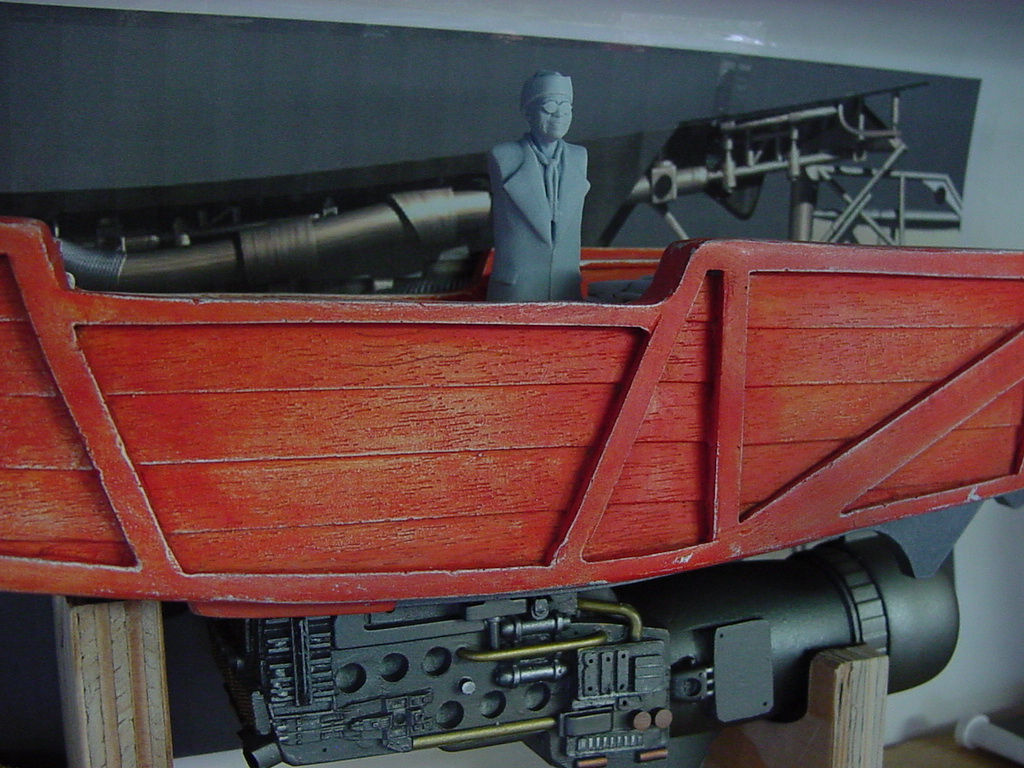
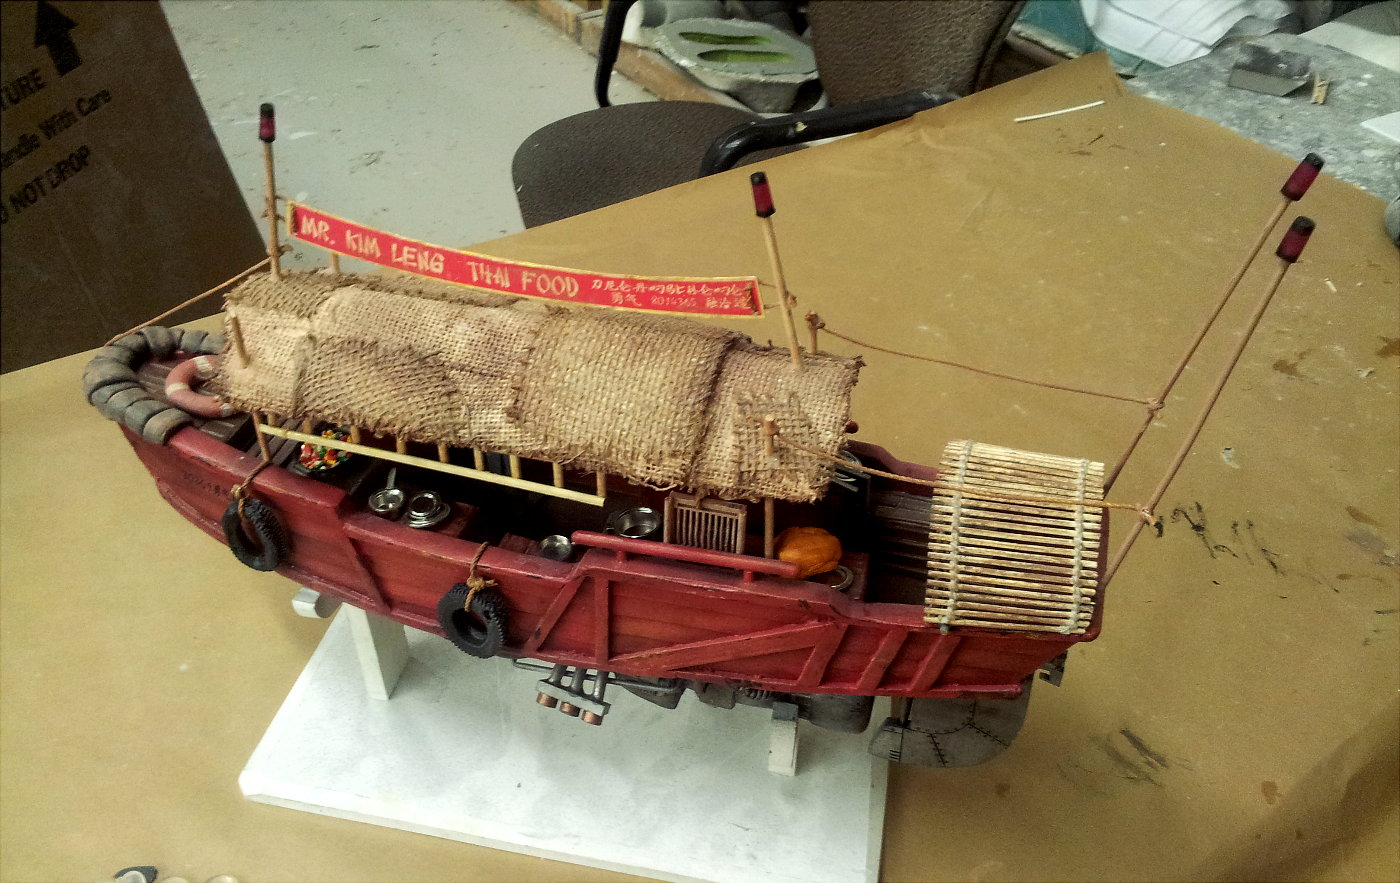
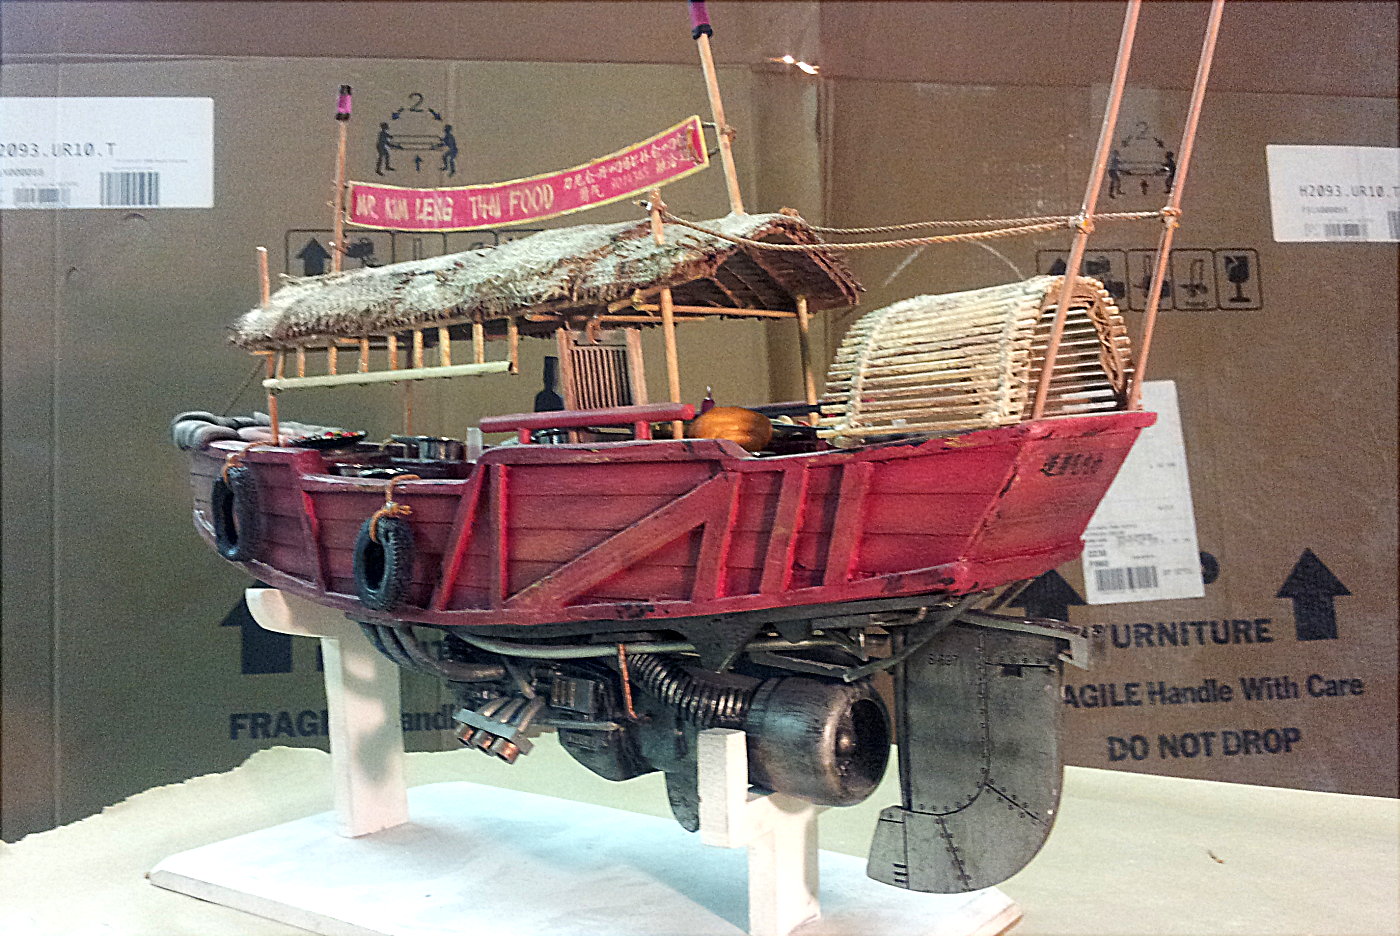
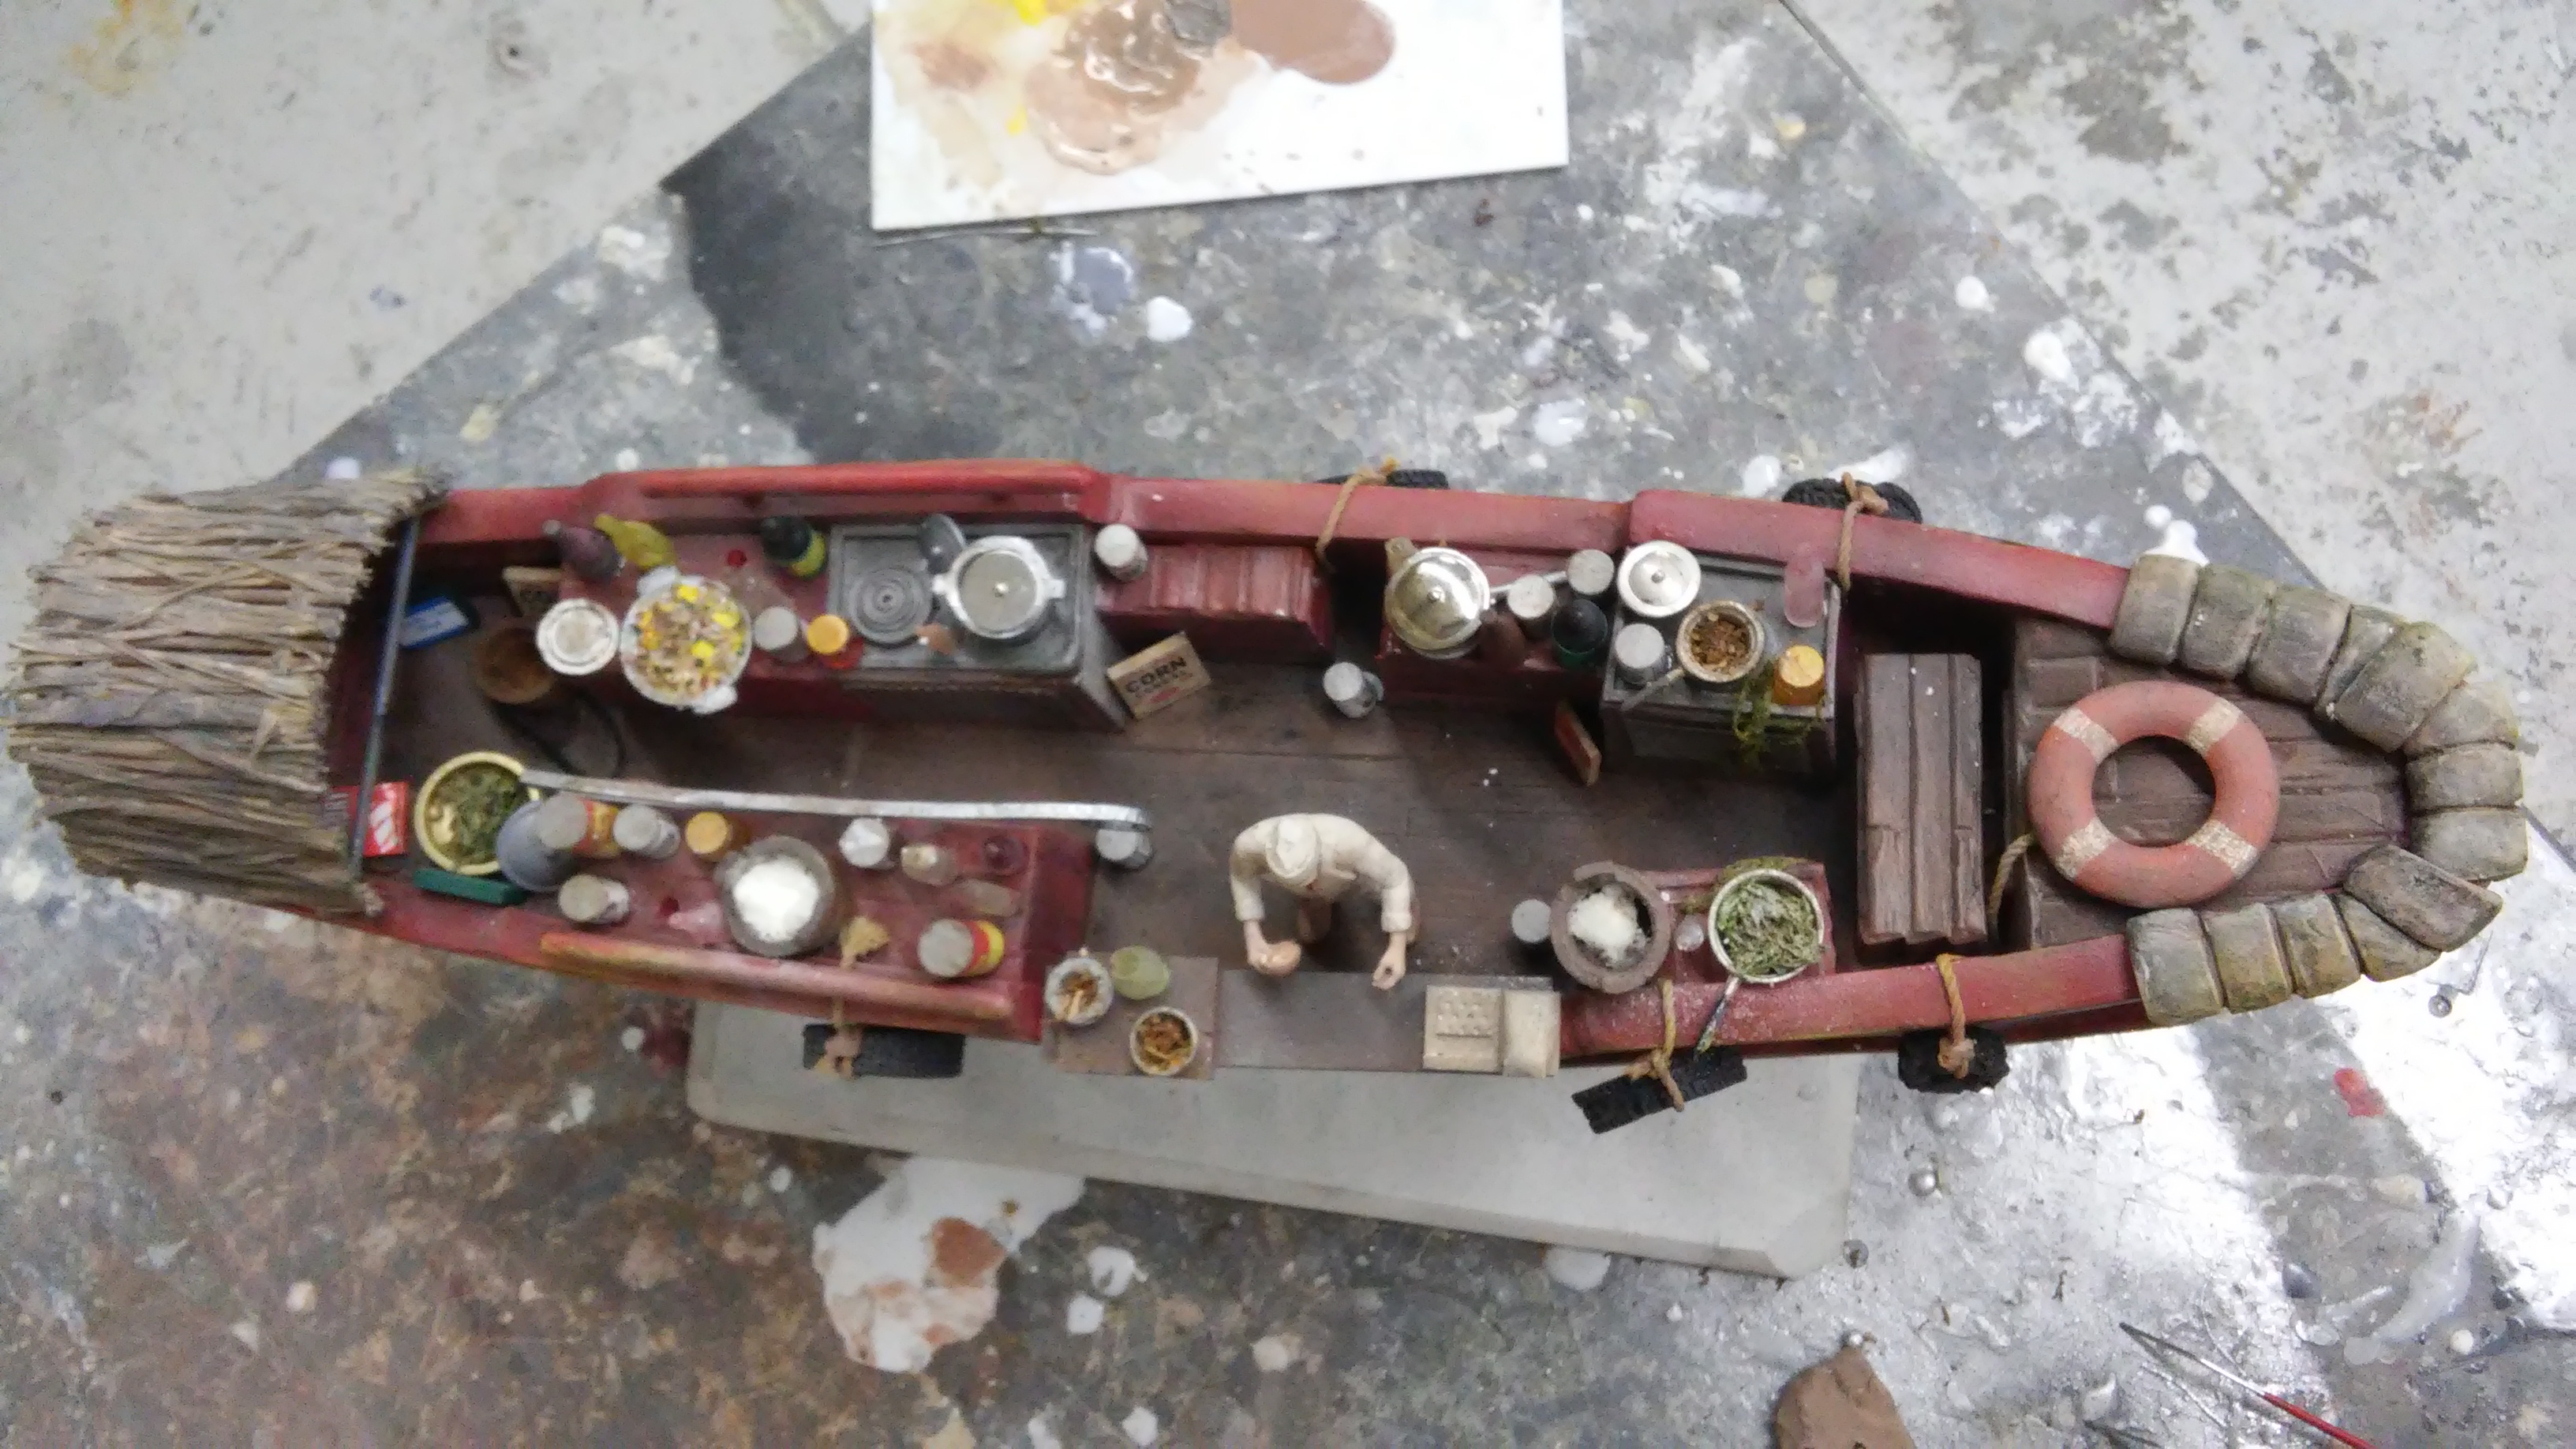
This model kit was created a whopping 18" scale, allowing you to micro detail the interior. Have a look:
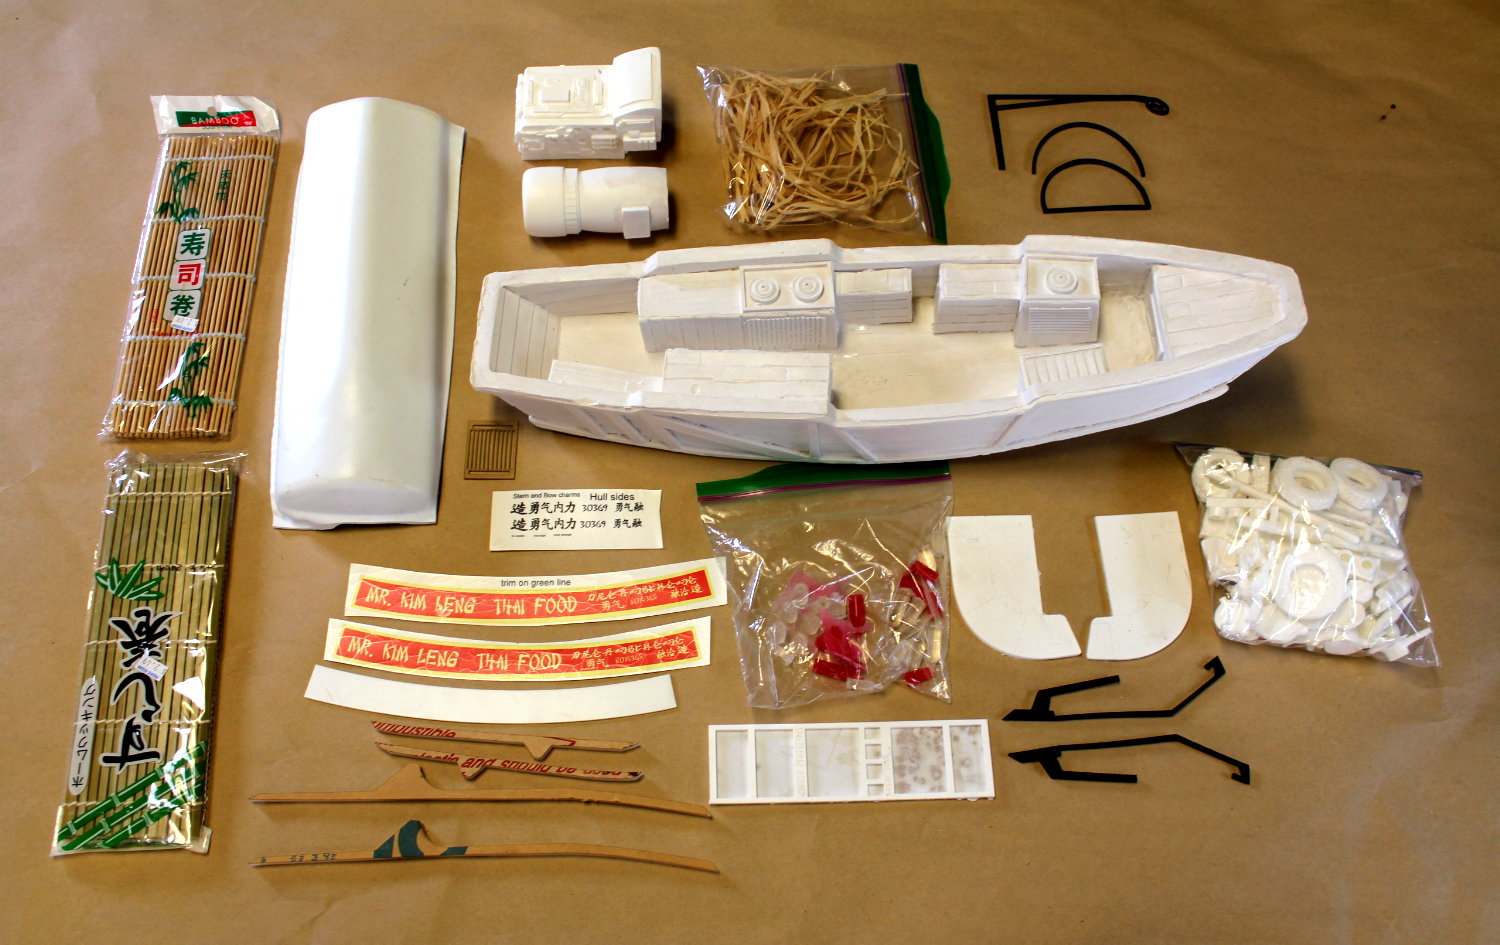
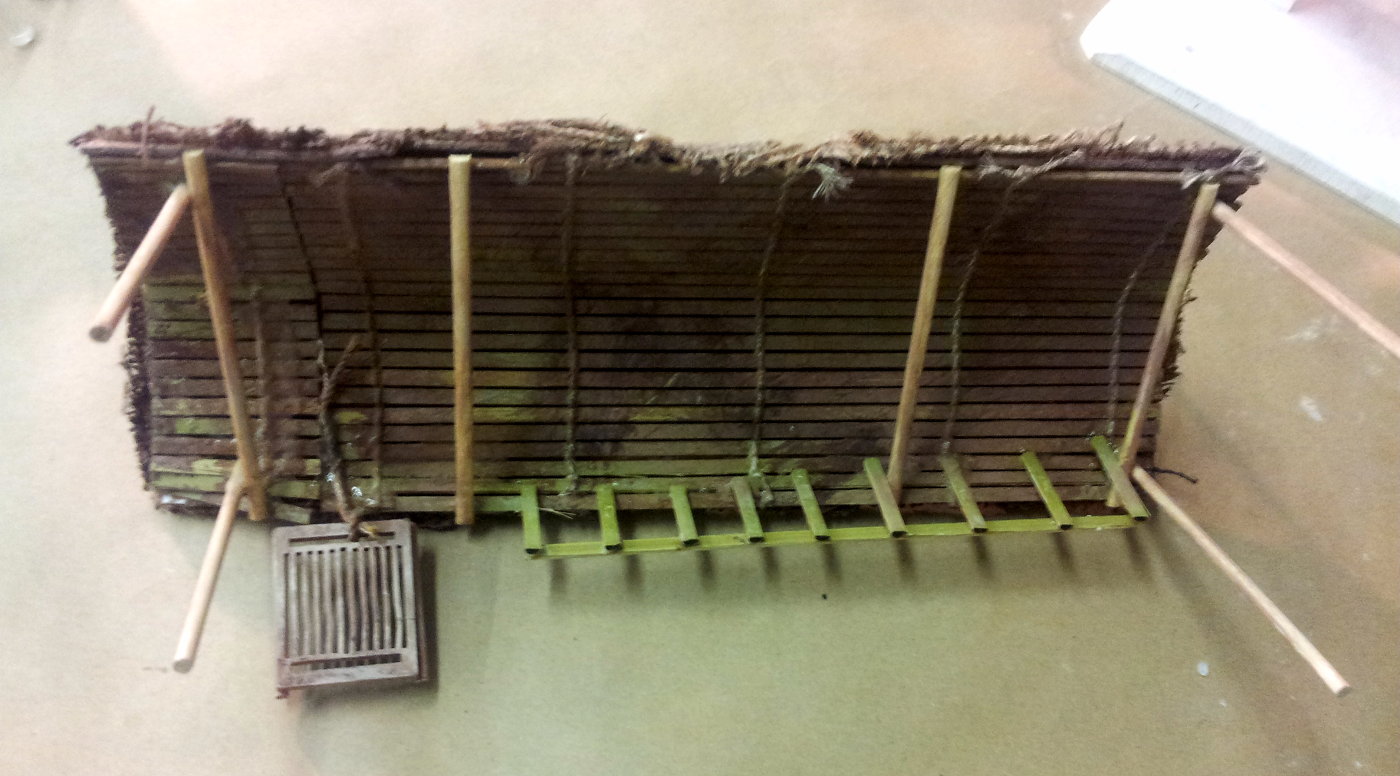
The updated kit (2020) now includes the bamboo matts. and texturing rattan FREE.
CHECK OUT THIS NEW BUILD-UP GALLERY!
ORDER YOUR KIT TODAY!
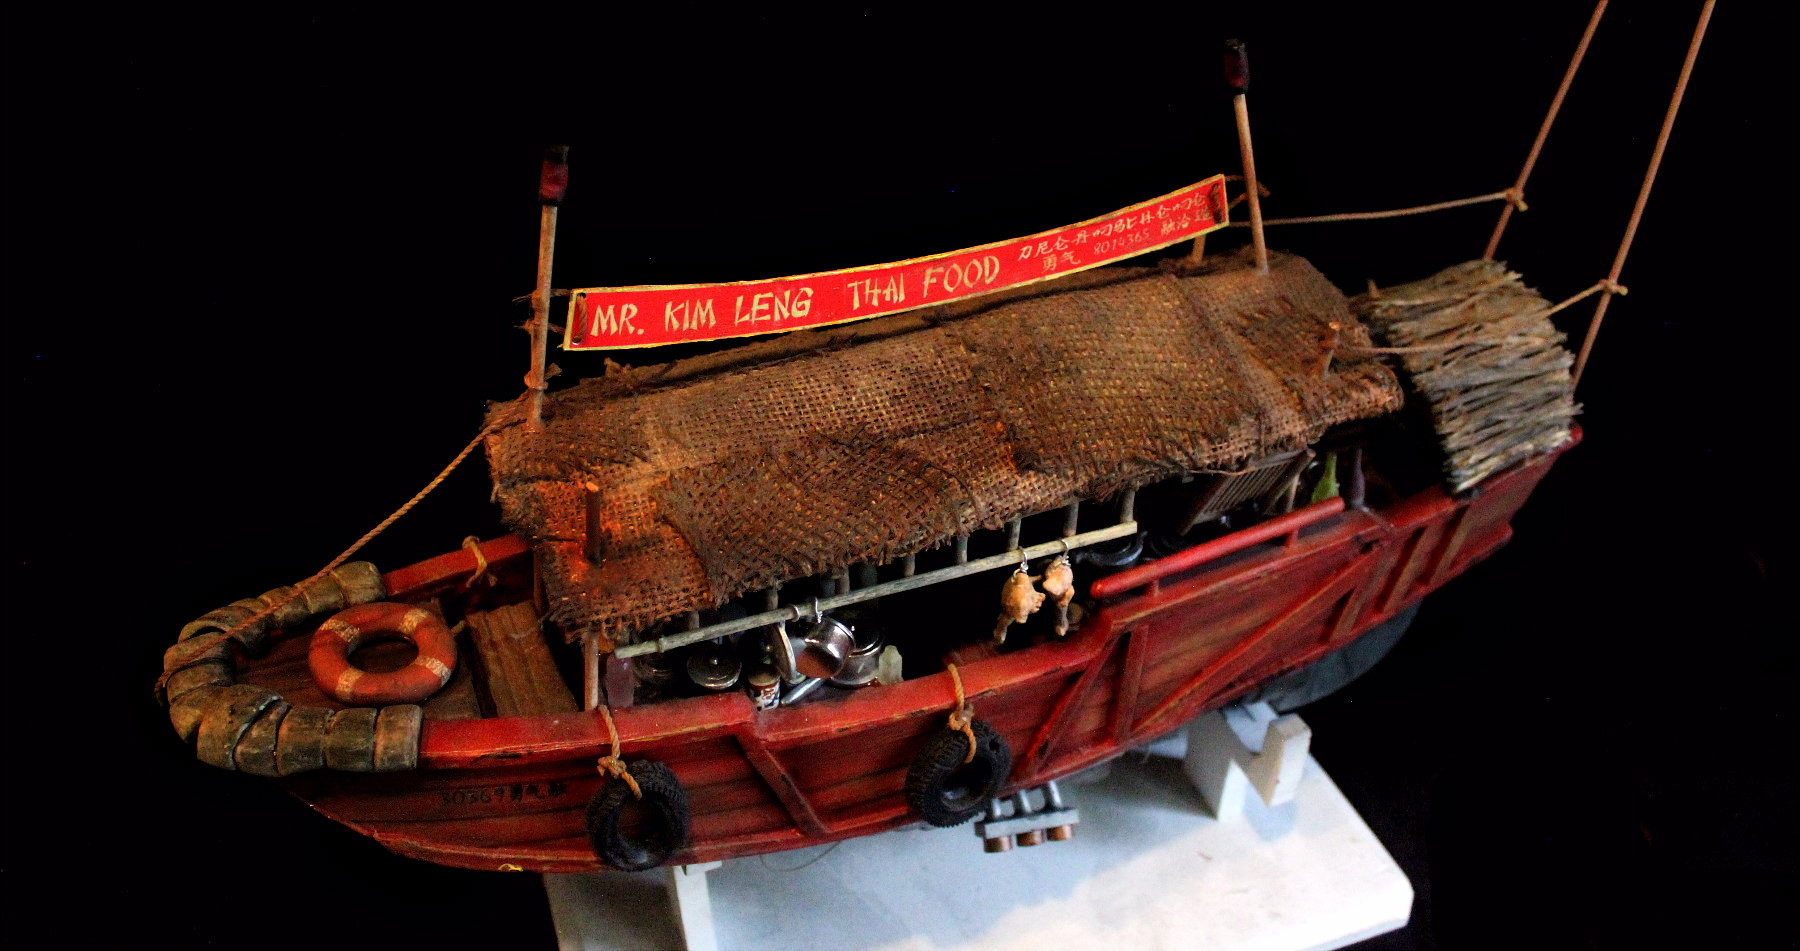
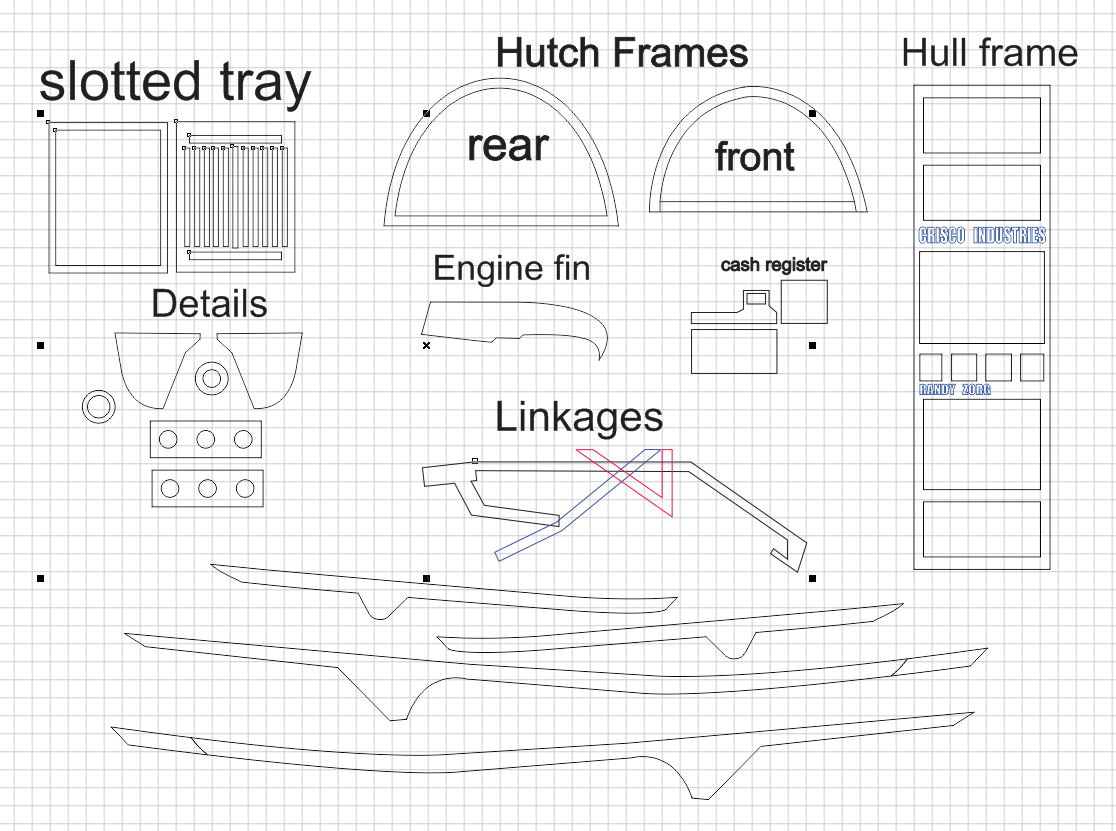
THE KIT
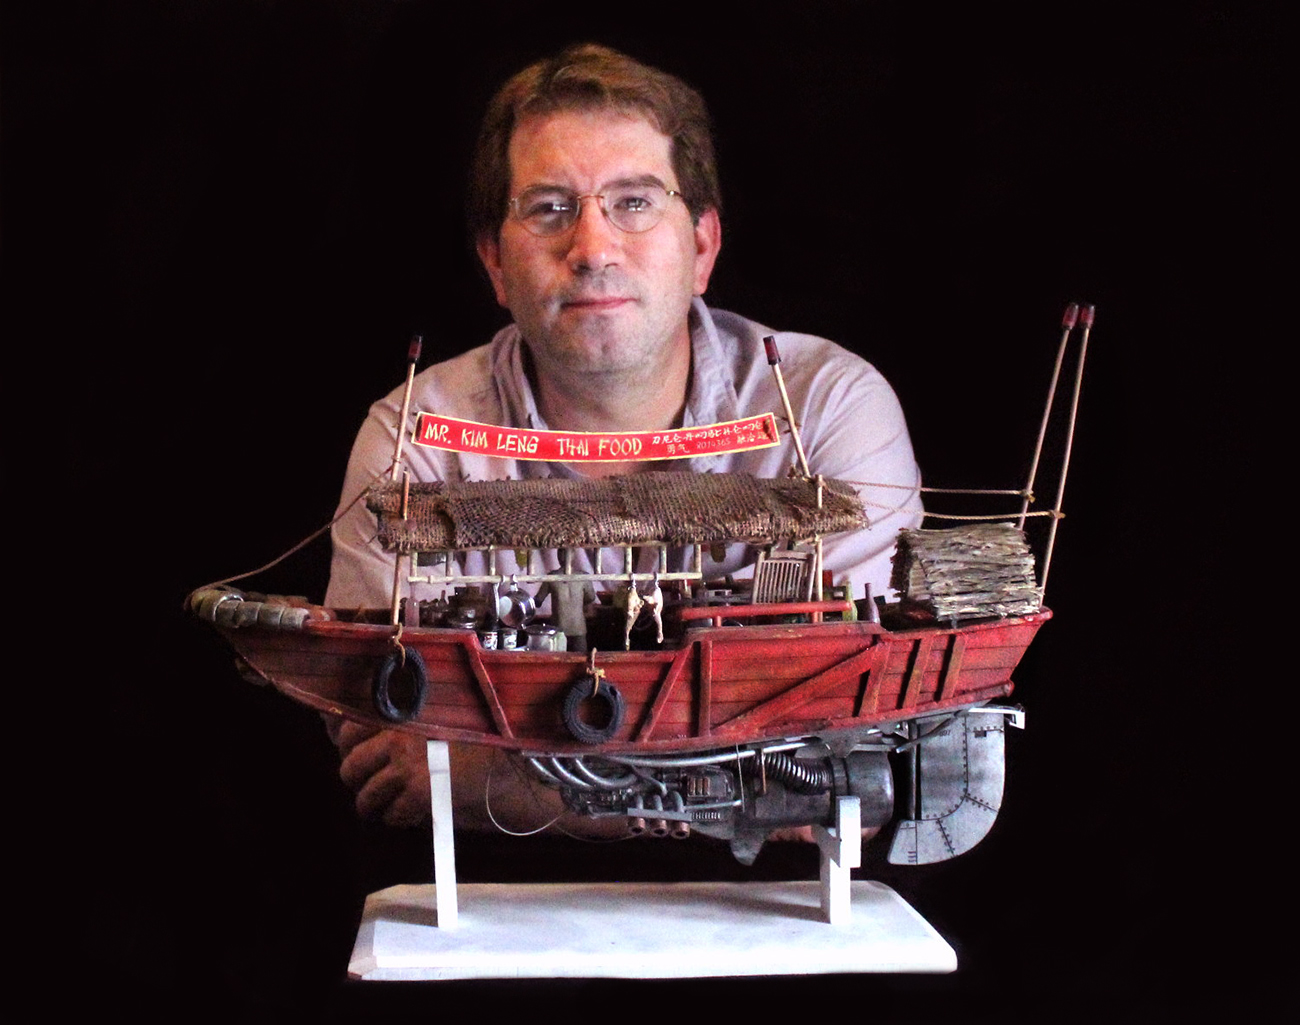
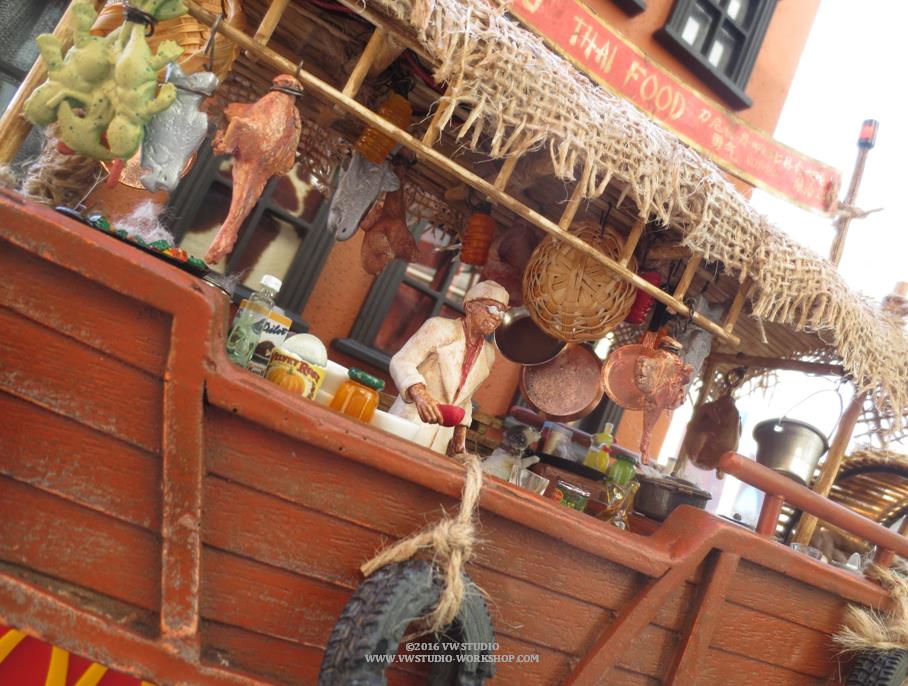
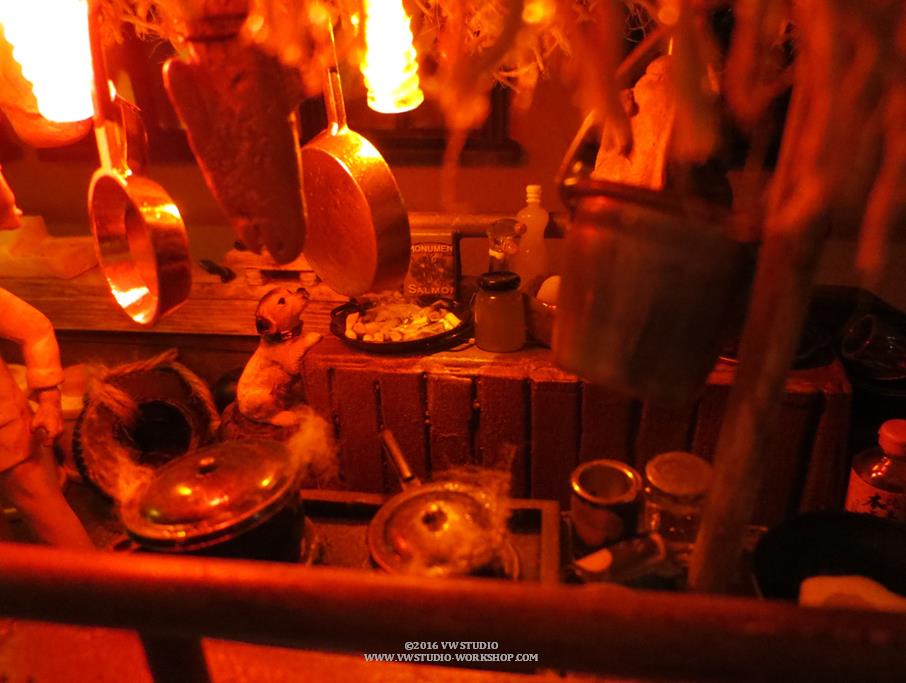
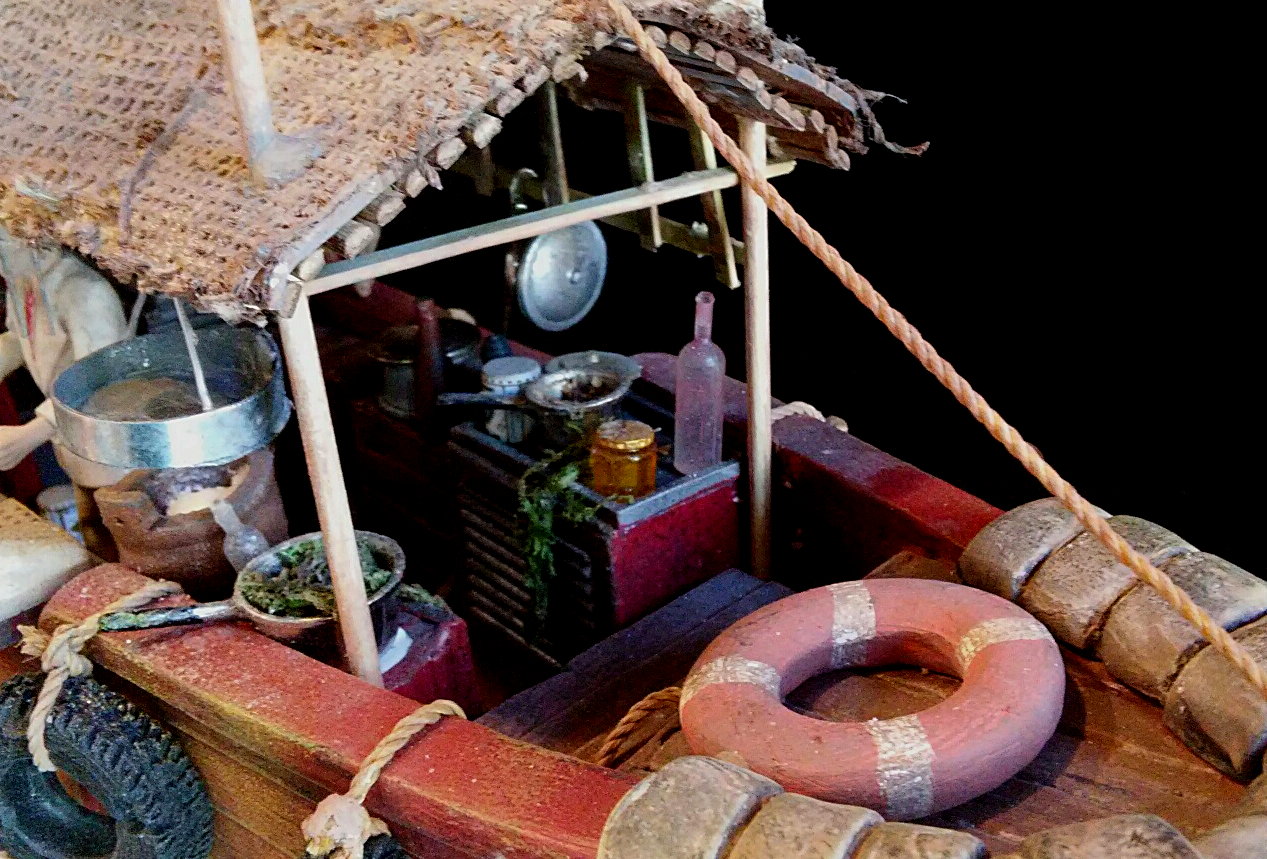
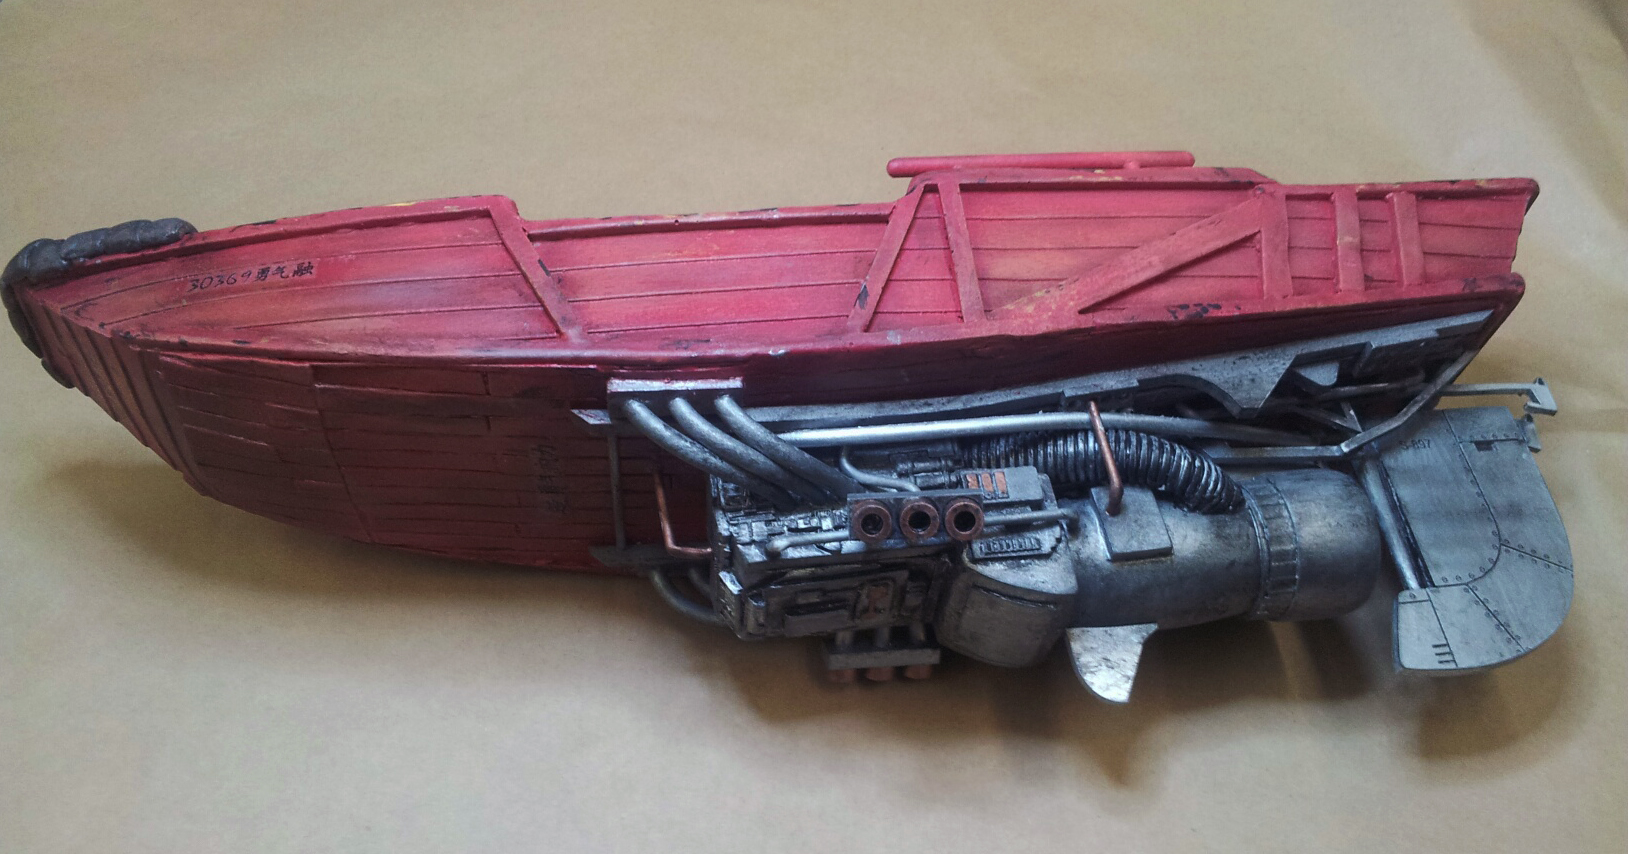
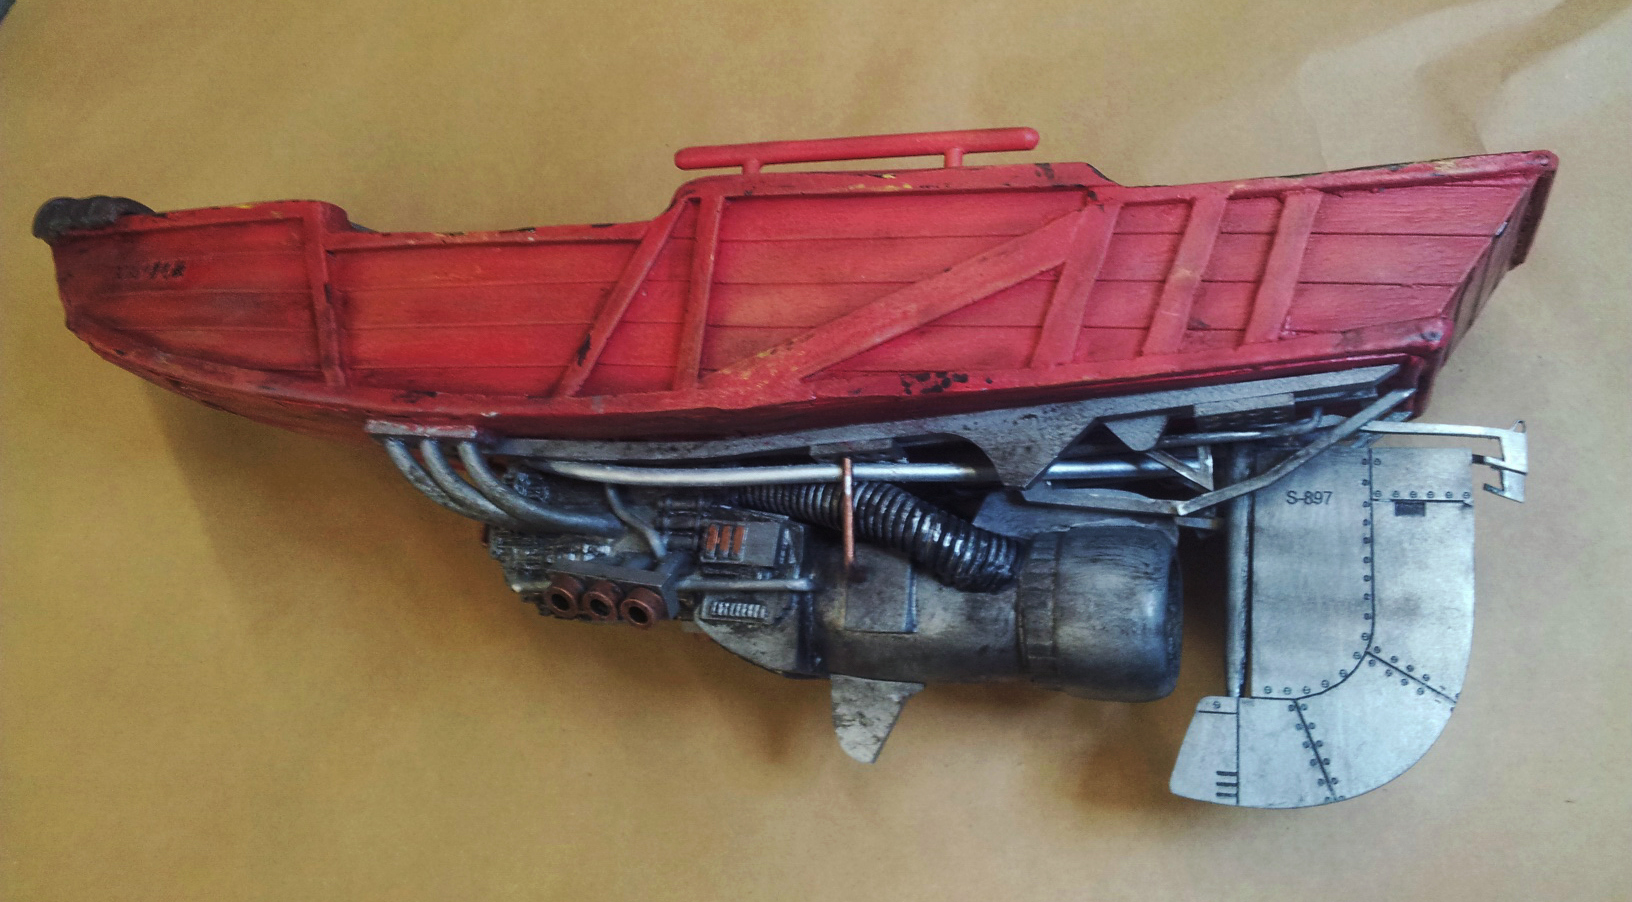
The model was built from scratch using traditional old school methods blended with some laser cutting and 3D printed parts. The hull by itself measures 21" long and with the antenna whips and rudder it's 15" tall. The kit is multimedia in every sense of the word! It includes resin cast parts, rataan, 3d printed parts, clear cast pieces, burlap, bamboo, laser cut acrylic, laser cut ABS, laser cut styrene, waterslide decals, etc.. A motivated builder will be able to install mini LEDs inside the lanterns. It's A BEAST that represents quite a bit of love and determination!
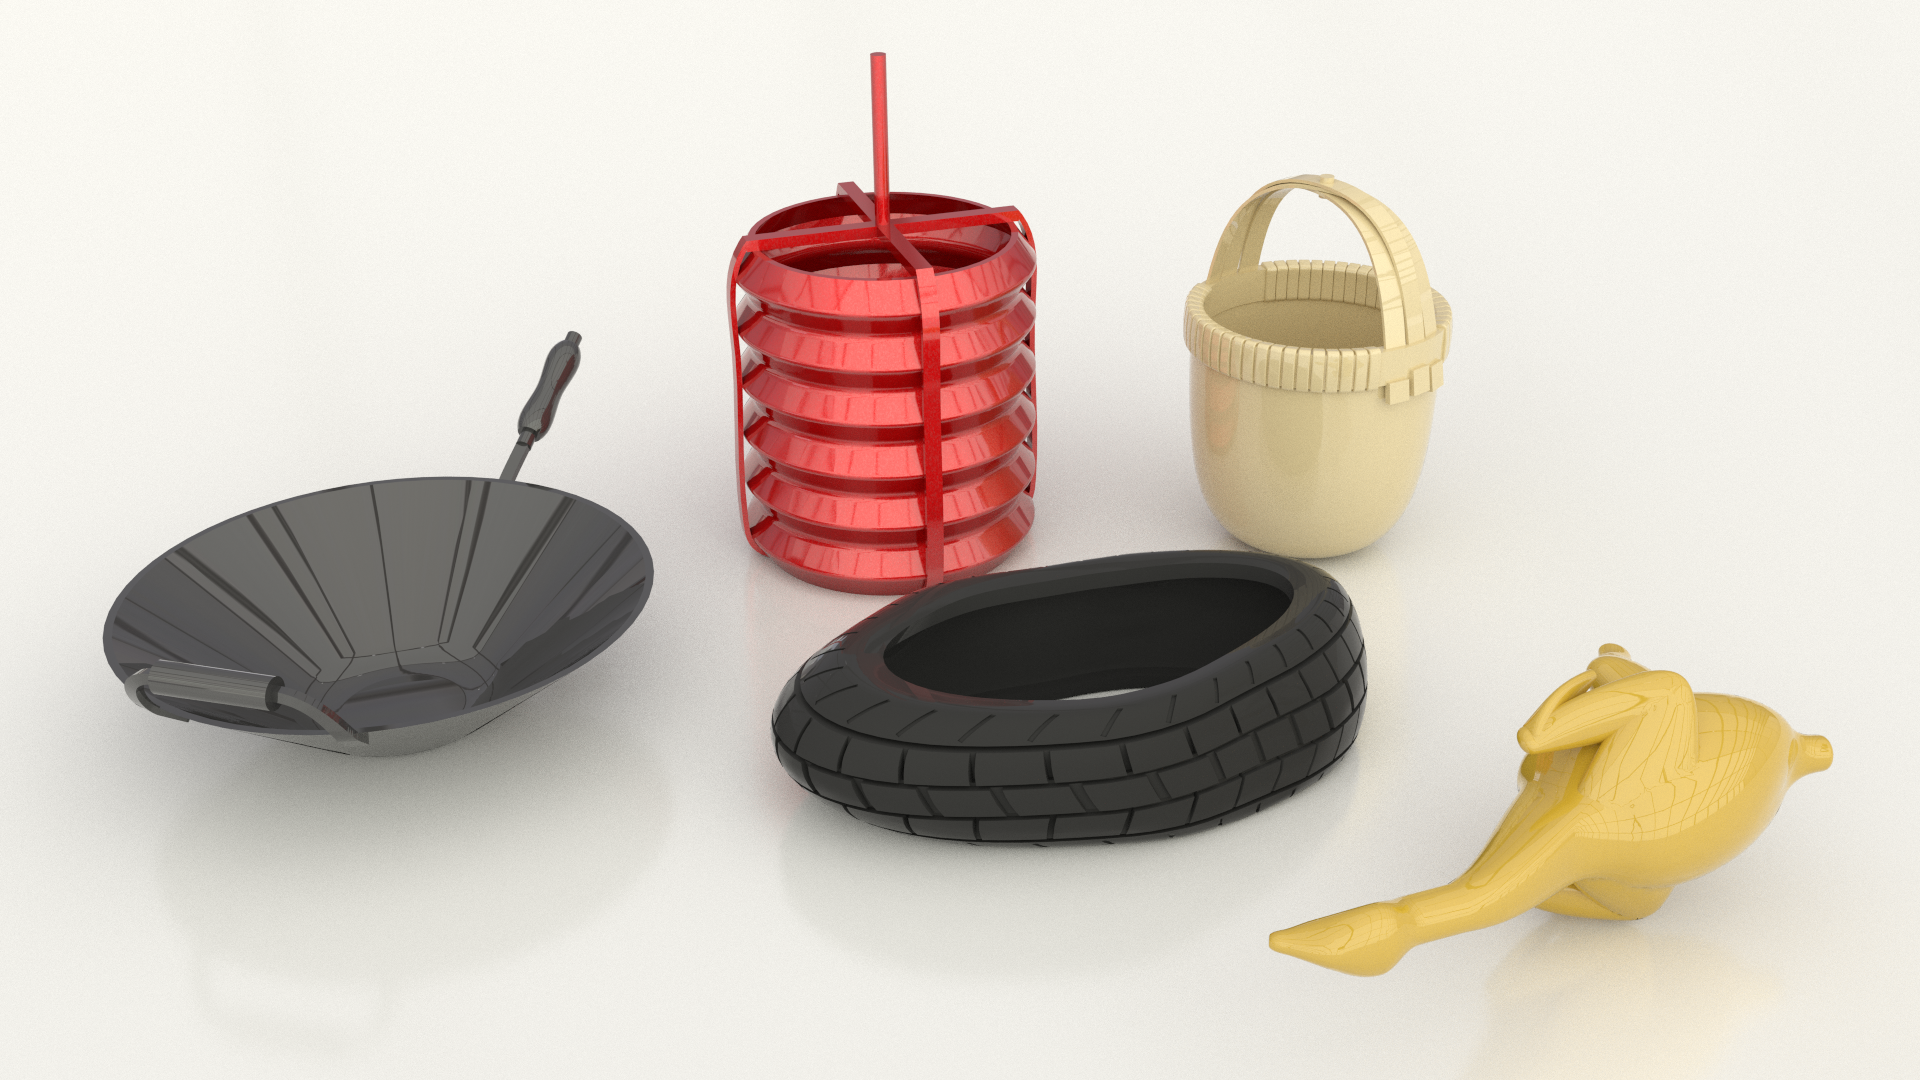
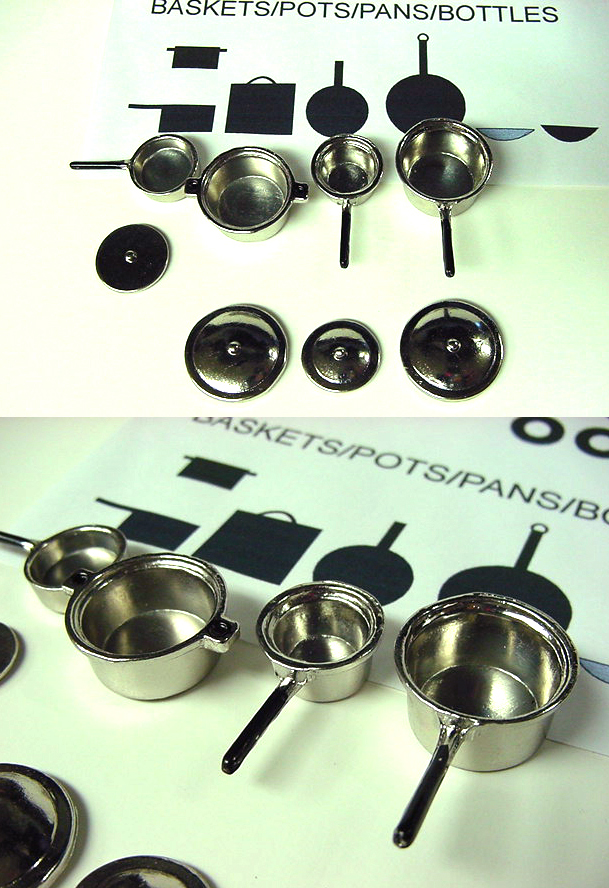
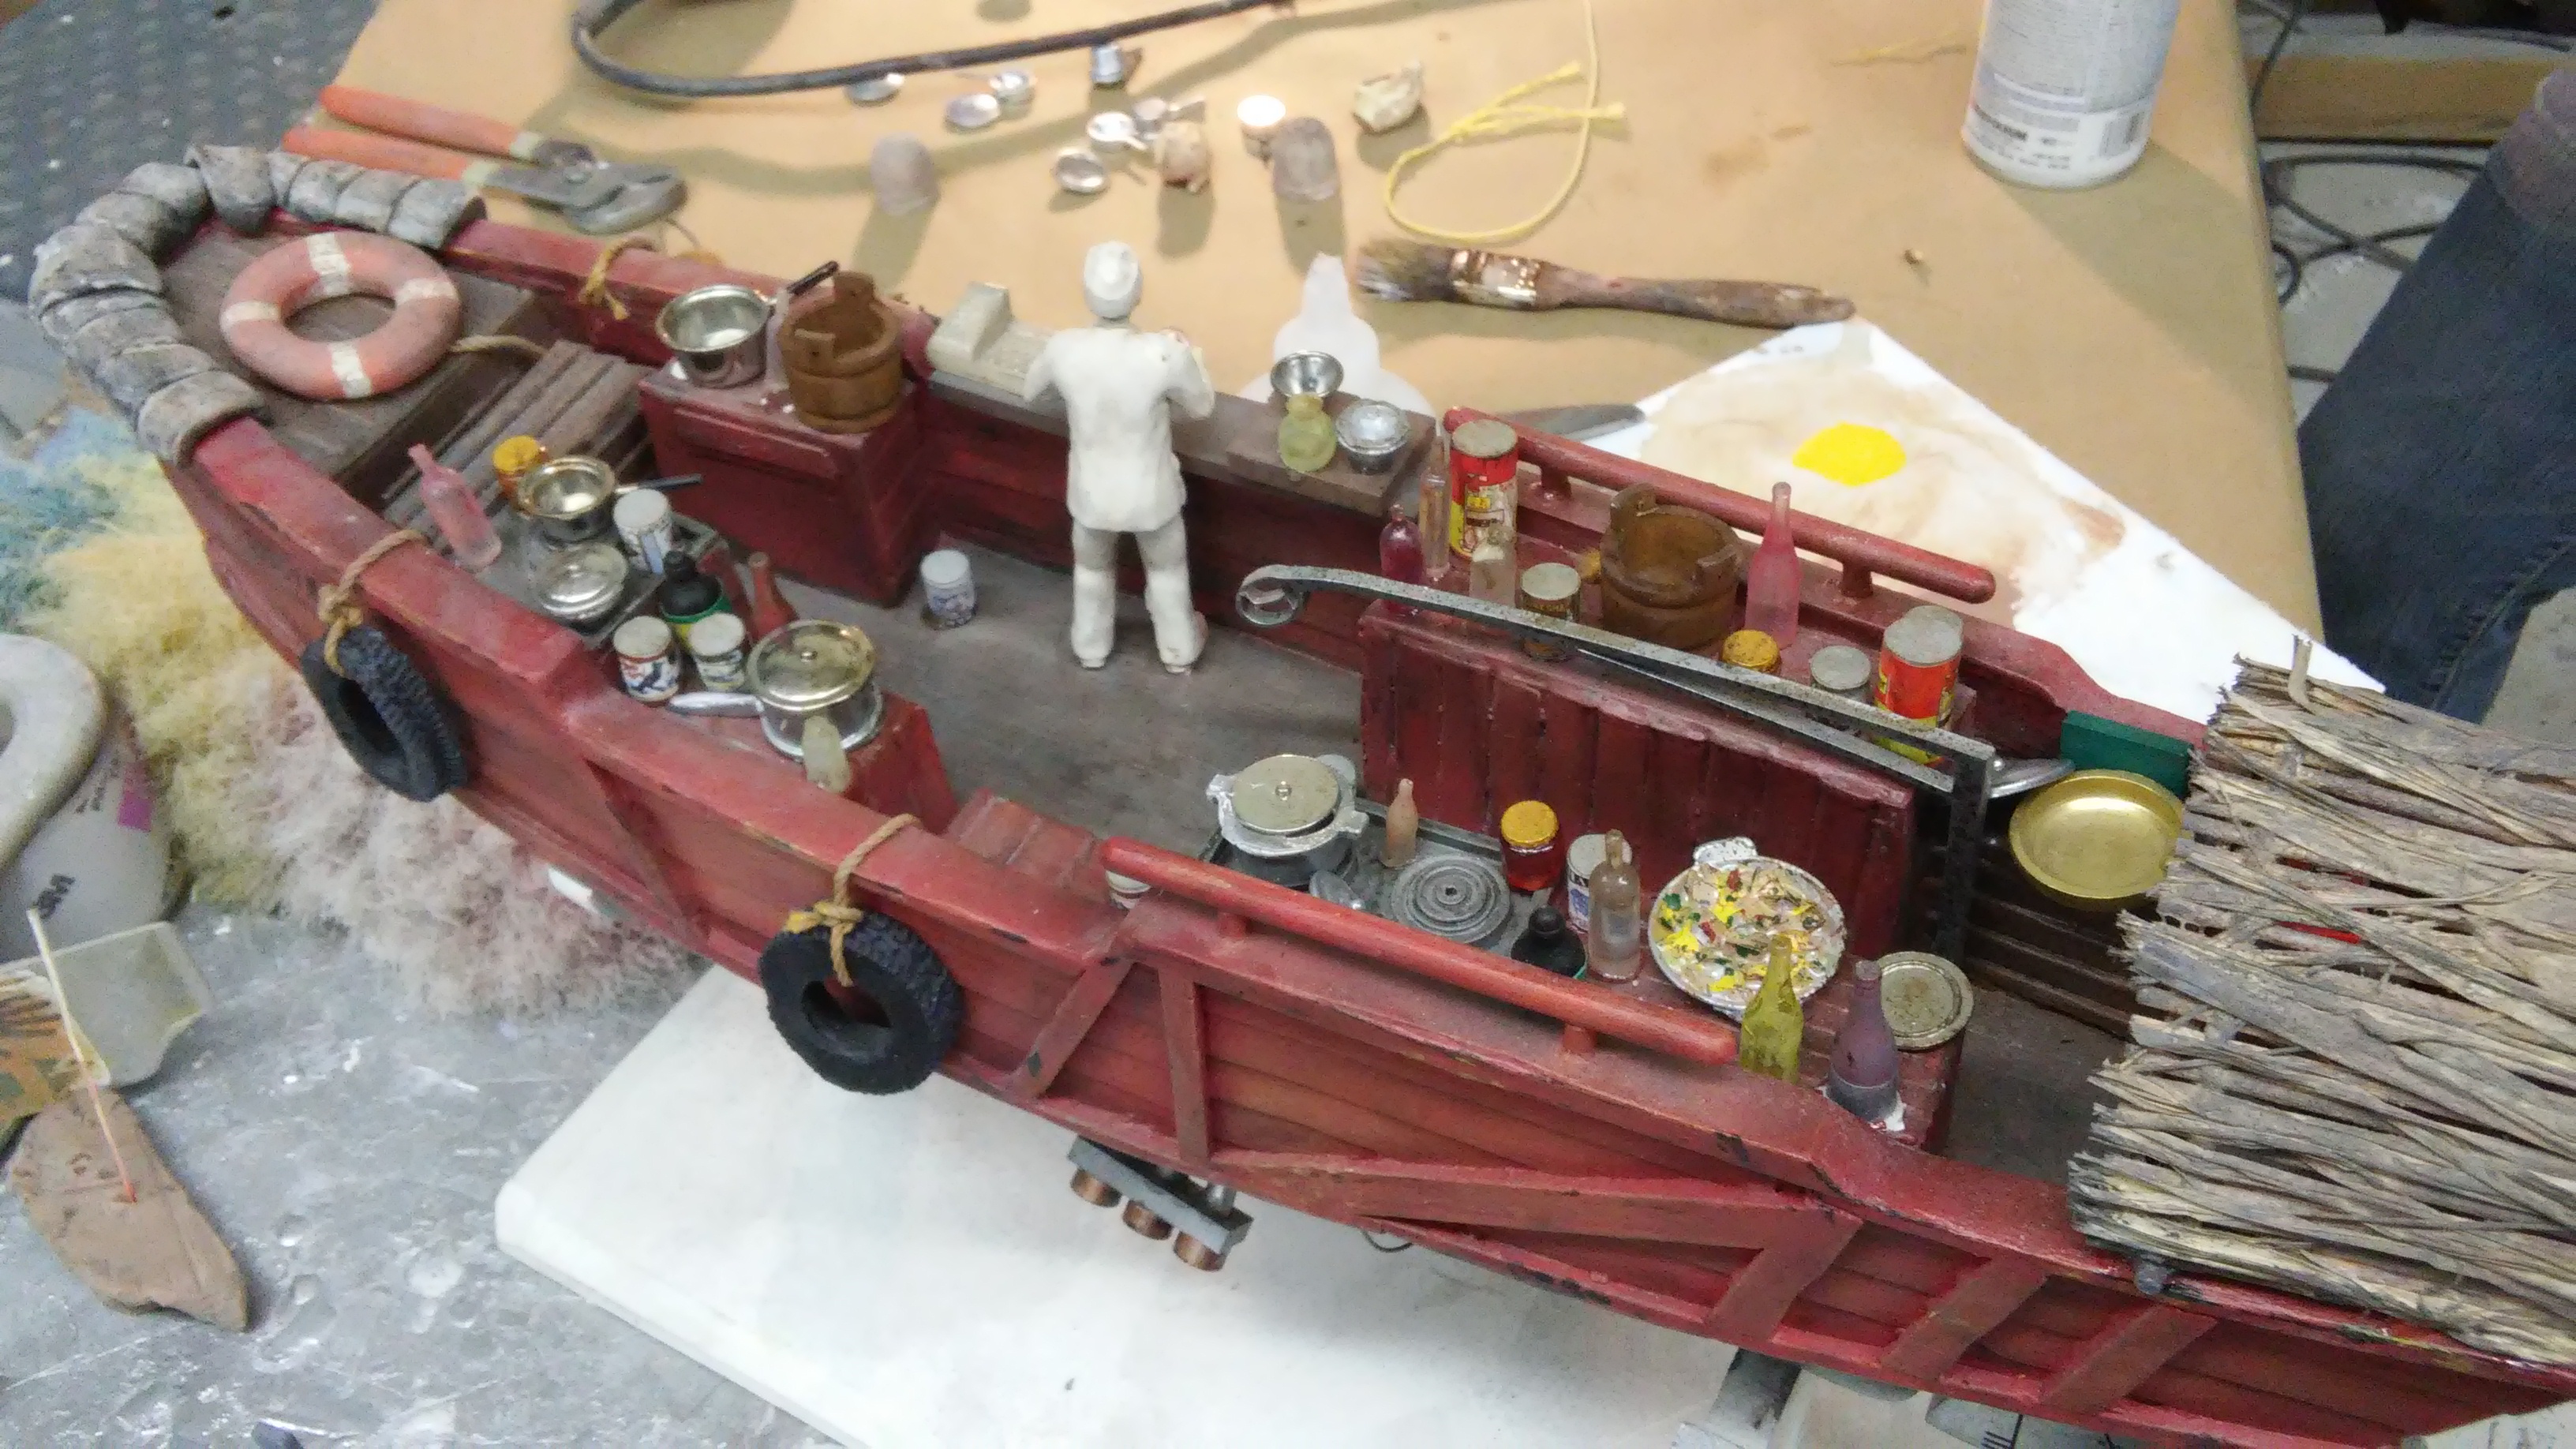
Each kit includes the scaled Mr. Kim figure, pots, pans, lids, jars, bottles, containers, chicken, a goose, fish, tray of food, all 3D resin prints!

**Because of the size and weight of this kit, shipping outside the U.S. is about $80.00
SAMPLE BUILDUPS OF THIS KIT:
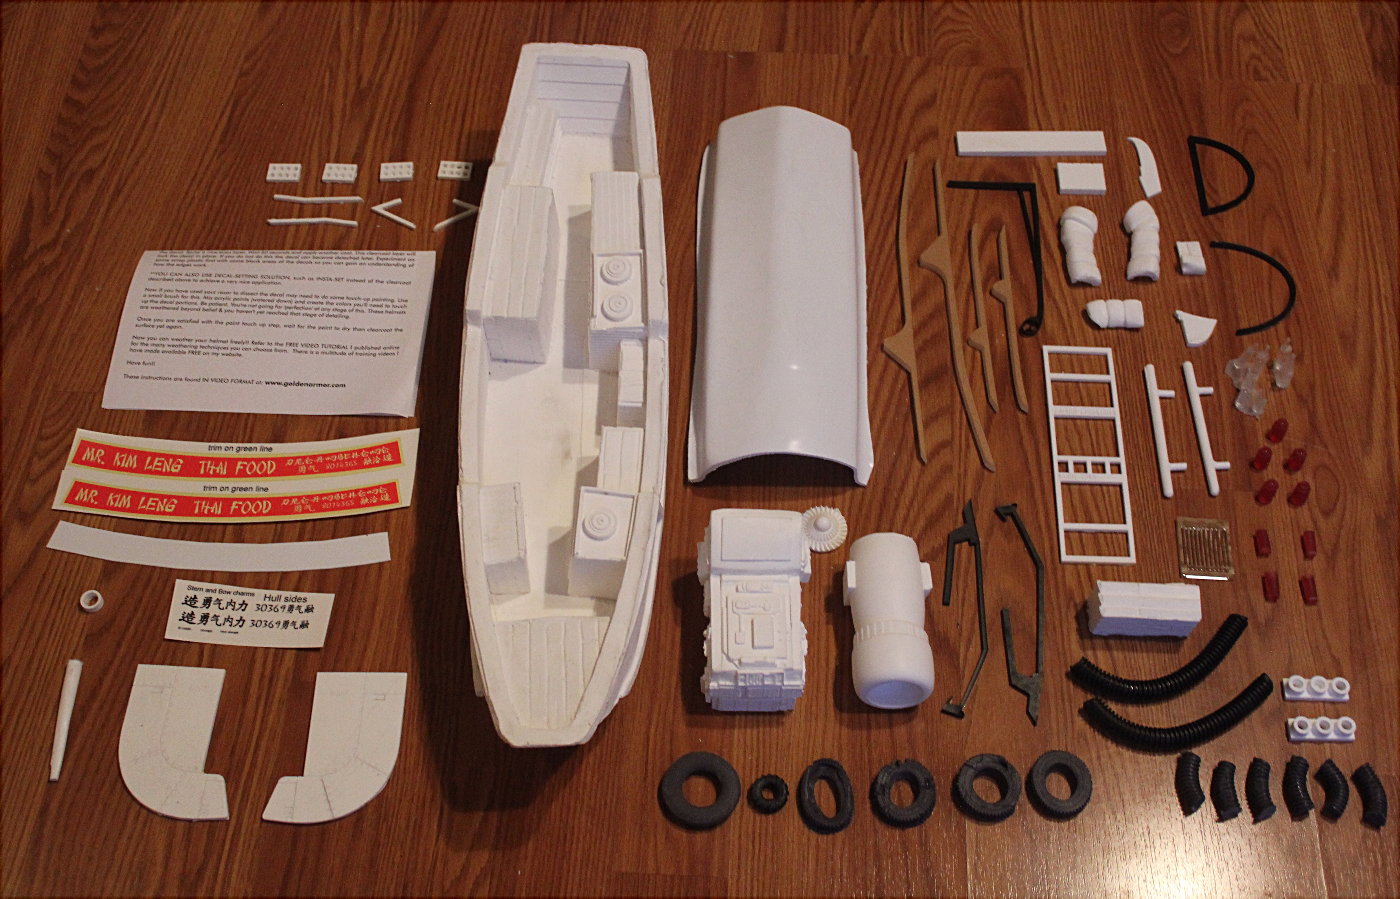
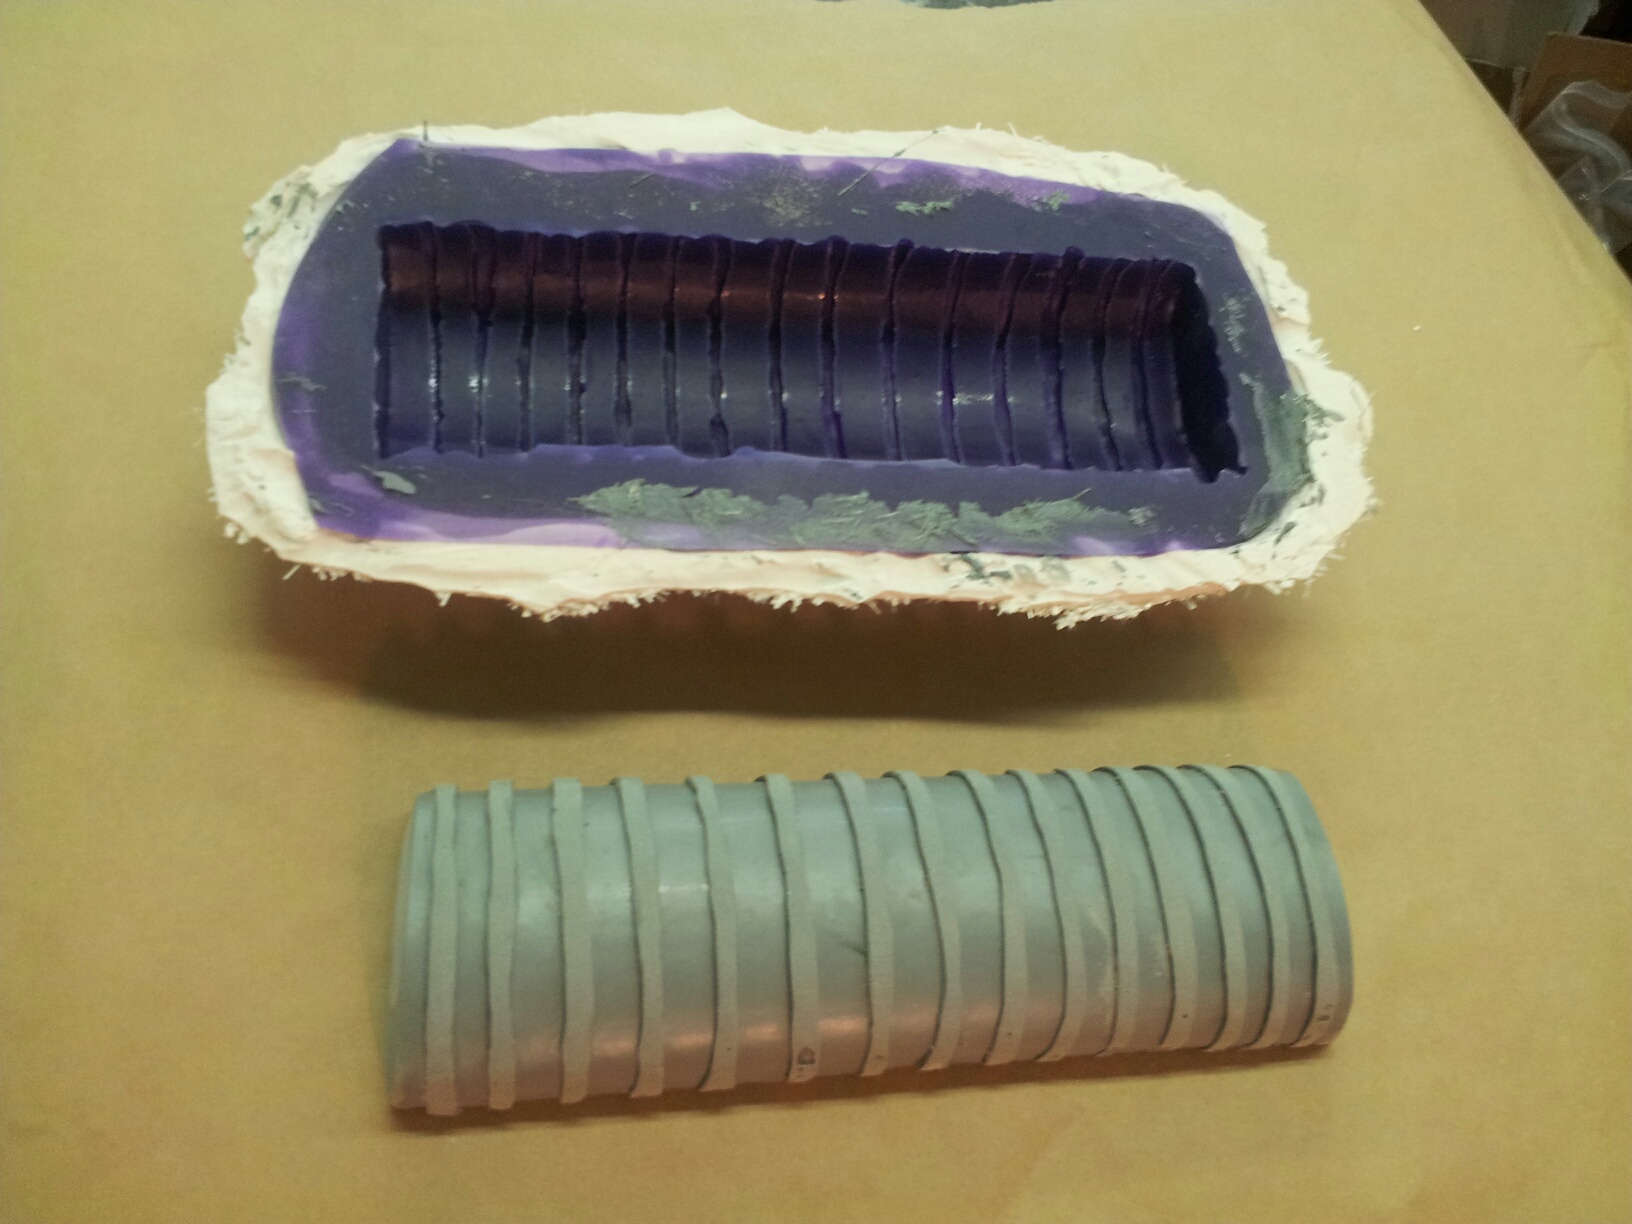
The castings are made from pressure cast solid high impact casting material of the highest quality. The BOAT KIT consists of about 5 dozen invidually cast pieces!:
- the boat body (solid casting)
- the canopy (thermal formed in .125 guage plastic - VERY thick and strong)
- Mr. Kim (3d printed 3parts - the body, 2 arms)
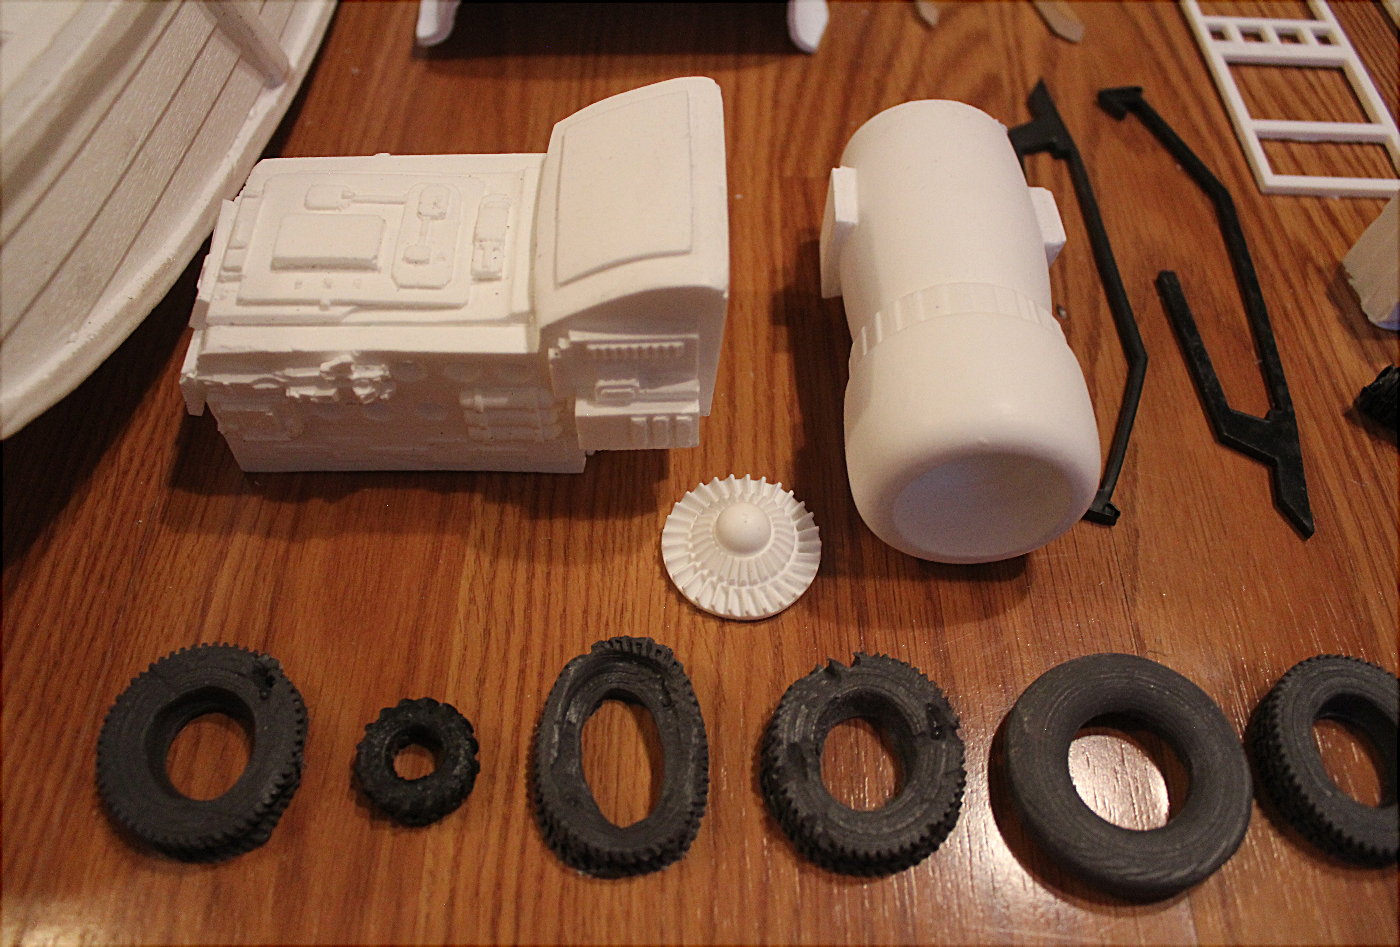
- the engine block (resin casting)
- the engine nozzle (resin casting)
- waterslide decal set and instructions
- banner (laser cut .060 plastic)
- 5 tires (castings)
- life preserver (casting)
- rudder, rudder mount, and ring (4 pieces)
- engine turbine inset piece (casting)
- 6 engine tubes (castings)
- 2 exhaust mounts (casting)
- 4 underhull mounts (laser cut lexan)
- 2 rudder mounts (laser cut ABS)
- set of engine mount details (8 pieces)
- engine fins (set of 2 parts) (laser cut and resin castings)
- sandbangs (set of 3 pieces)
- engine mount plate (resin casting)
- wooden crate (resin casting)
- serving tray (laser cut acrylic)
- lanterns (red tinted transluscent resin (can be lit with LEDs or fiberoptcs)
- set of clear cast and colored wine bottles, sushi flasks, soda bottles, etc..)
- antenna whip tops (red tinted transluscent resin (can be lit with LEDs or fiberoptcs)
- rear canopy U-shaped frames (laser cut ABS)
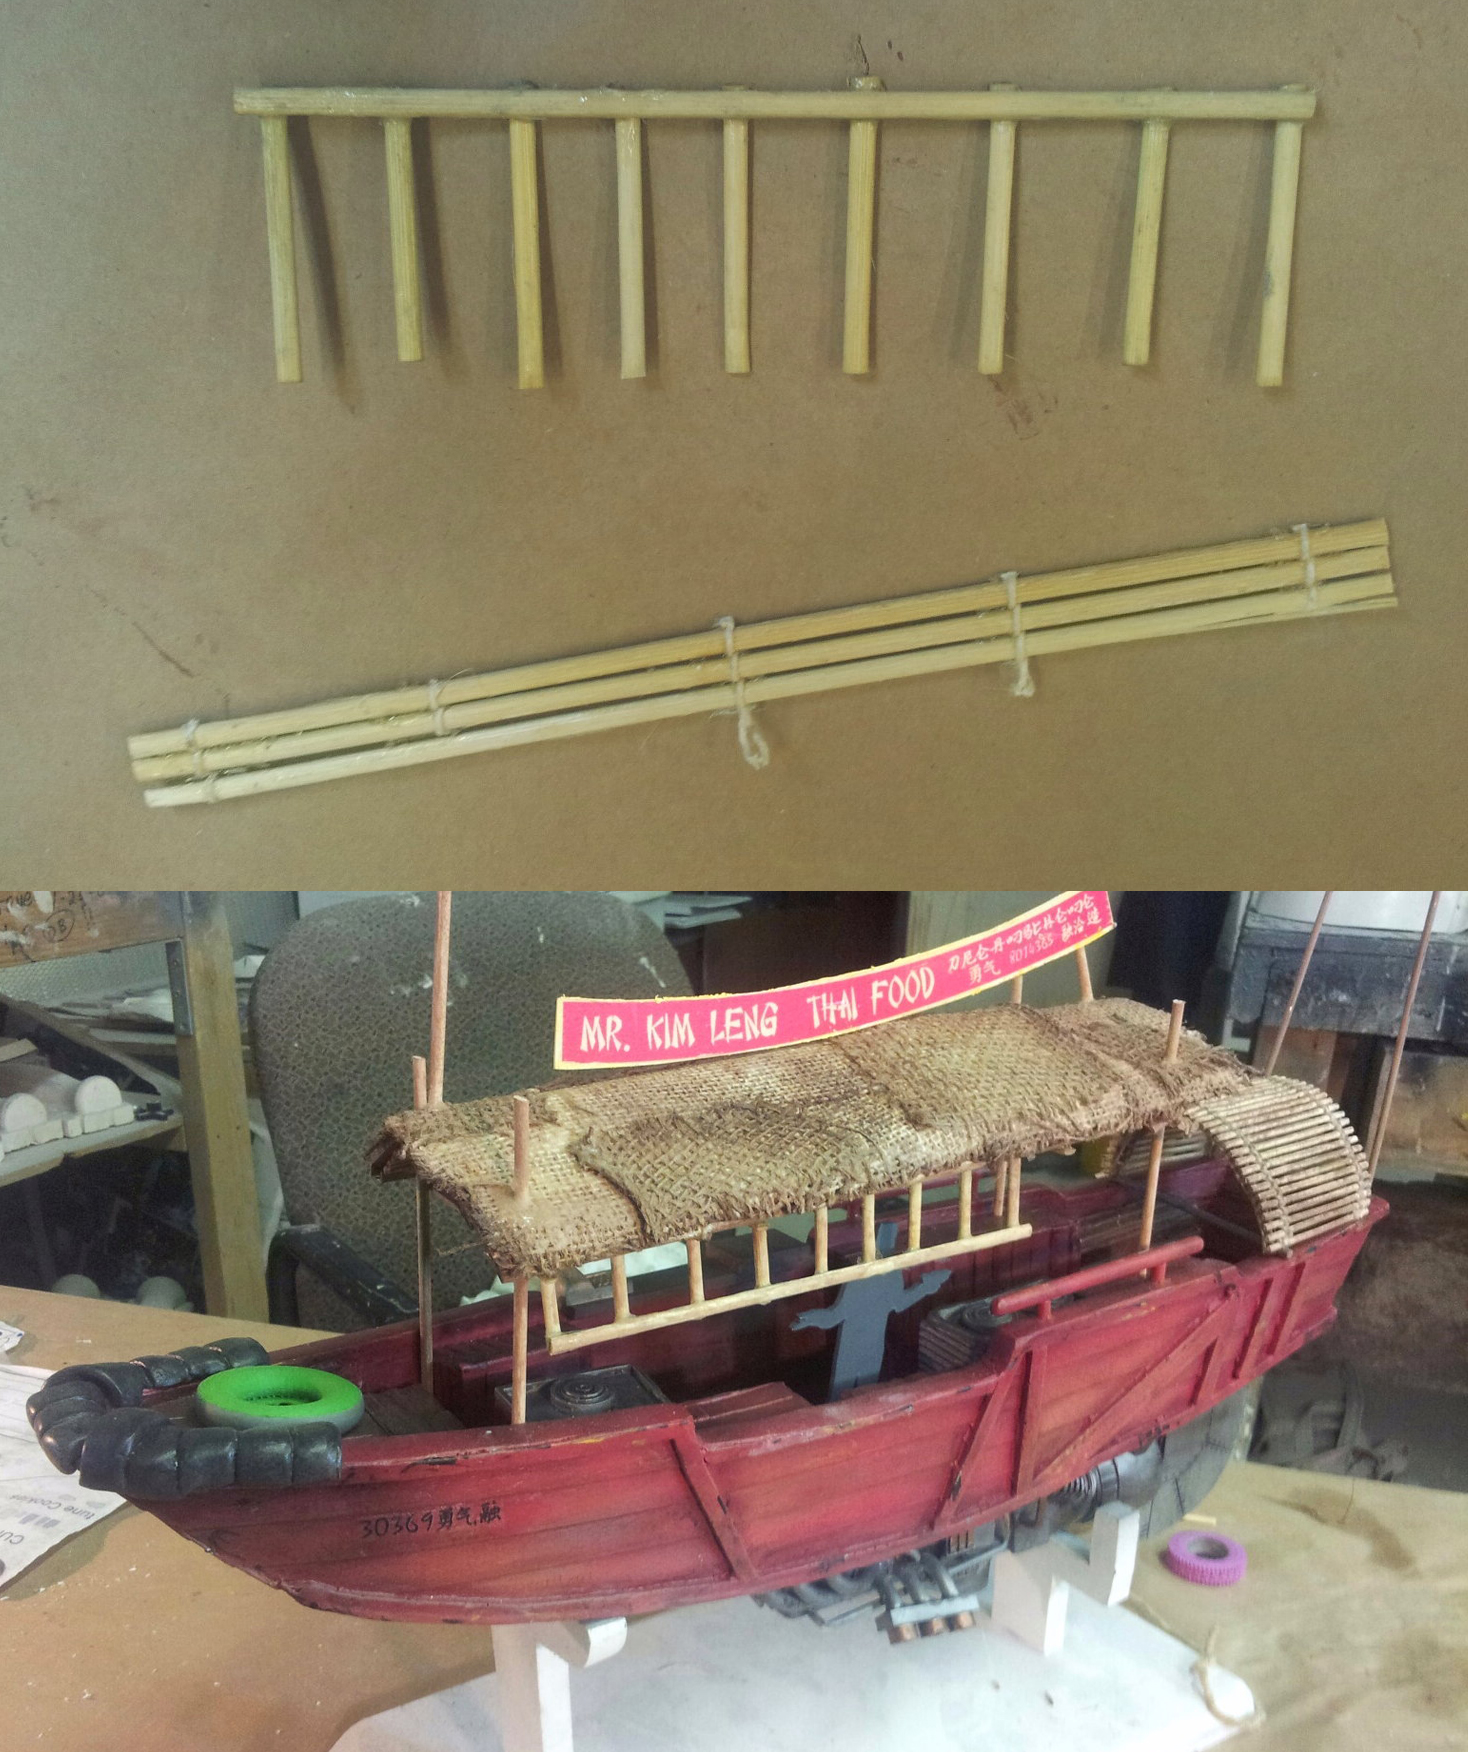
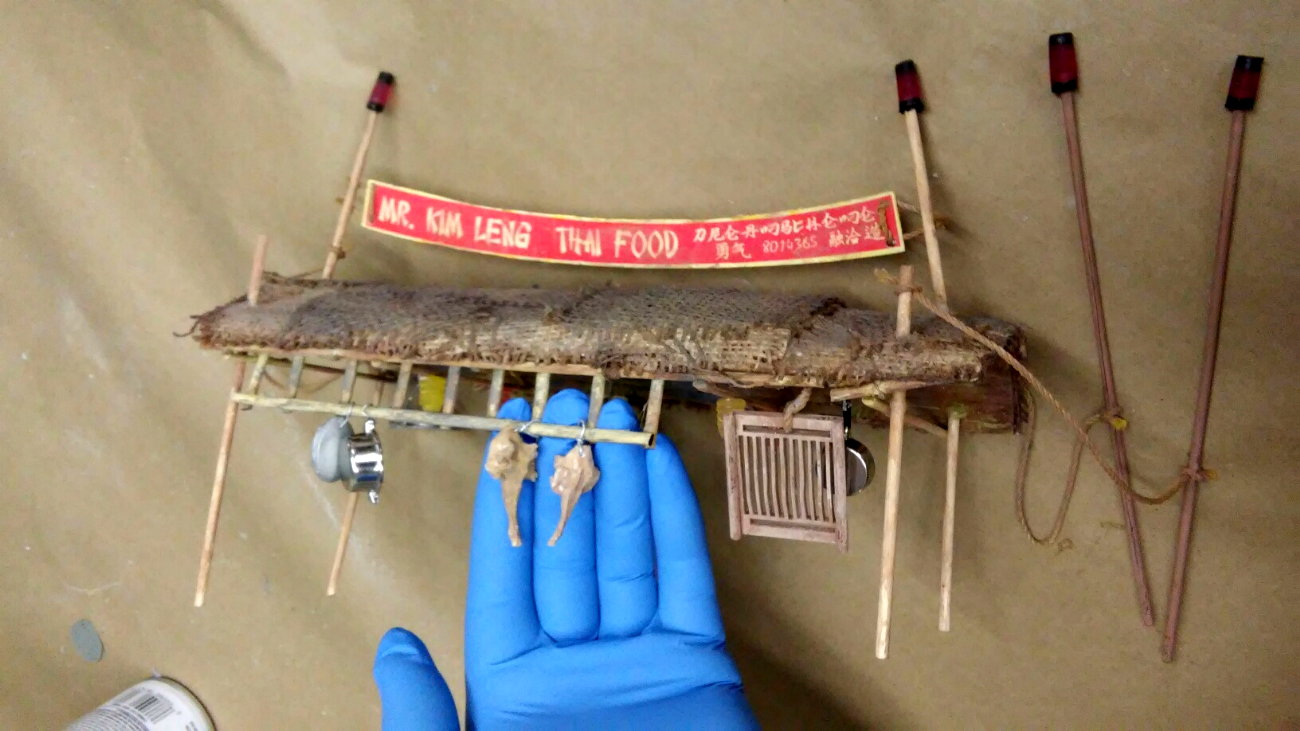
- set of pots and pans, wok, for decorating the interior (hung from string off the canopy framework)
- 2 hanging wicker baskets (castings)
- ducks and chickens and fish (various resin castings). Hang these from the canopy frame.
- cash register (resin casting)
- serving counter (resin castings)
- chopping block (resin casting)
- cups and plates
- jug (to hang at the bow hull)
- life-preserver
The DELUXE ADD-ON consists of:
1.) bamboo sushi matt curved slat (for REAR 'nap' canopy)
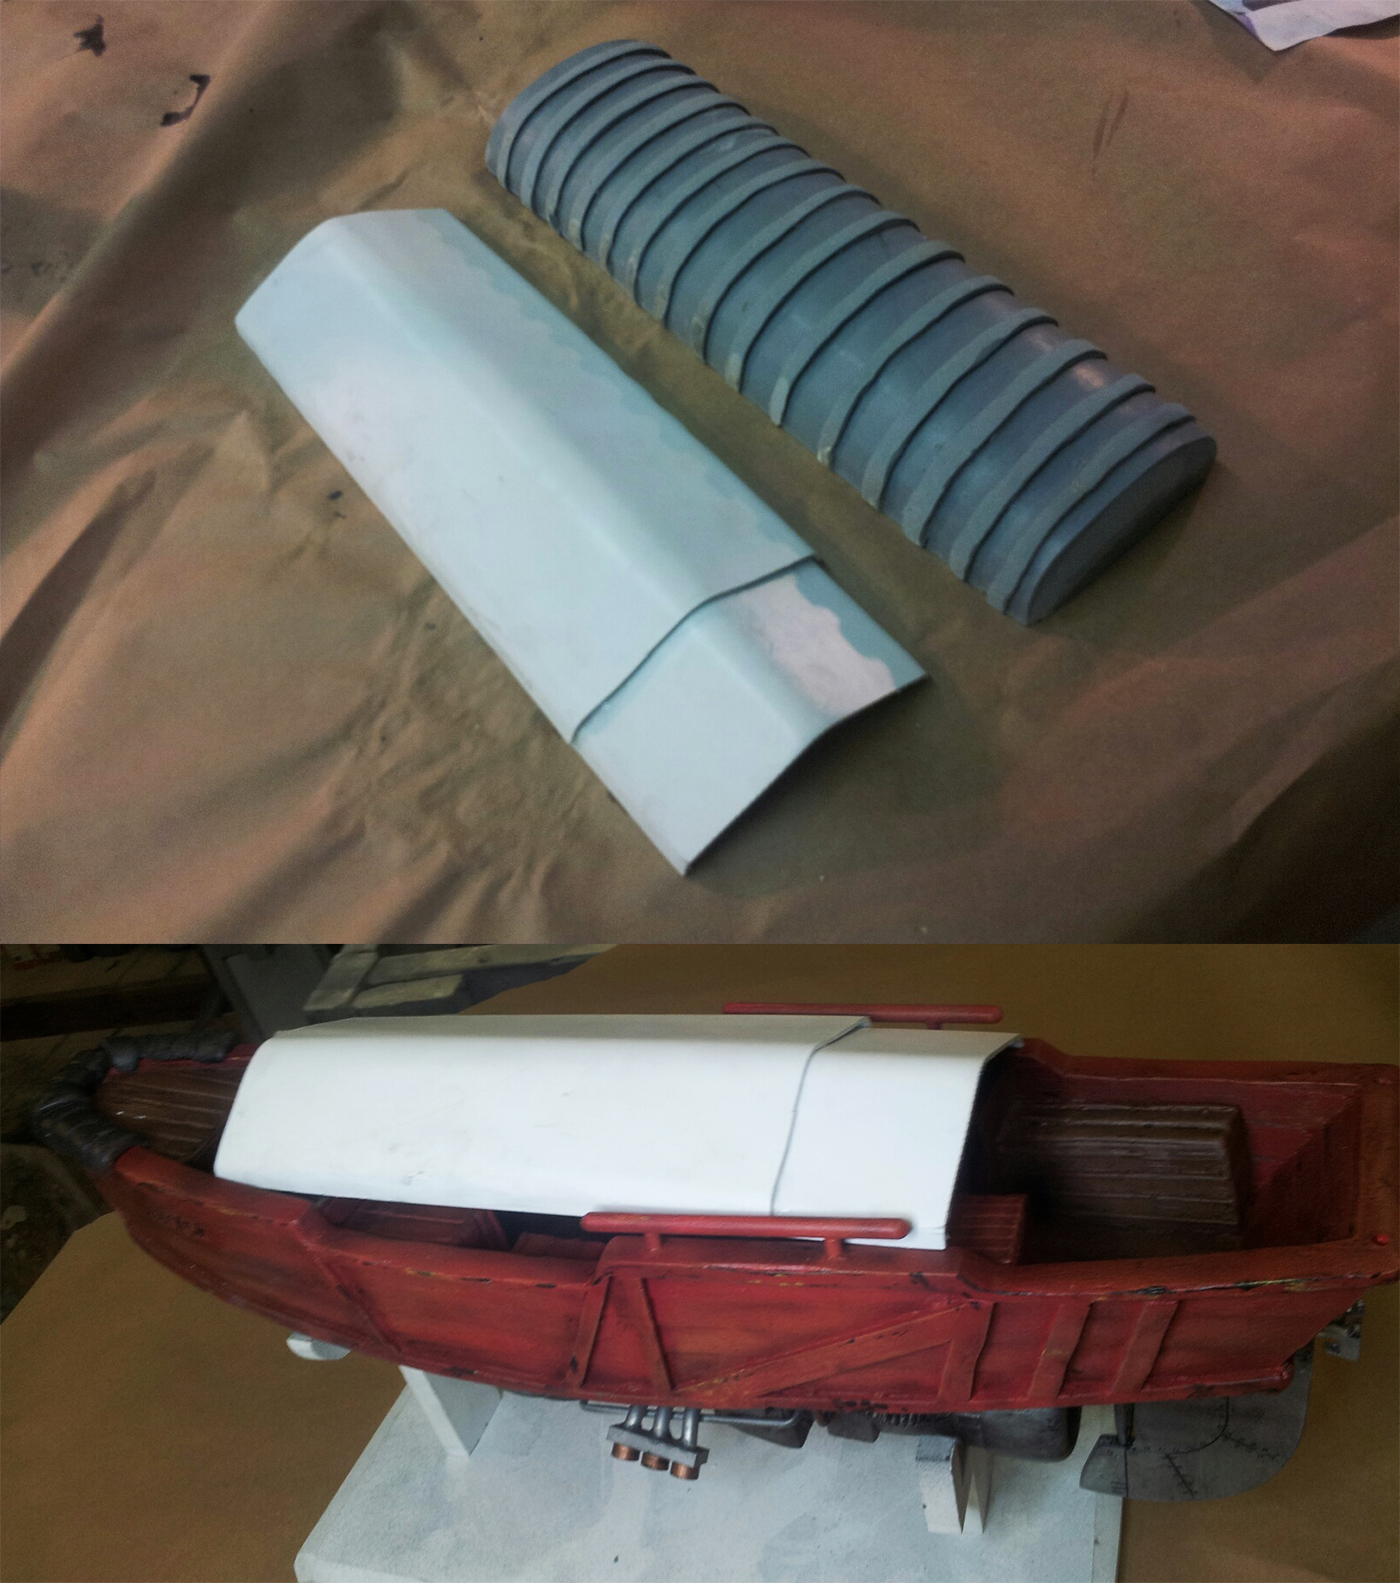
2.) ribbed hoses for engine
3.) acquarium tube for engine
4.) bamboo sushi matt (flat slats) for the main canopy underside structure) This piece is also used to make the hanging frame on the starboard side.
5.) lengths of kit string (for the rigging)
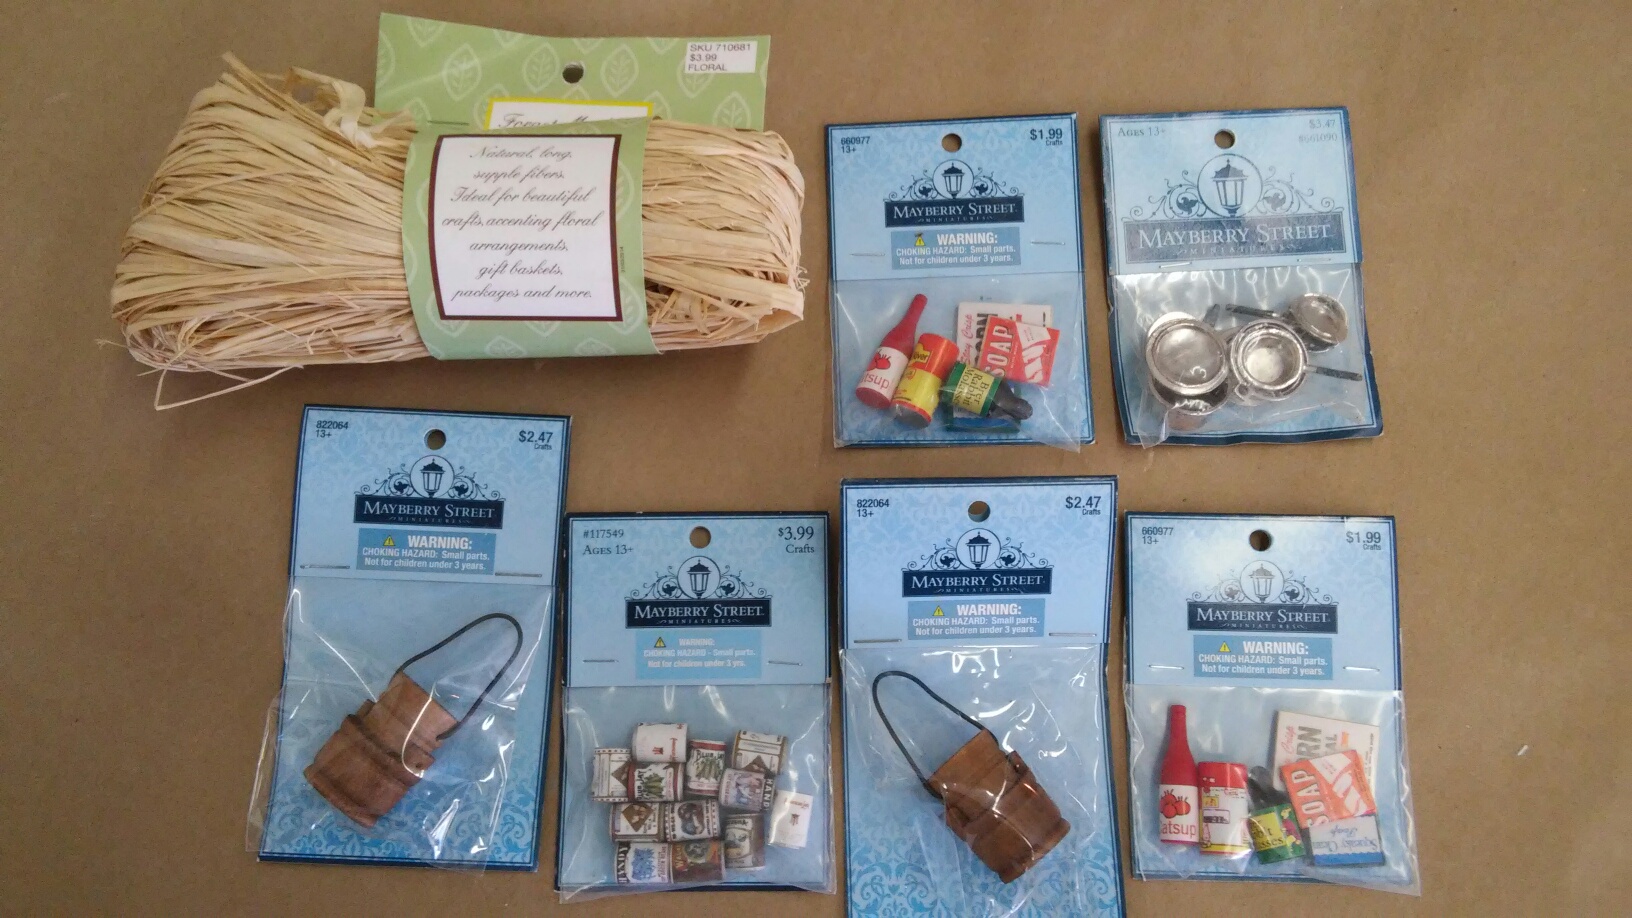
The kit can be embellished with the small dollhoue accessories found at most craft stores (not included in the store):
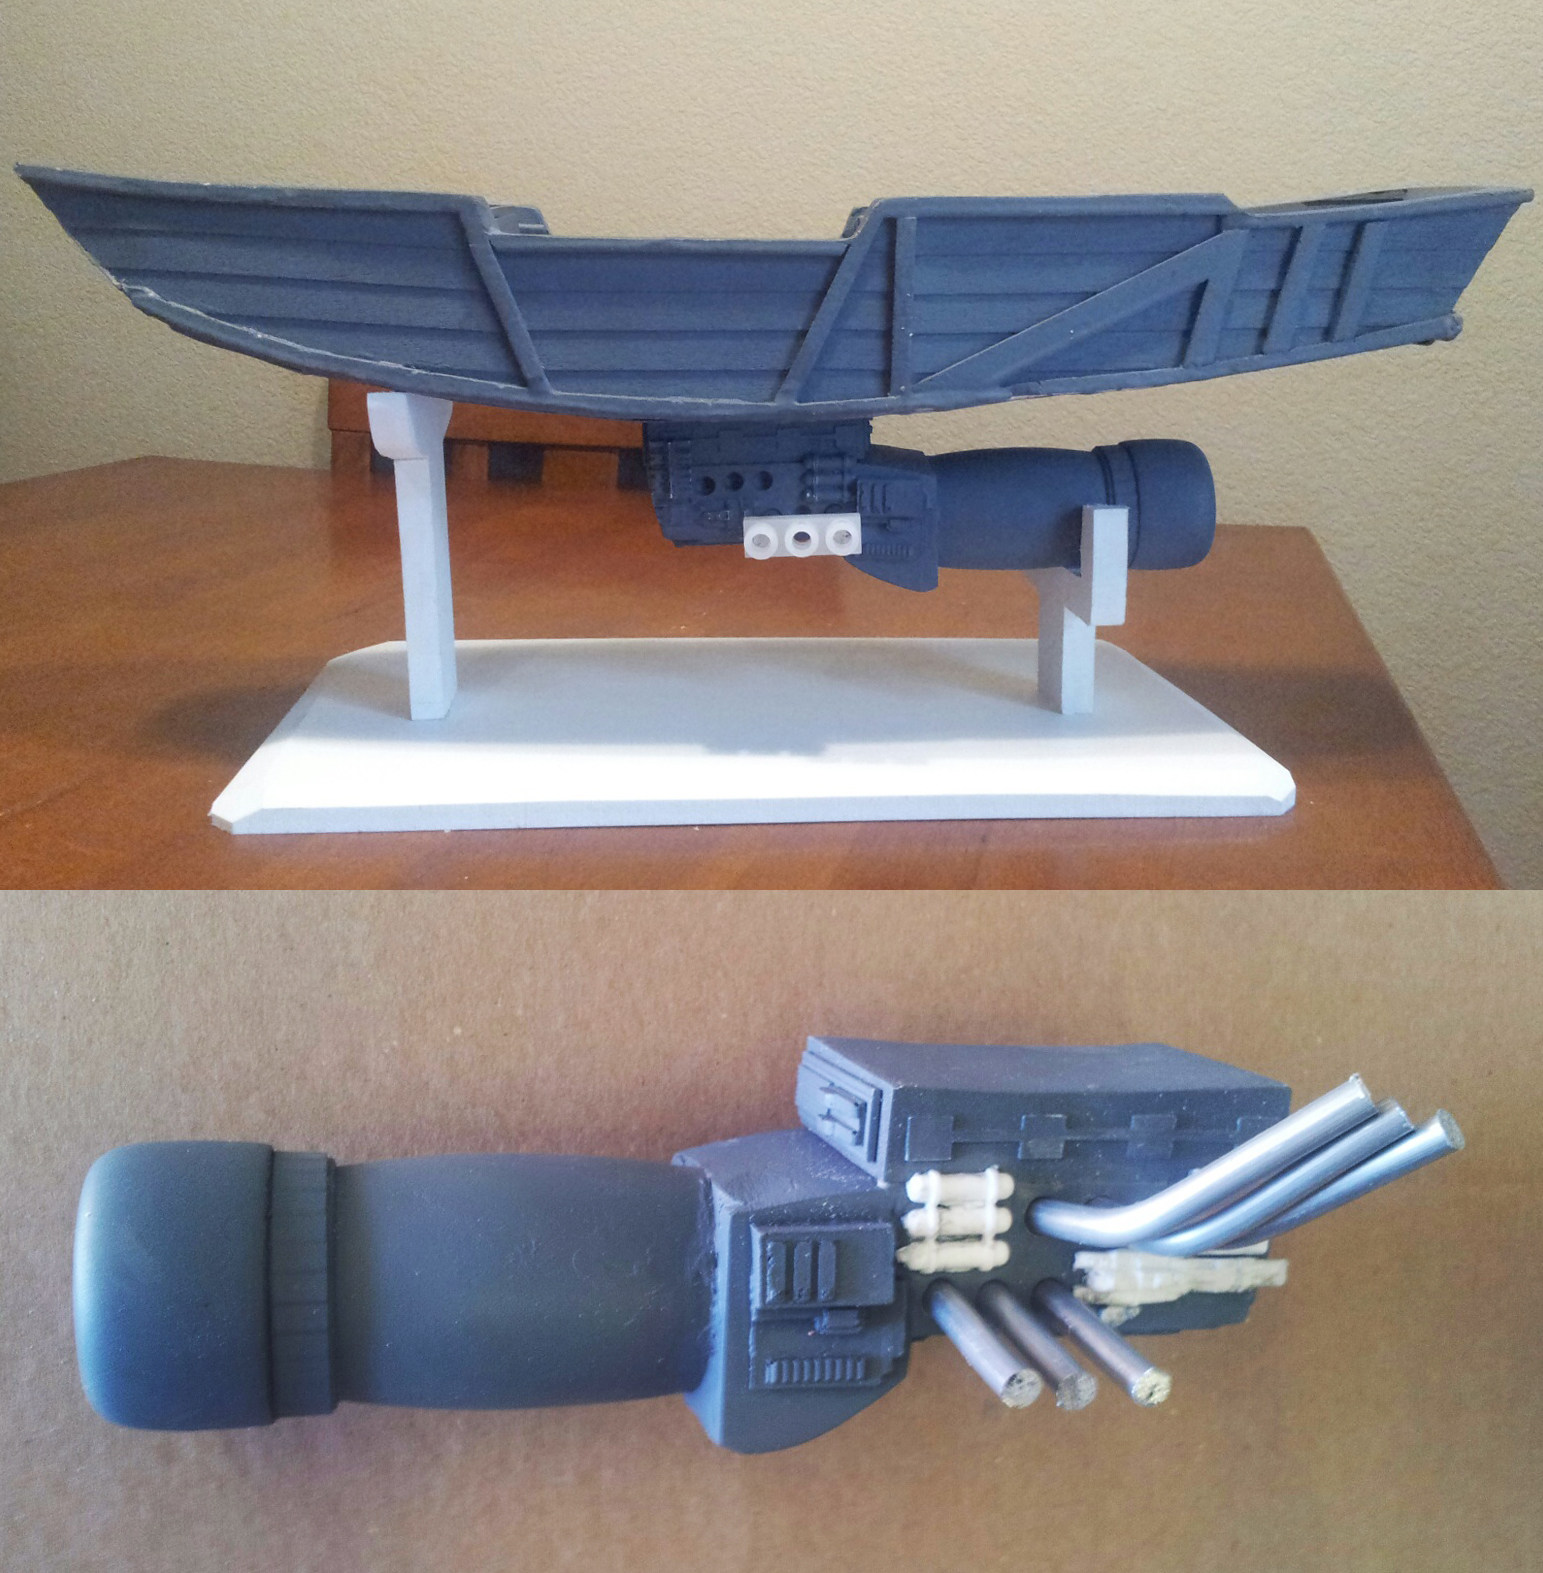
A closer look at the engine block detailing:


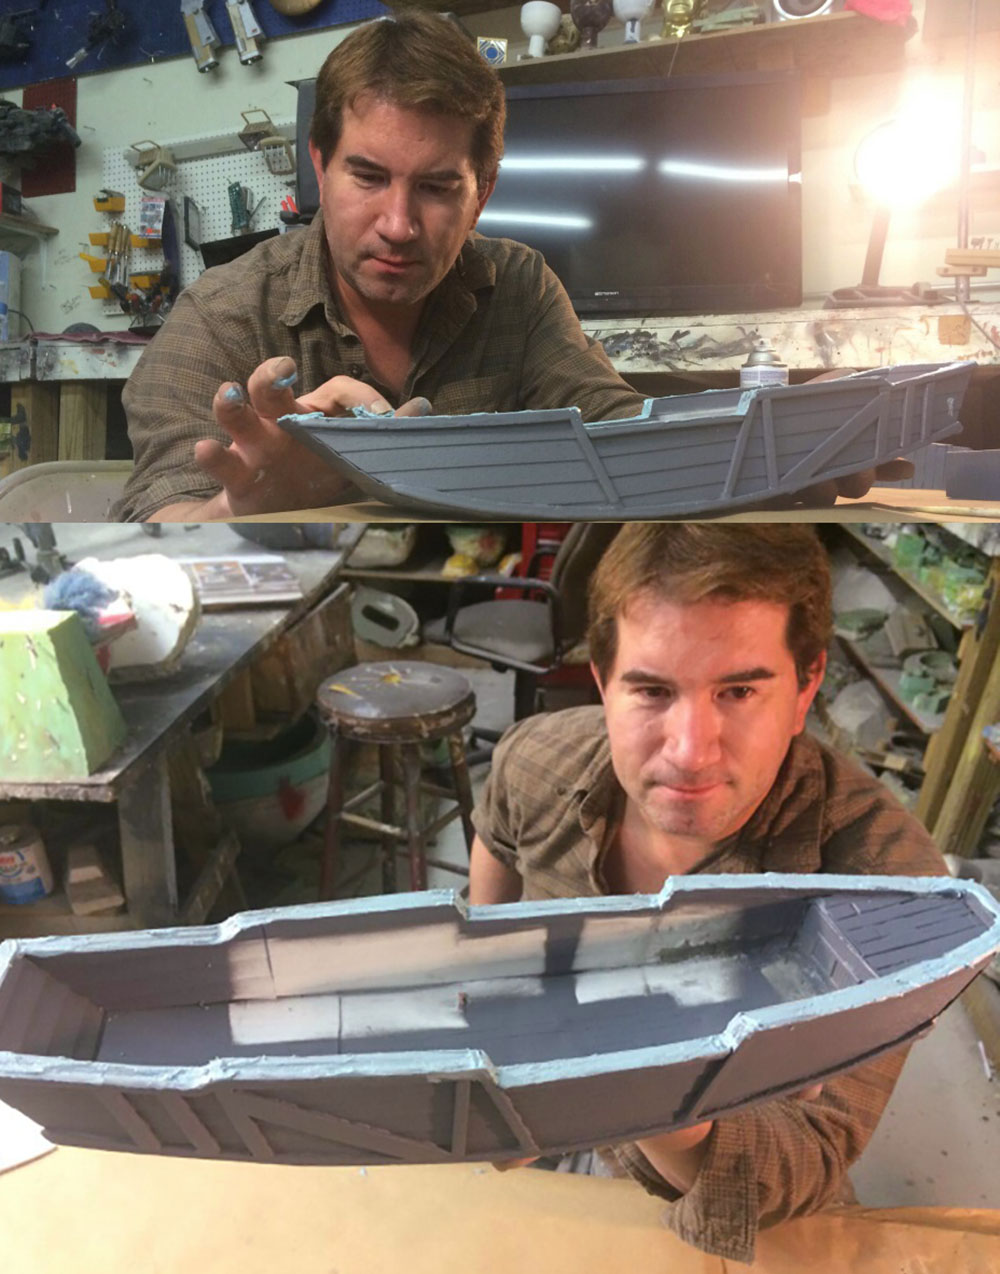
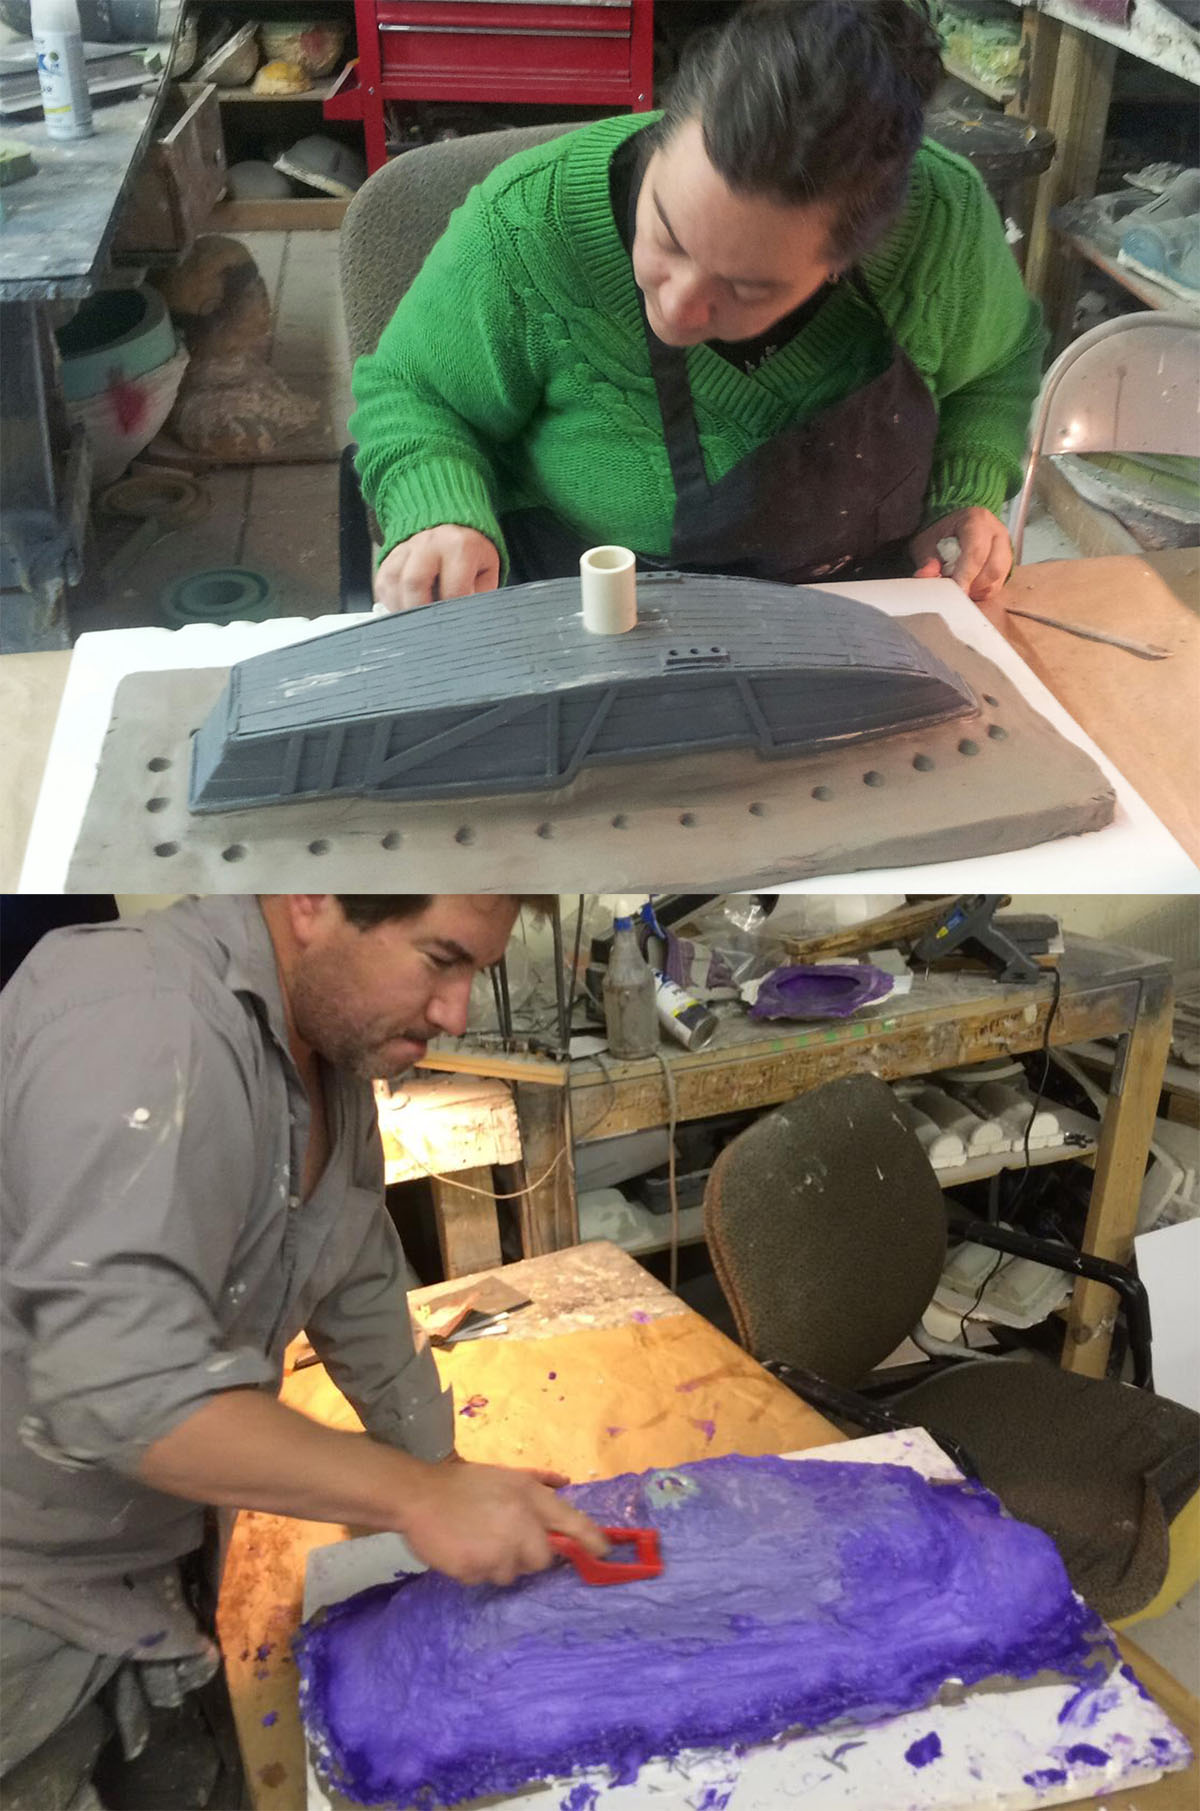
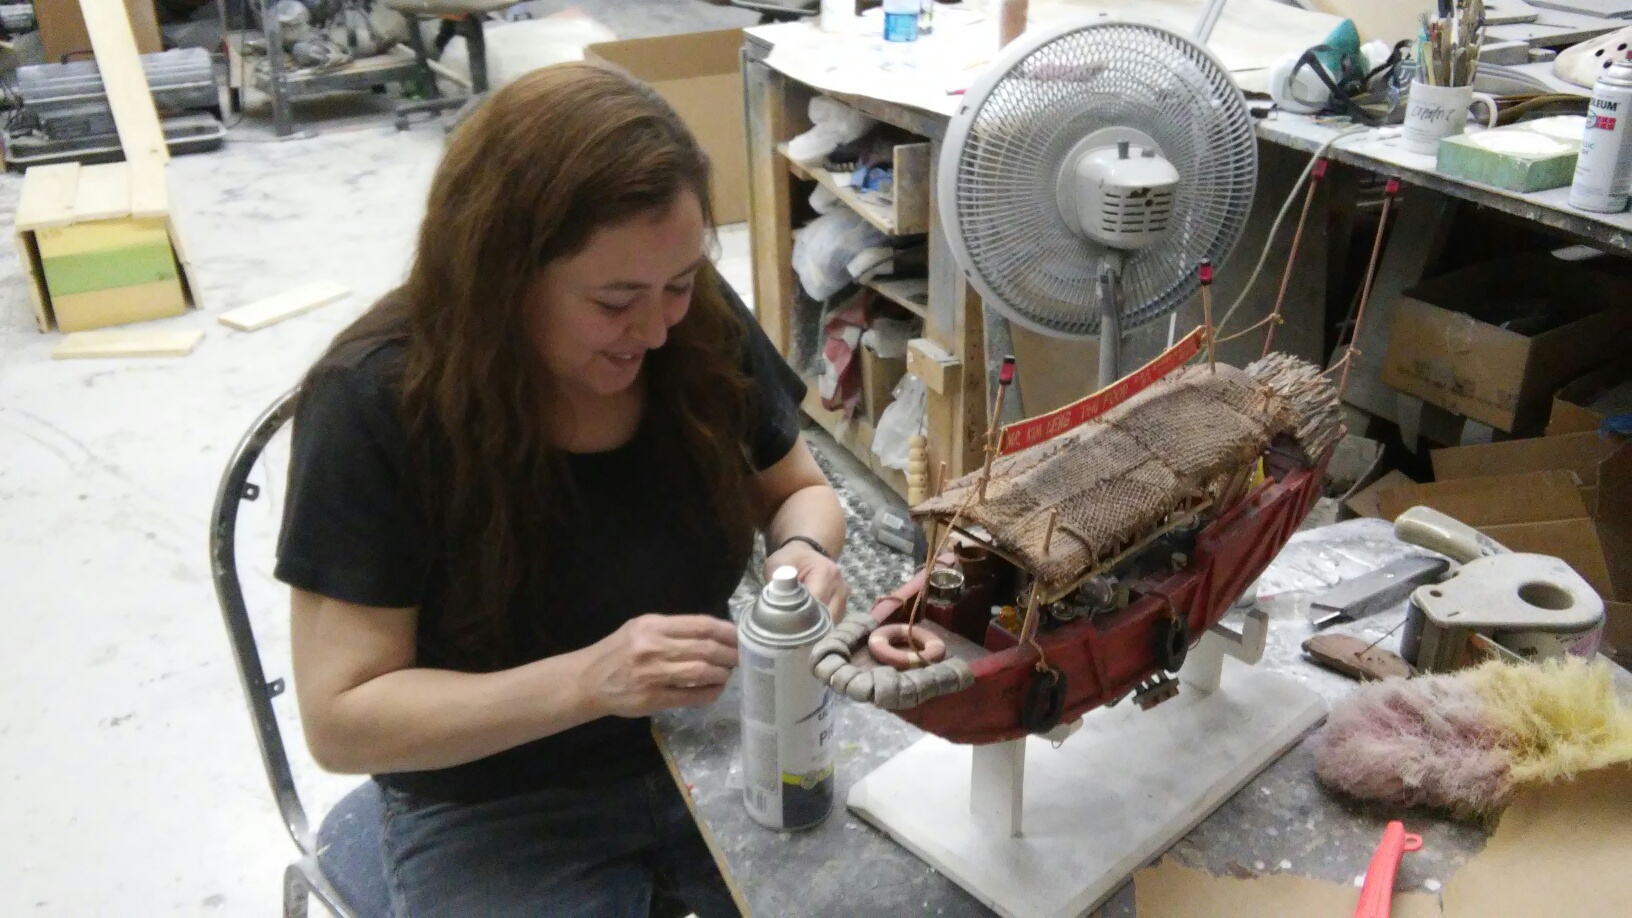
HOW IT WAS MADE:
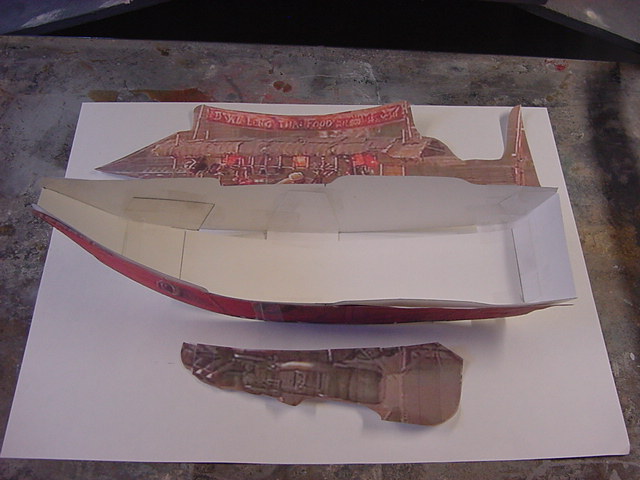
This project was intialized by Randy Neubert of voodoofx.com as a card stock study model, then turned over to me to start the scratchbuild.
I decided to upscale the model to a massive 21 inches long!! The kit is constructed using laser cutting technology, 3D printing, and traditional model buiding techniques.
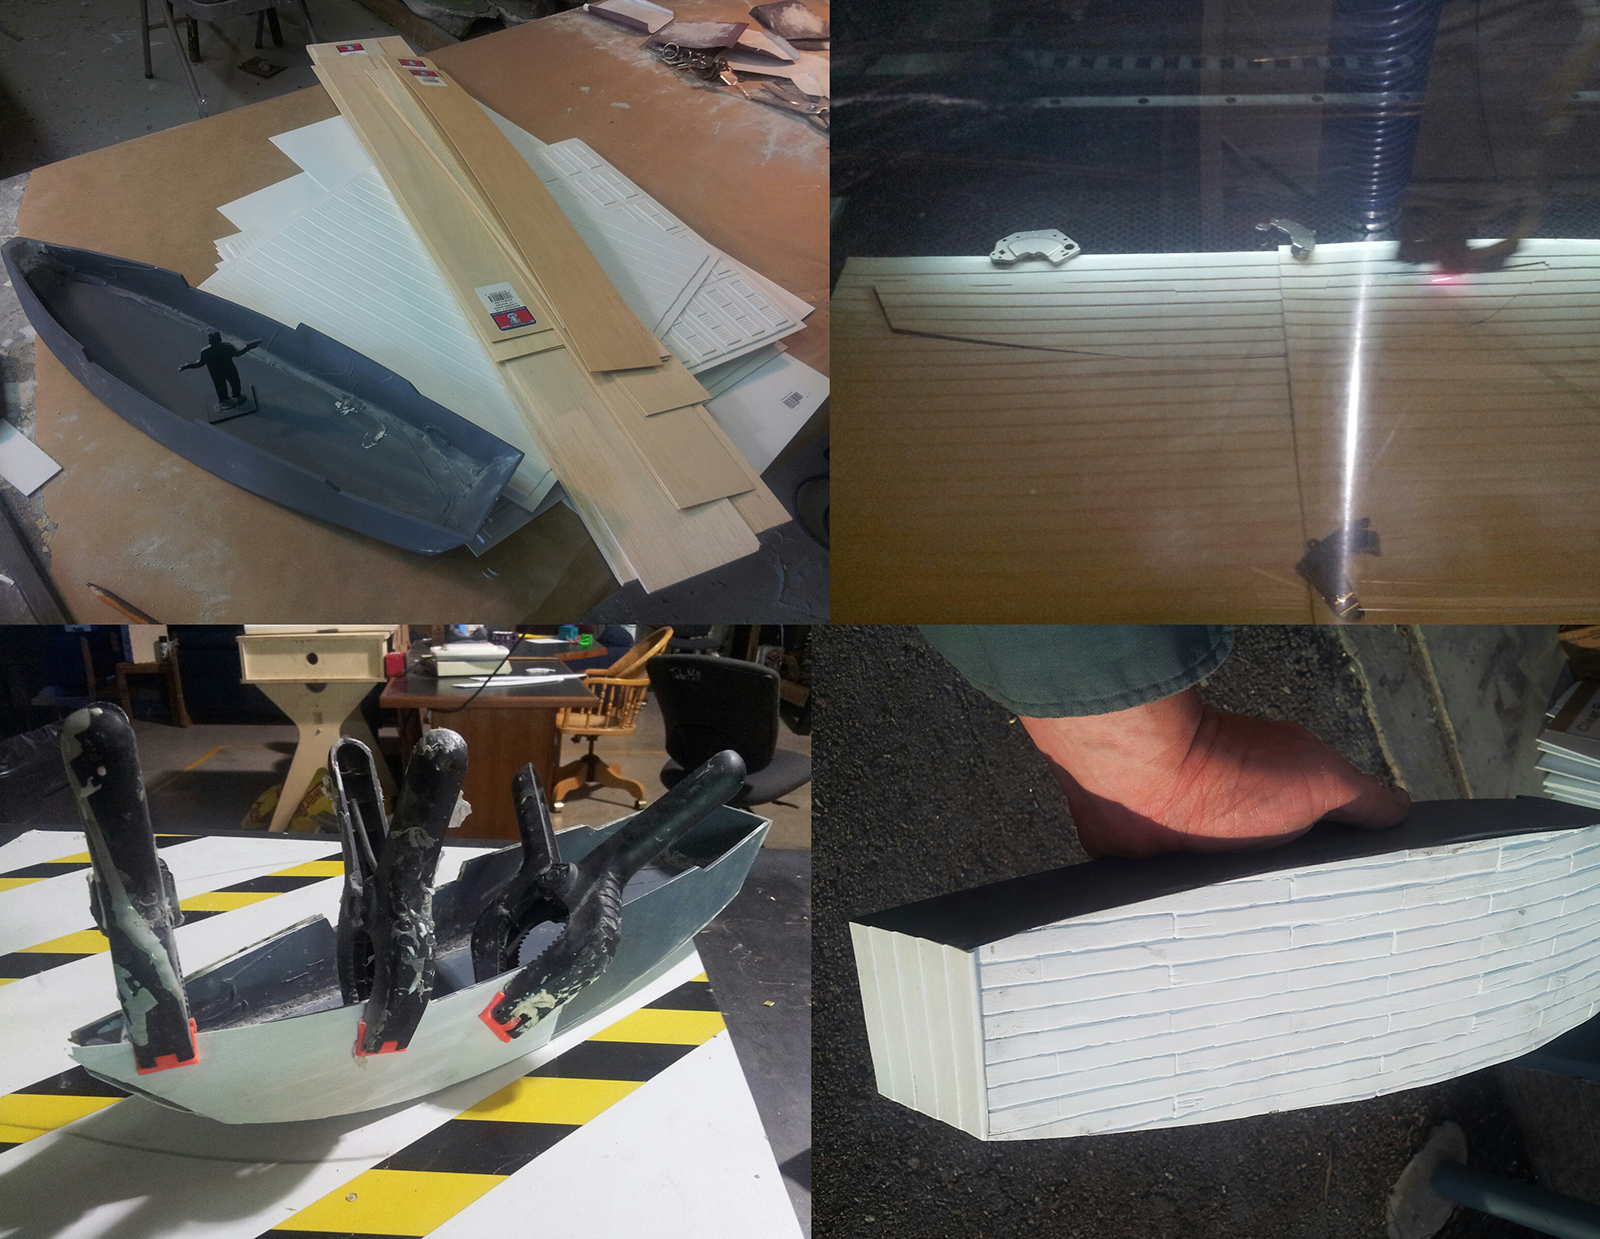
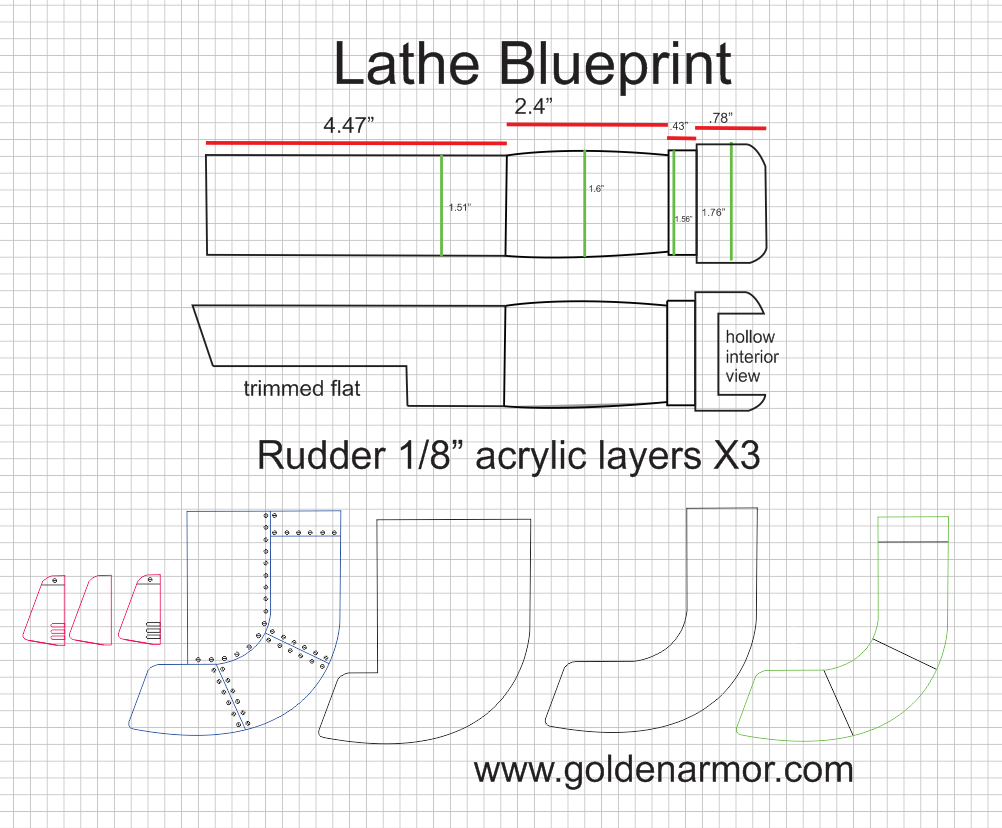
To start things out I created some CAD blueprints to figure out proportions and details. These blueprints would later be used to vector-cut the hulls and planking for the model.

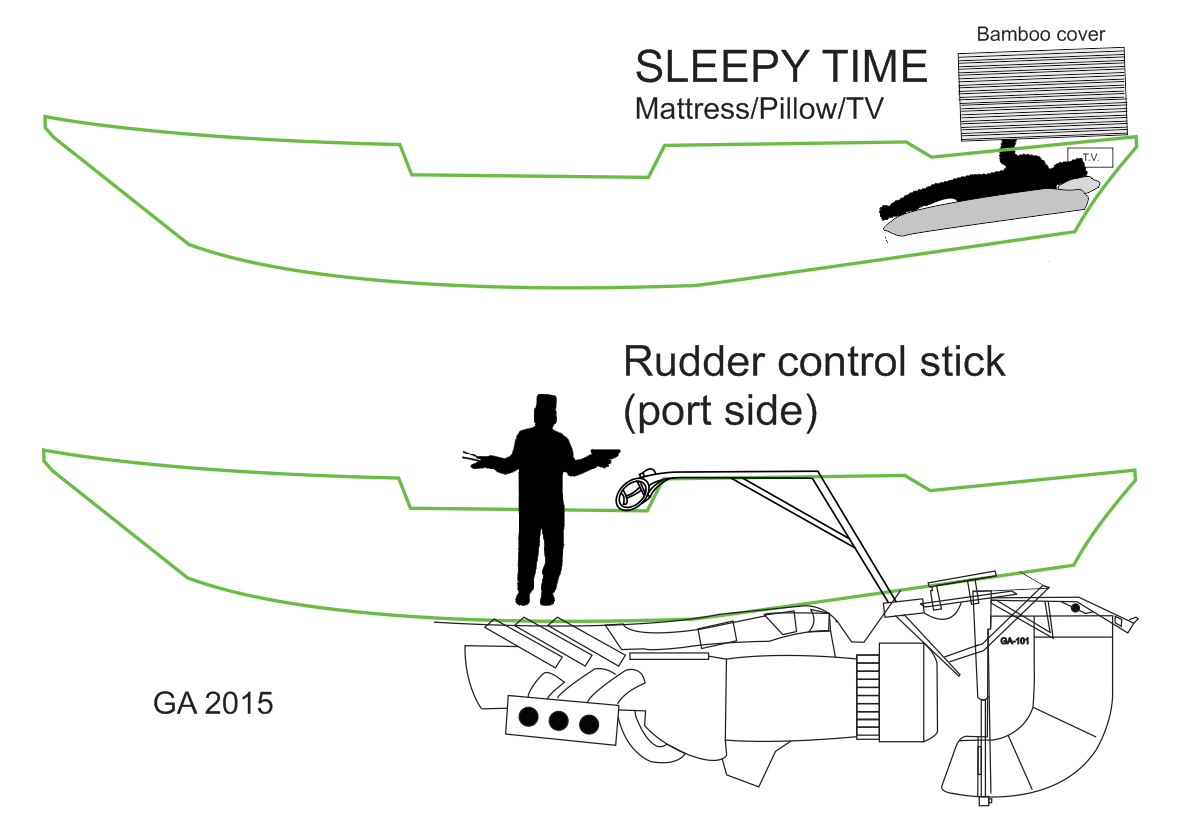
I used some creative freedom to design some interior features not seen on film.
Once I was finished with all my blueprints I was ready to start the build:
I started by laser cutting the hulls in .125 styrene and glueing them together to form the base shell. I need to shape the plastic port and starboard using heat, and the bottom was shaped and corrected using bondo.
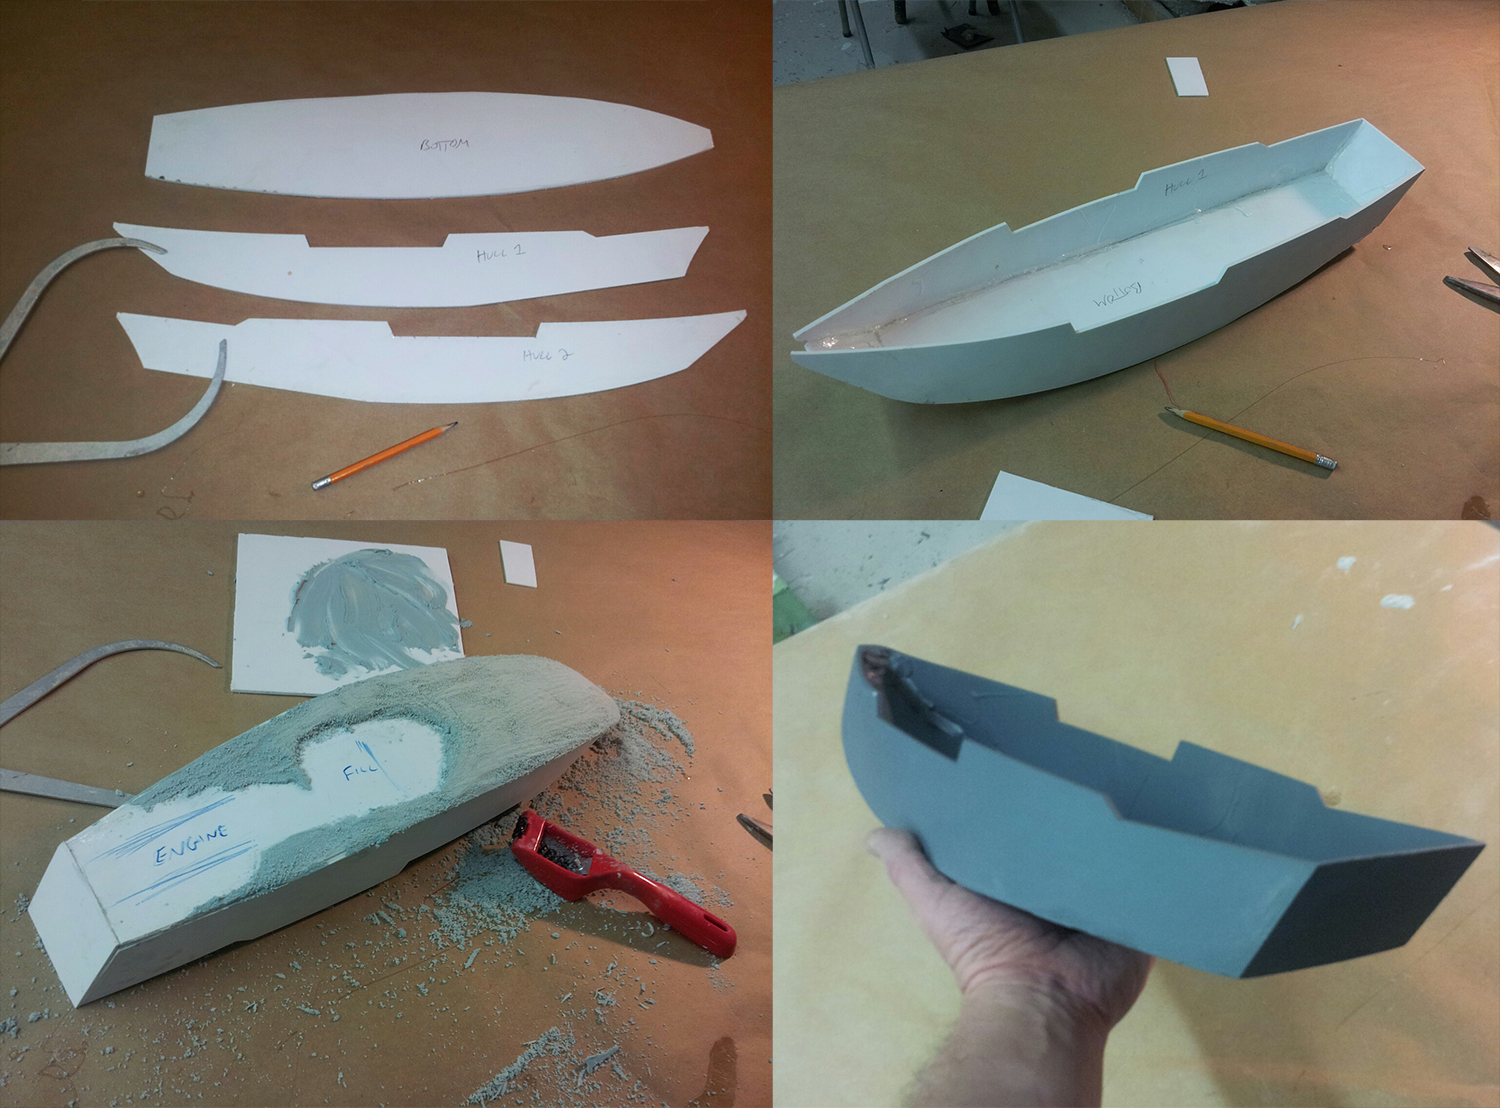
A $200 trip to the hobby store yielded balsa planking and strene texture panels which you can see being cut and laminated in these shots:
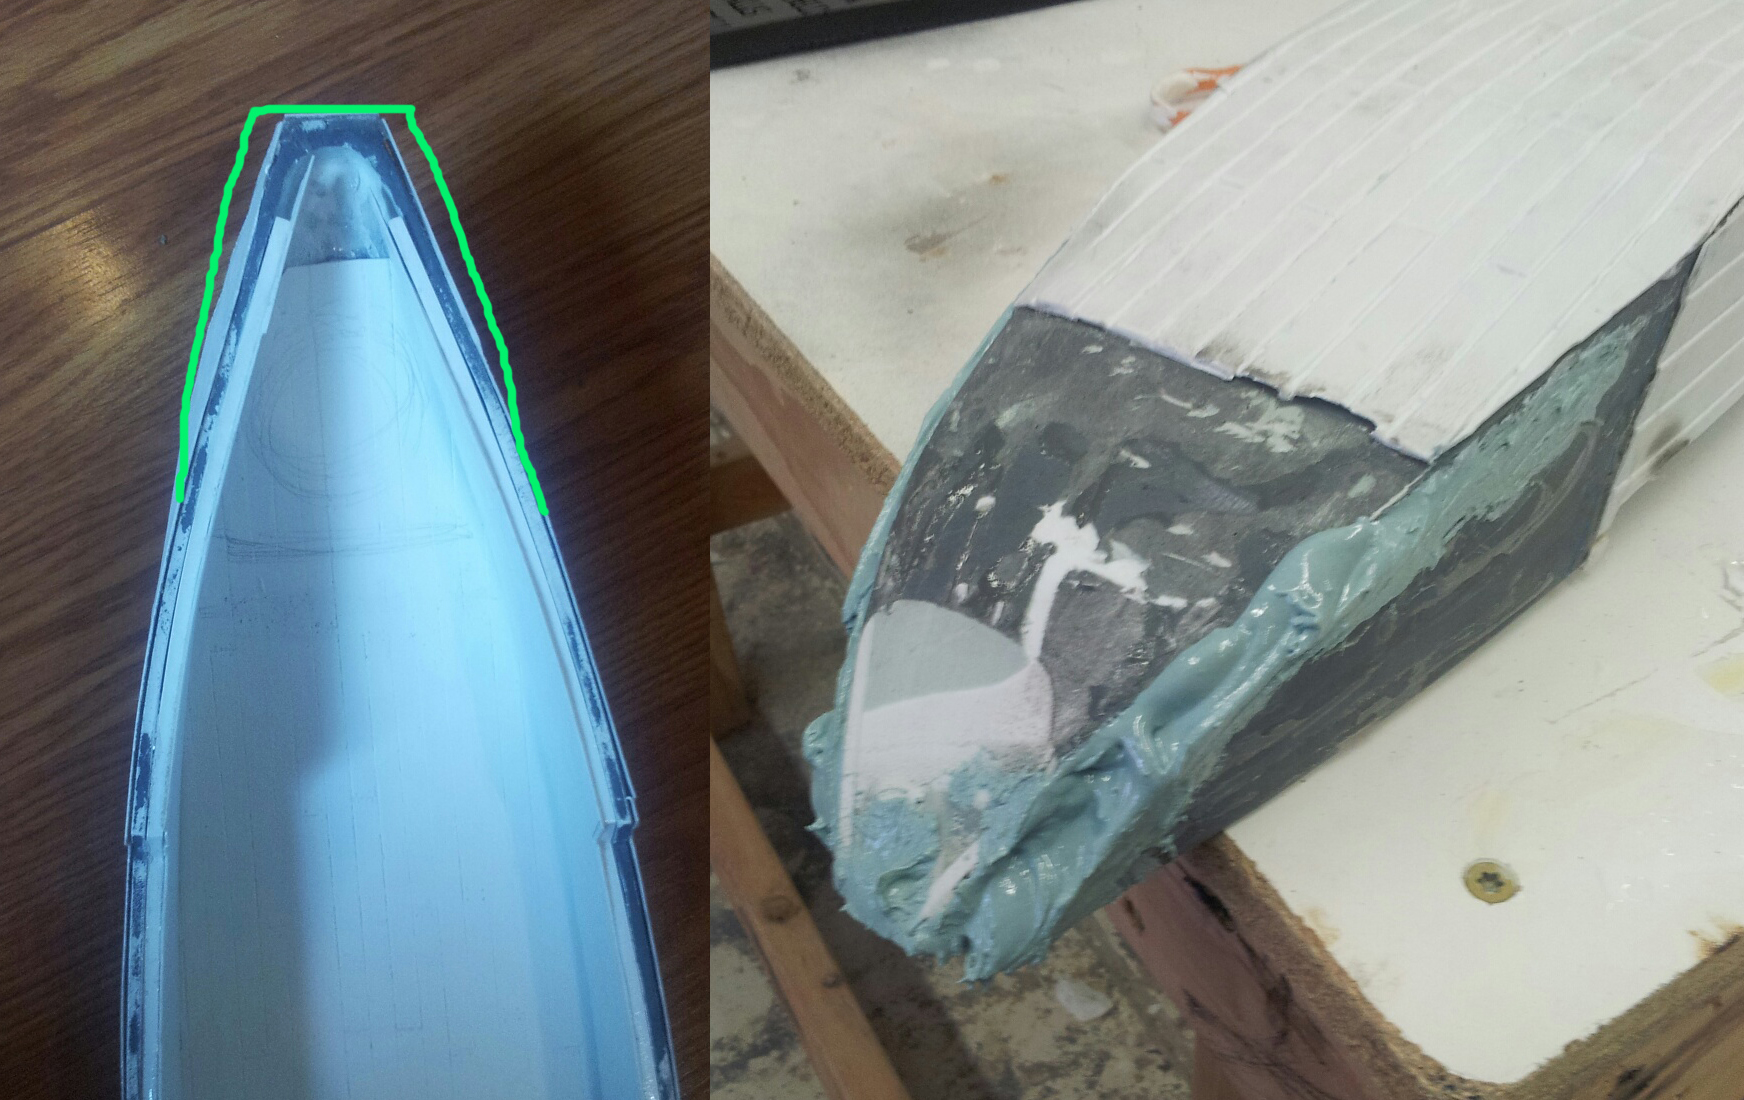
Model building should be a flexible process. I needed to back things up a bit when I noticed the nose was becoming too sharp. I needed to widen it out by a good 1/2". I drew up my plan, chopped the bow up, stripped the planking and started over. I was much happier with the new bow shape.
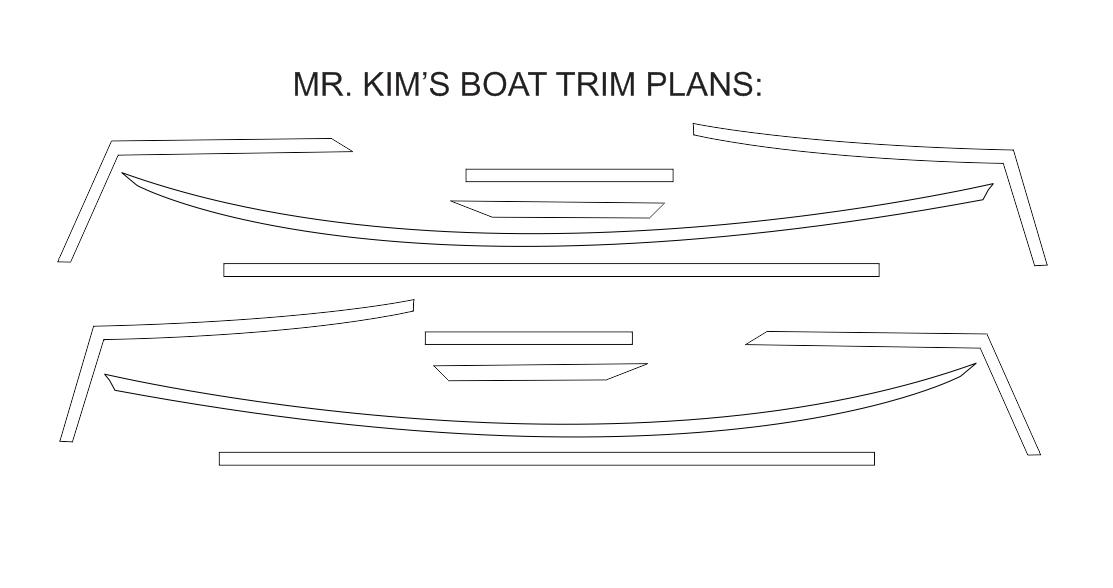
I again used my CAD blueprints to develop the trim sections, laser cut them and applied them to the hulls.
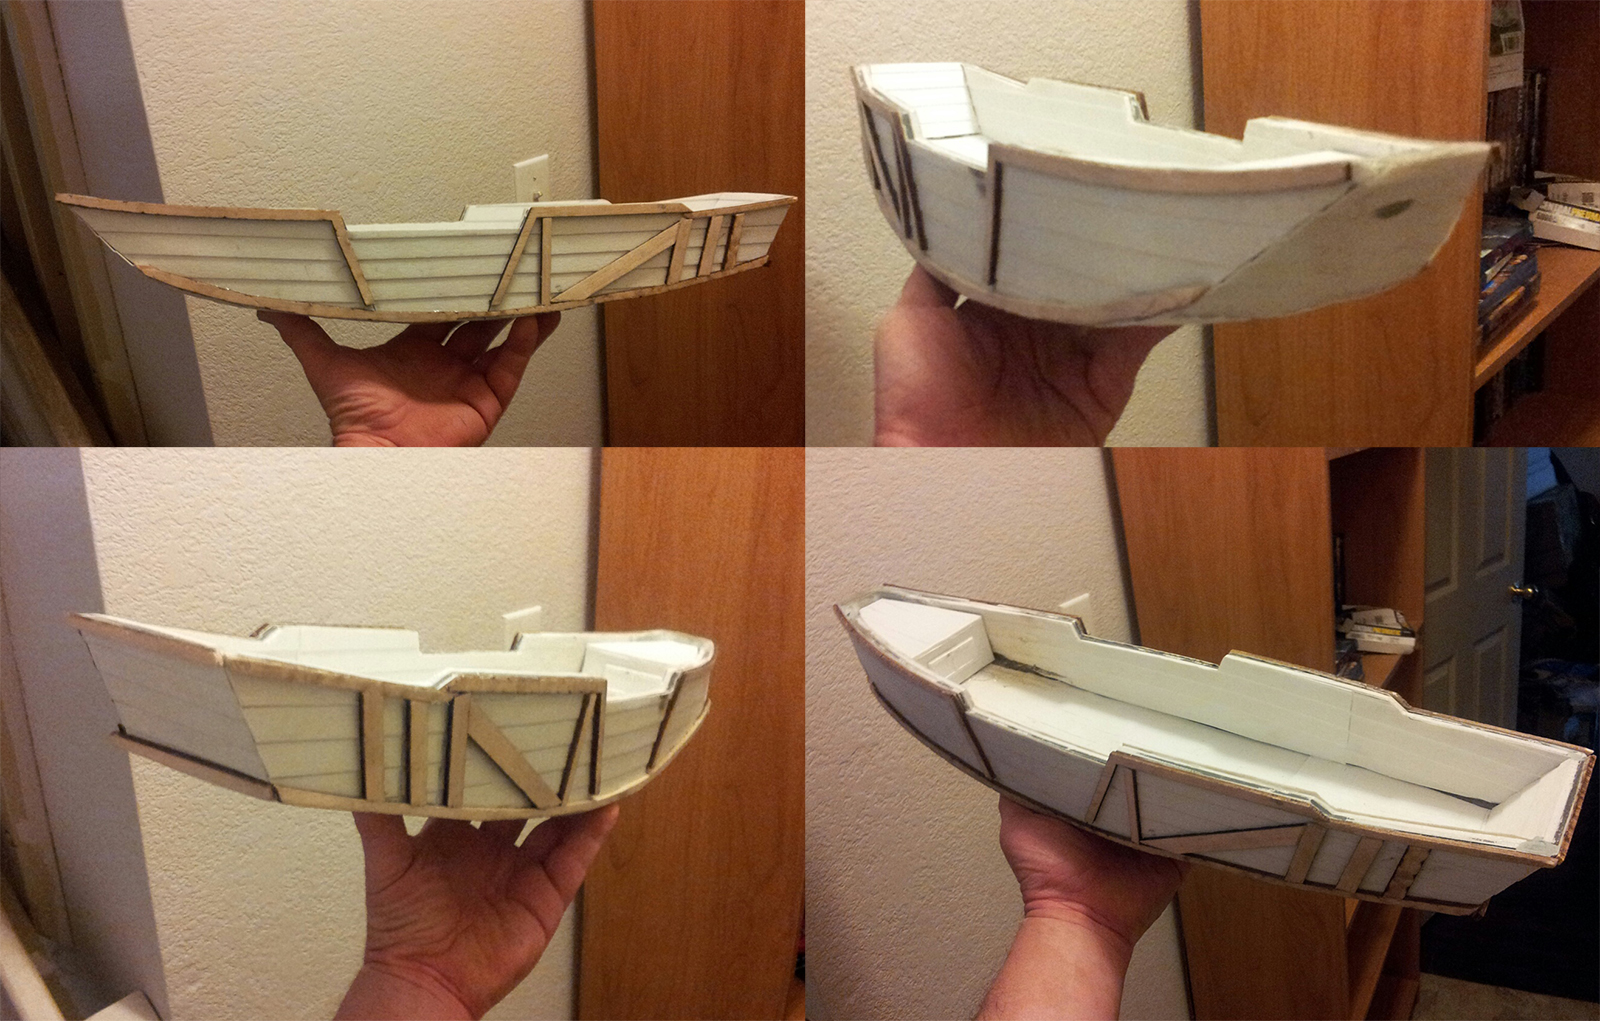
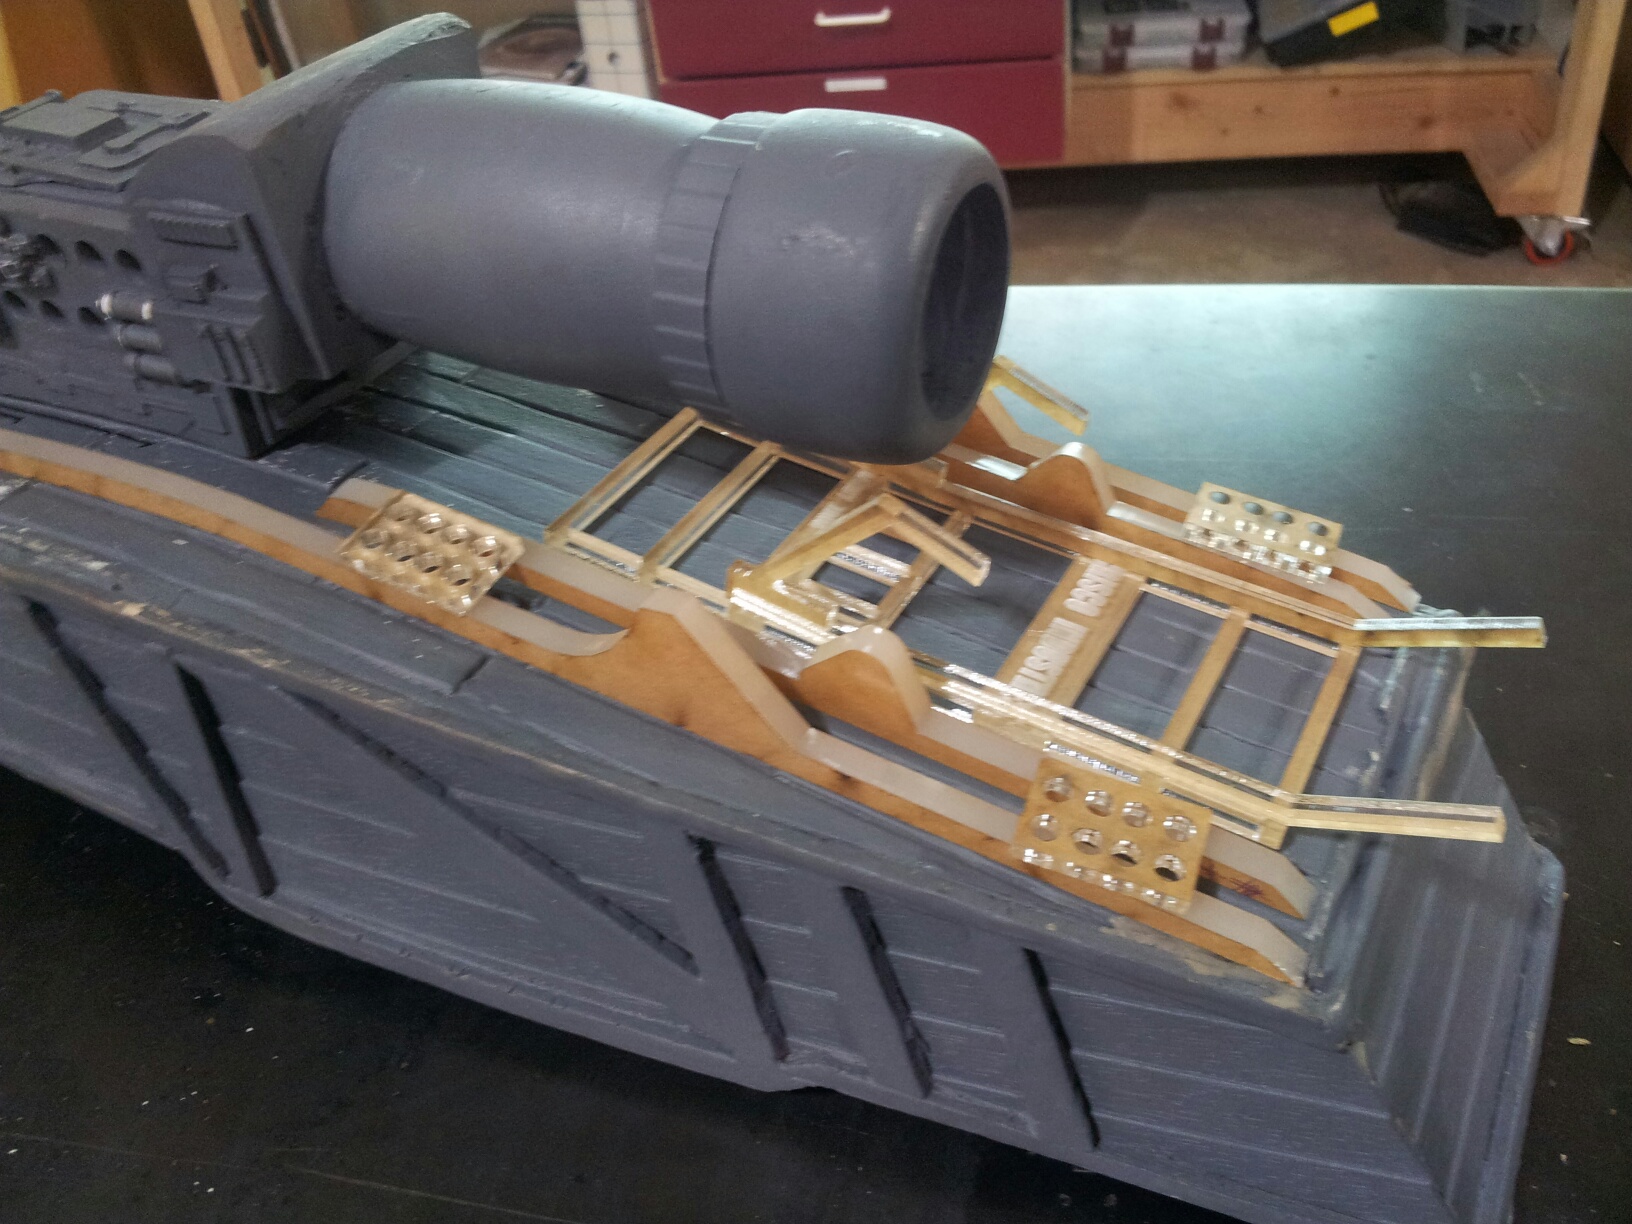
I used APOXIE SCULPT to fill in any gaps and sealed the balsa trim with fiberglass resin and was ready to start detailing the interior:
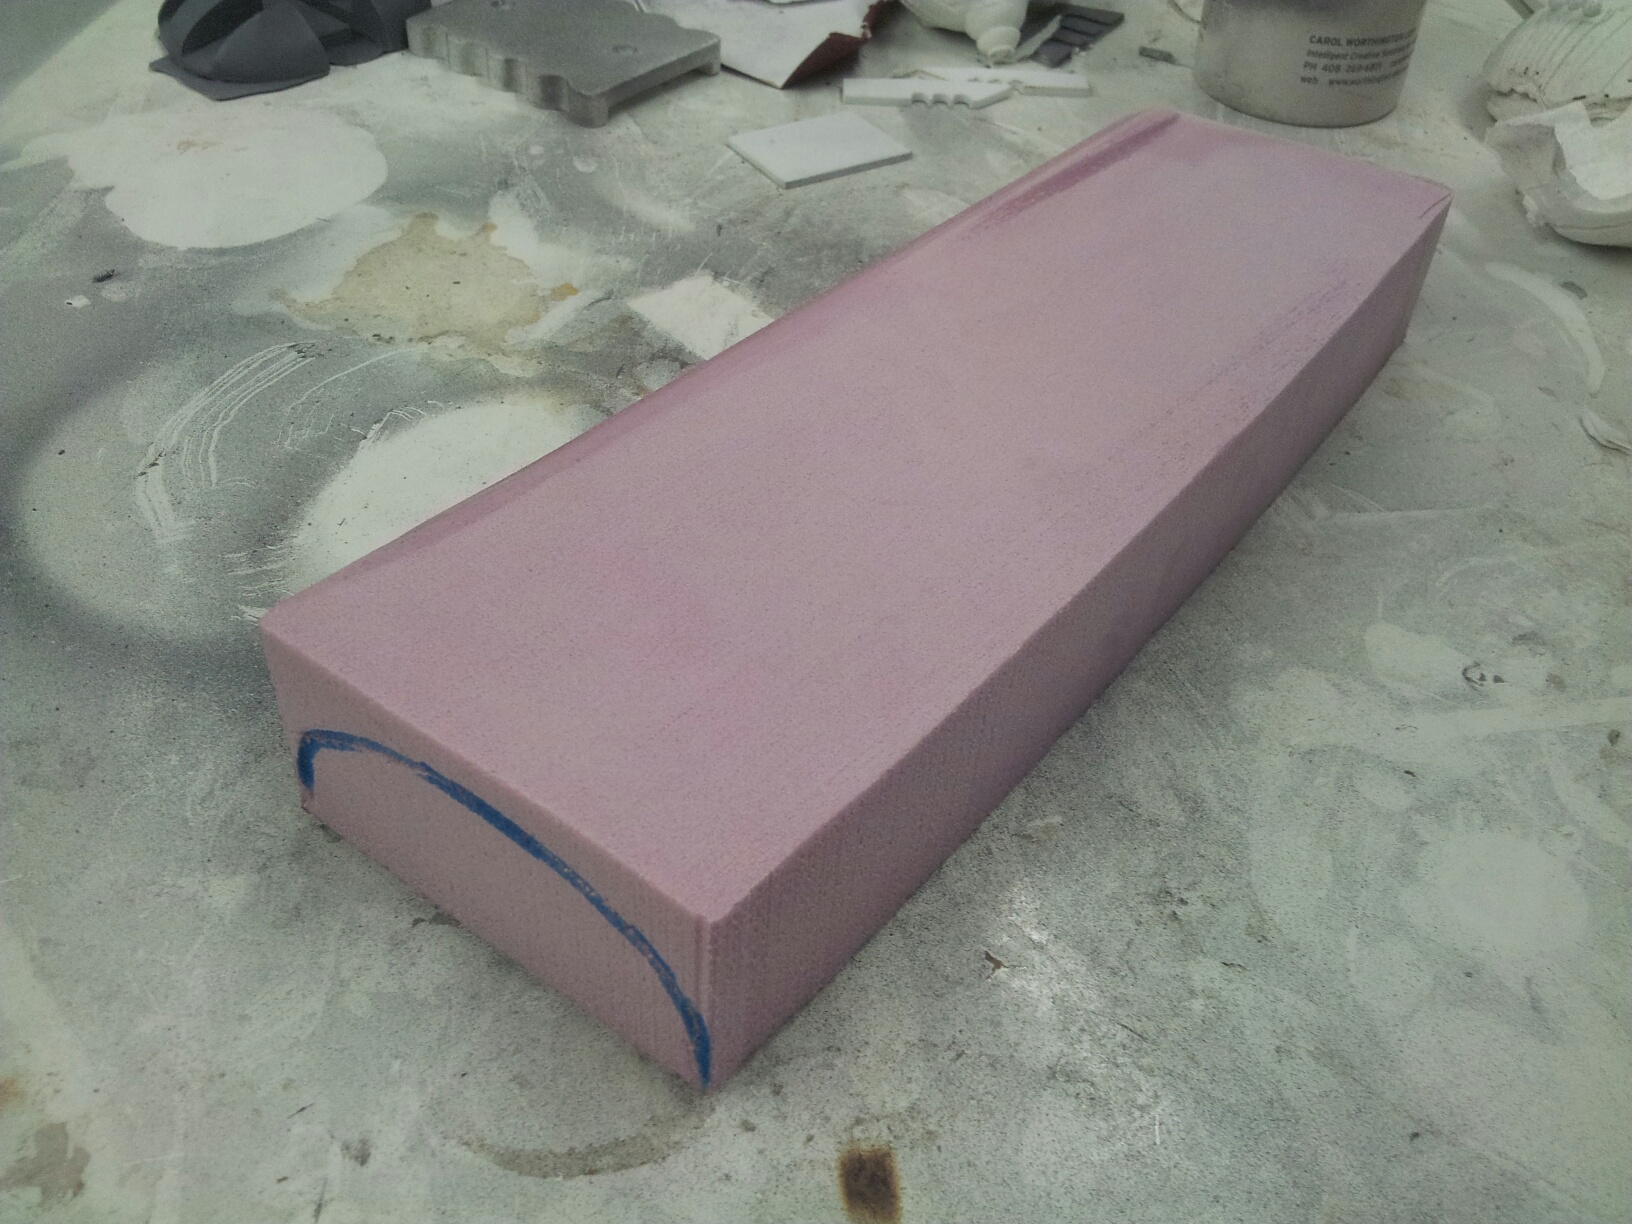
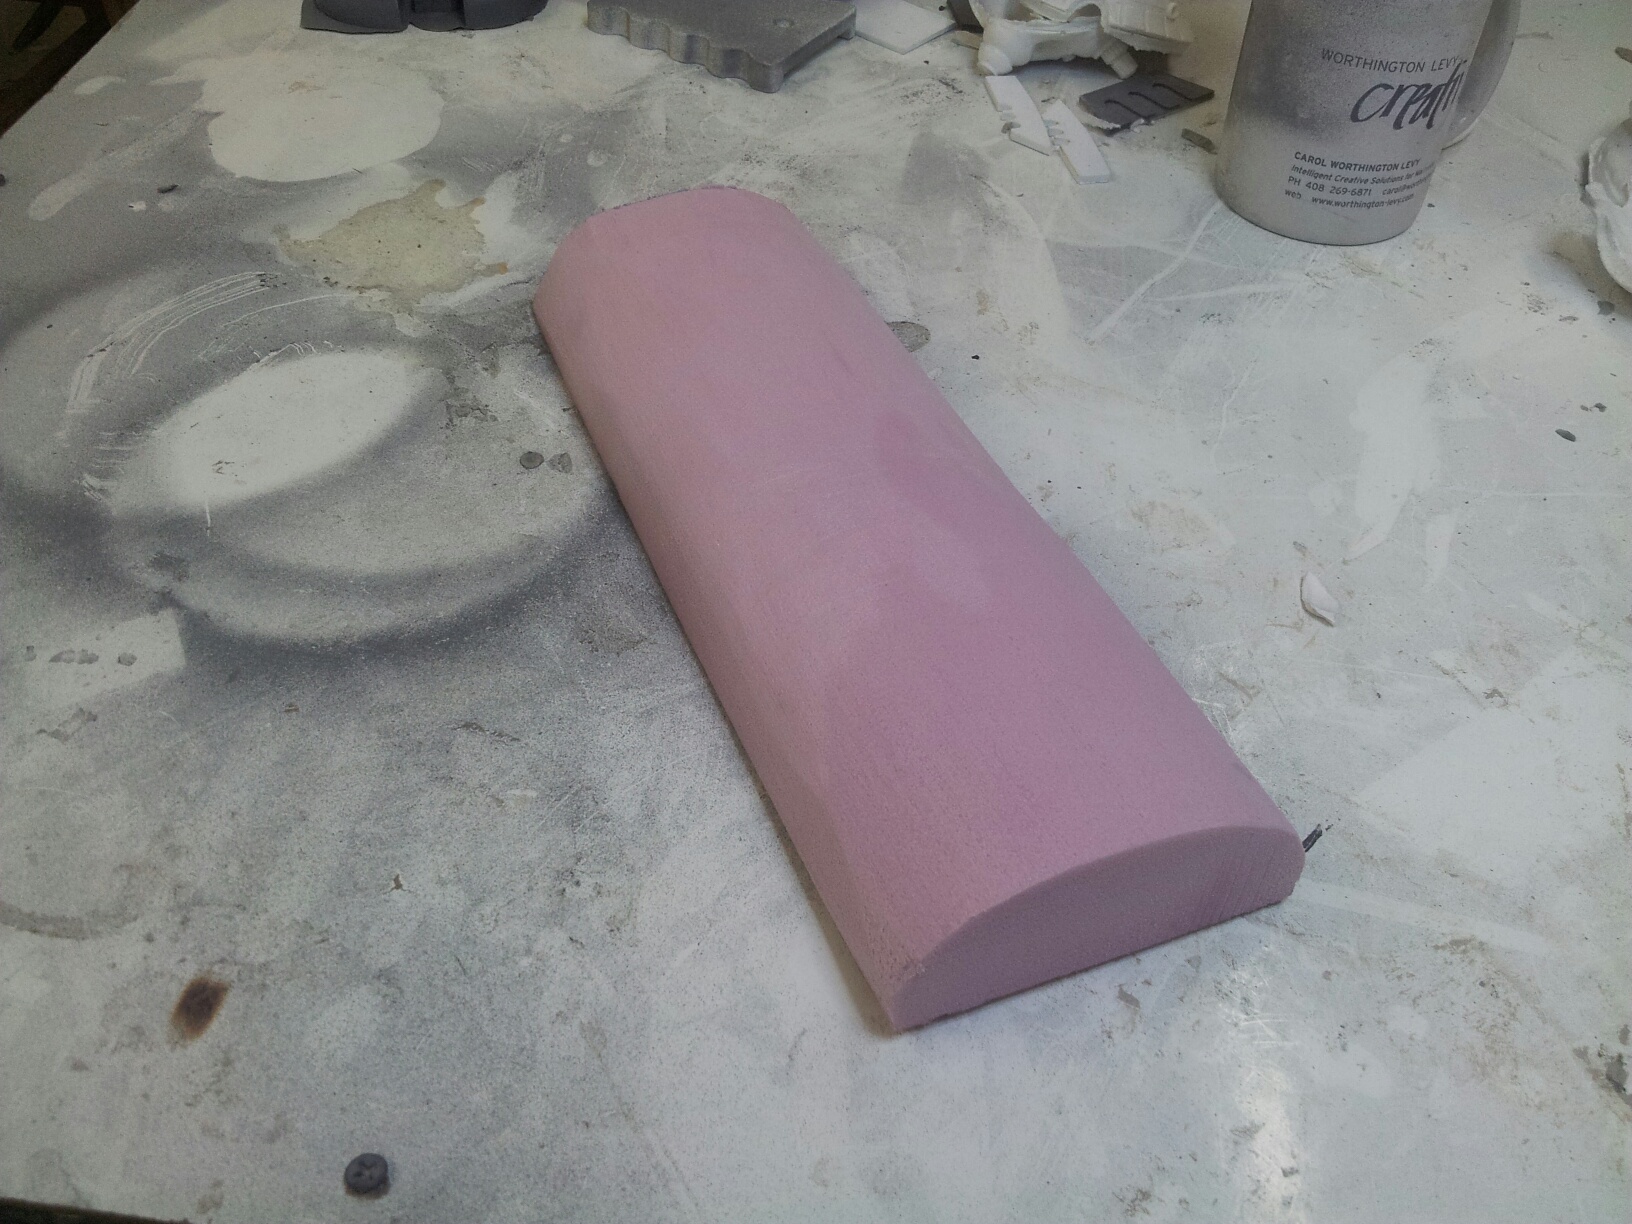
The Interior was blocked out using foam blocks. Once those were shaped properly and connected where needed, I surfaced them with various wood and metal textures.

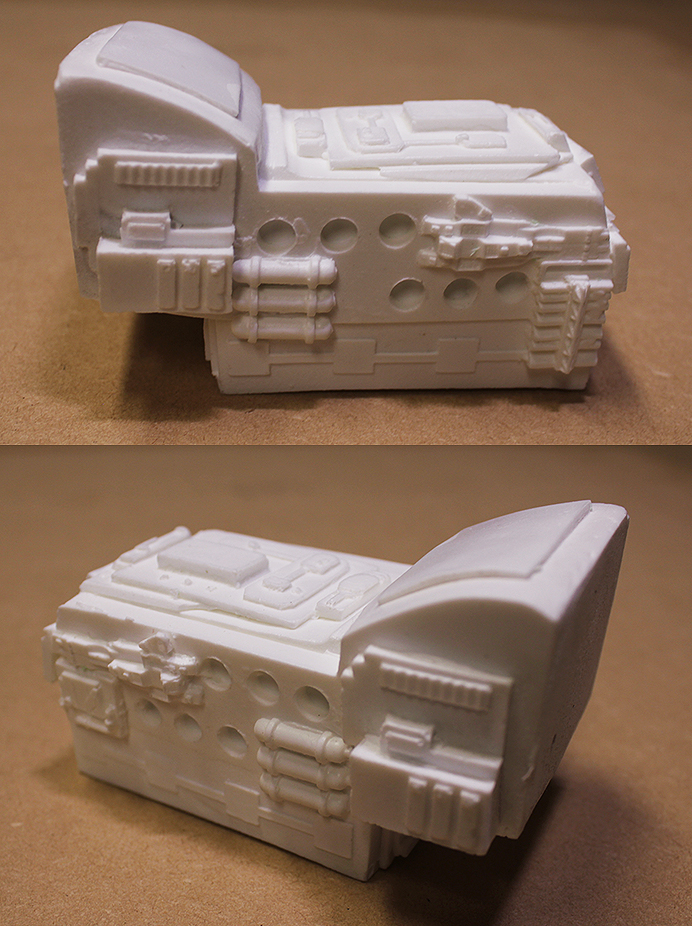
THE ENGINE
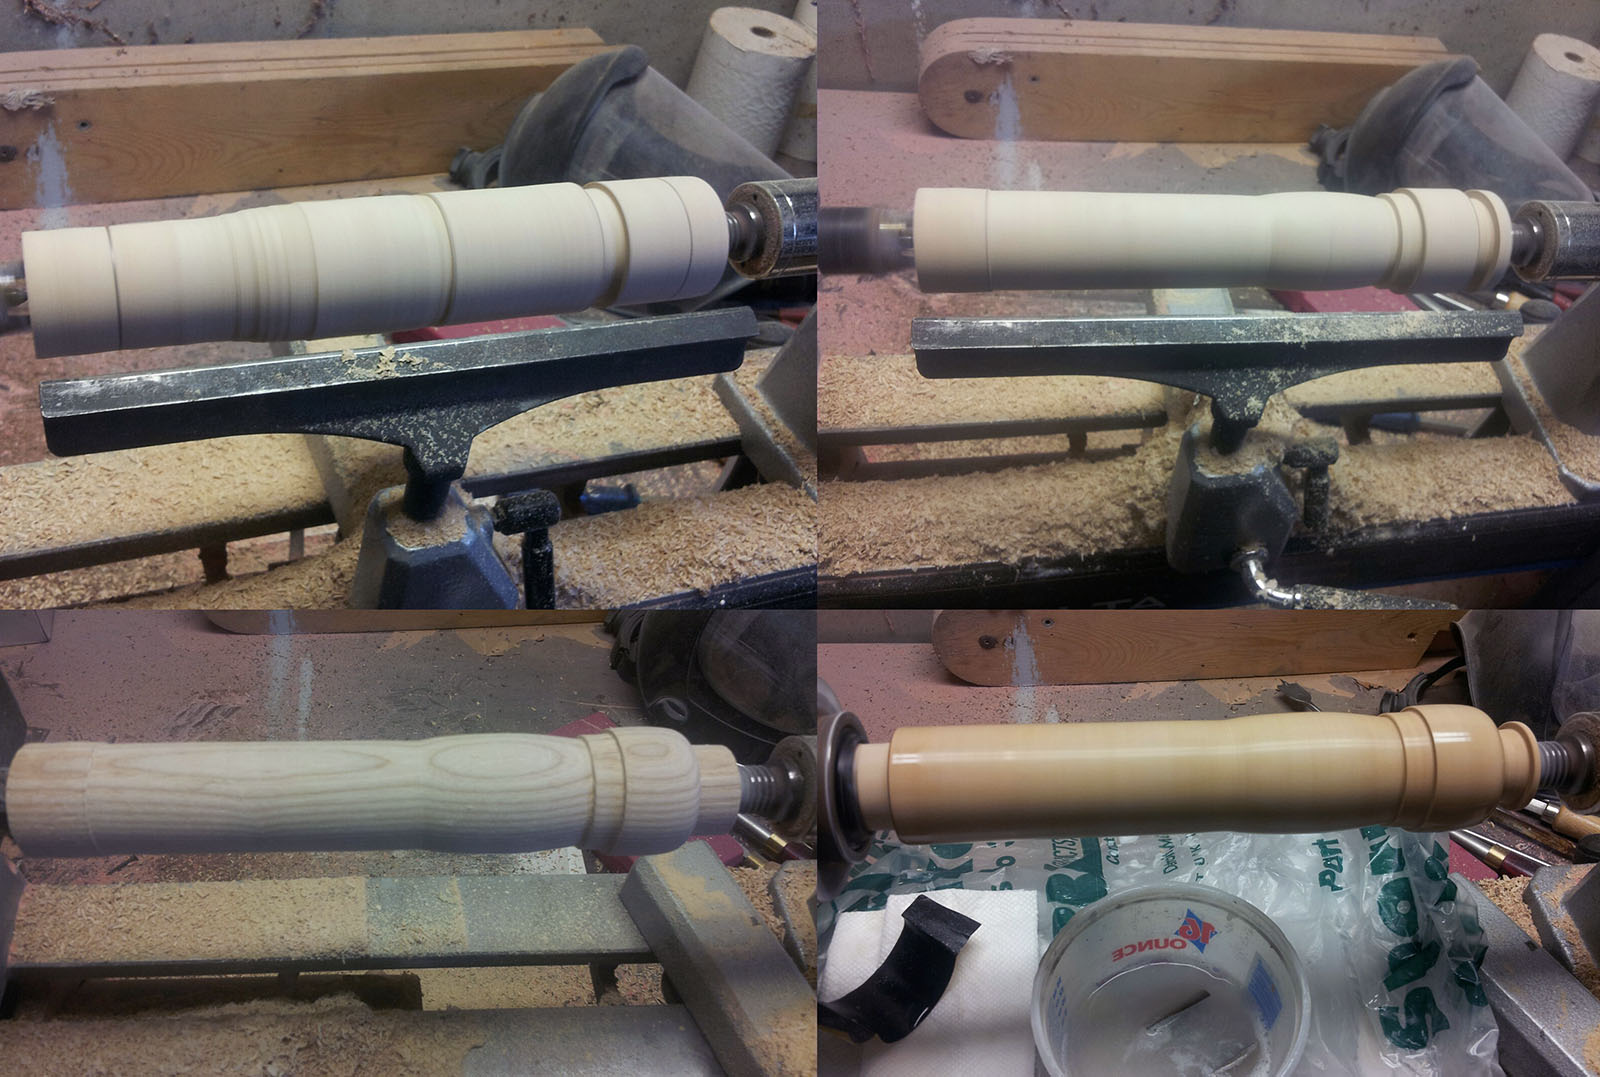
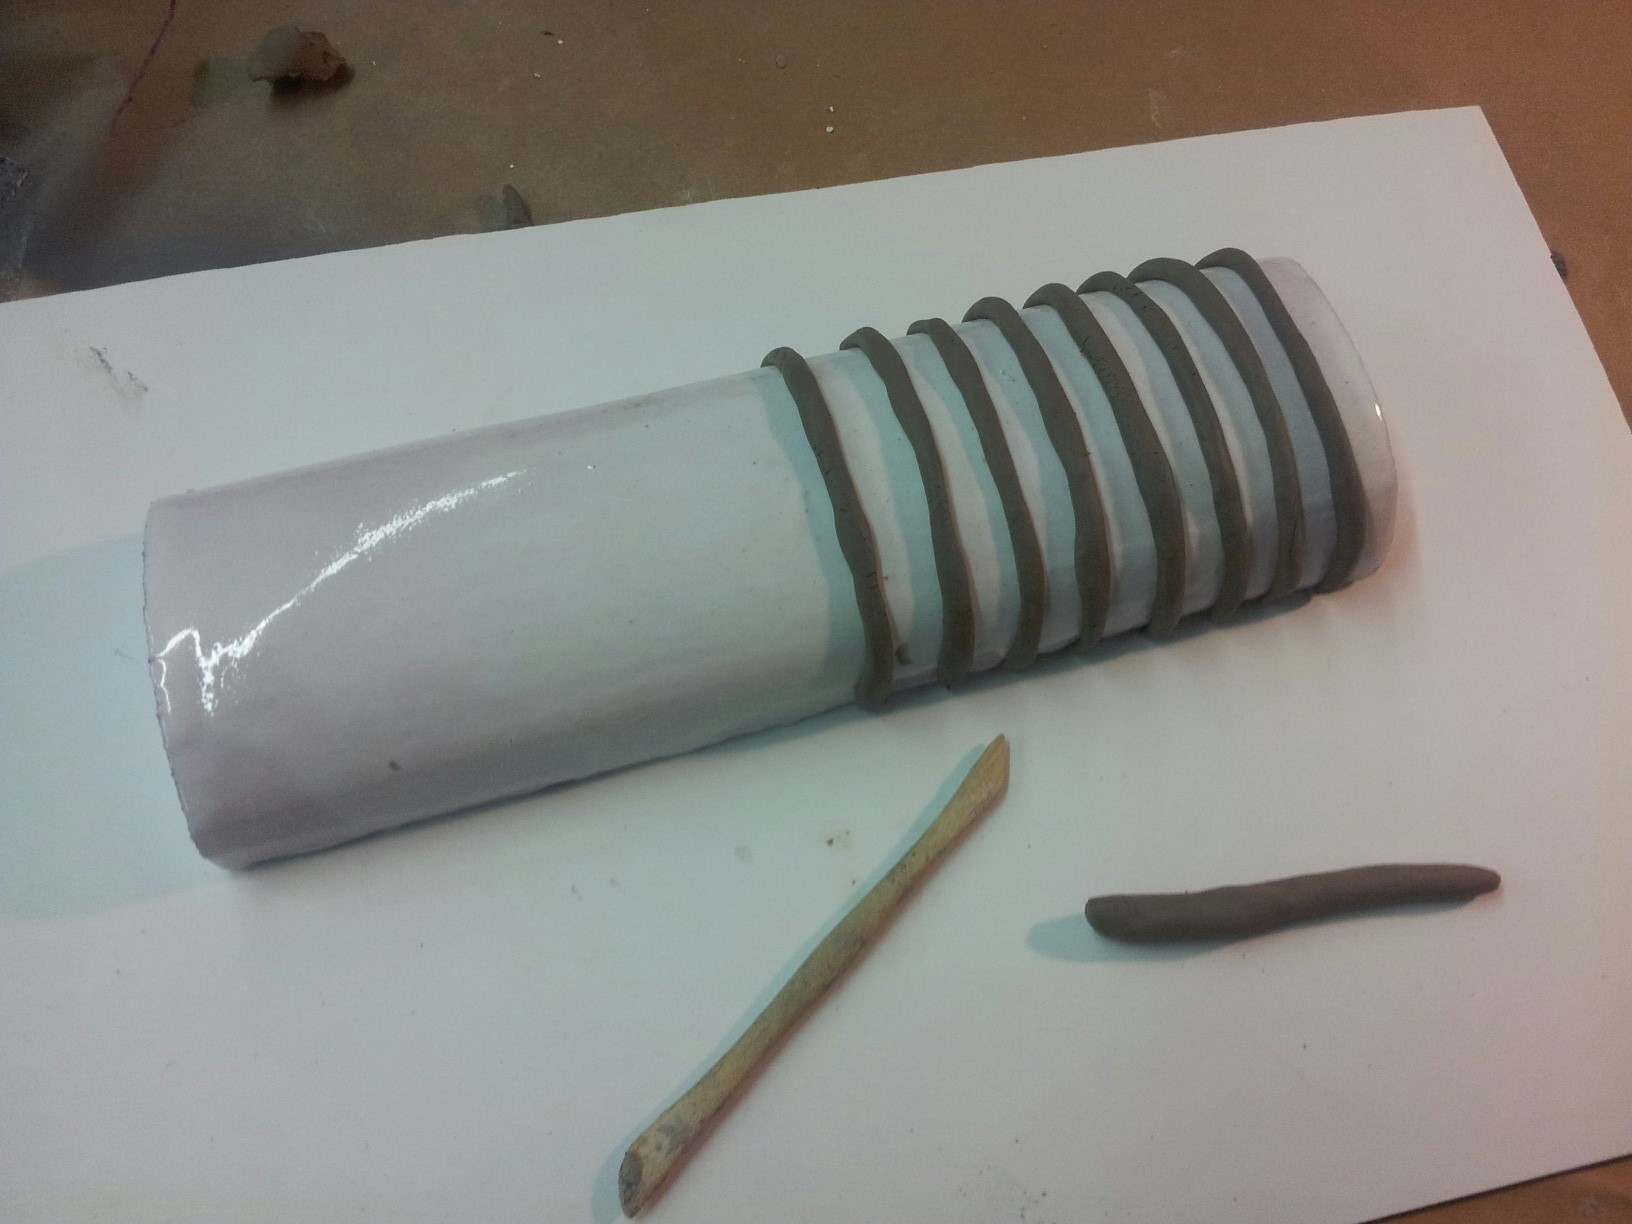
Time to tackle the engine. I decided the best approach to get the general structure was to mill it in wood and then detail it with plastic.
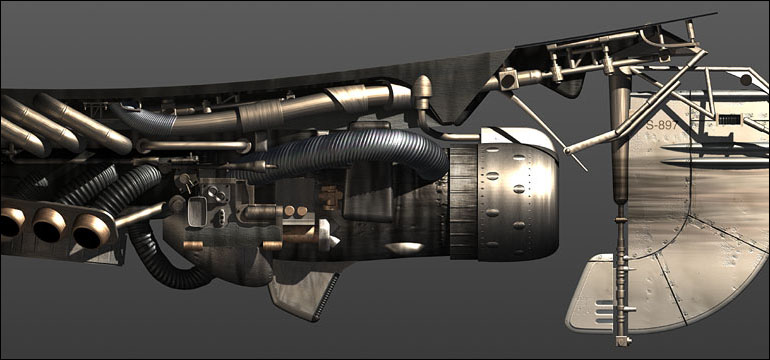
Here's the process of turning the engine from a raw piece of poplar.
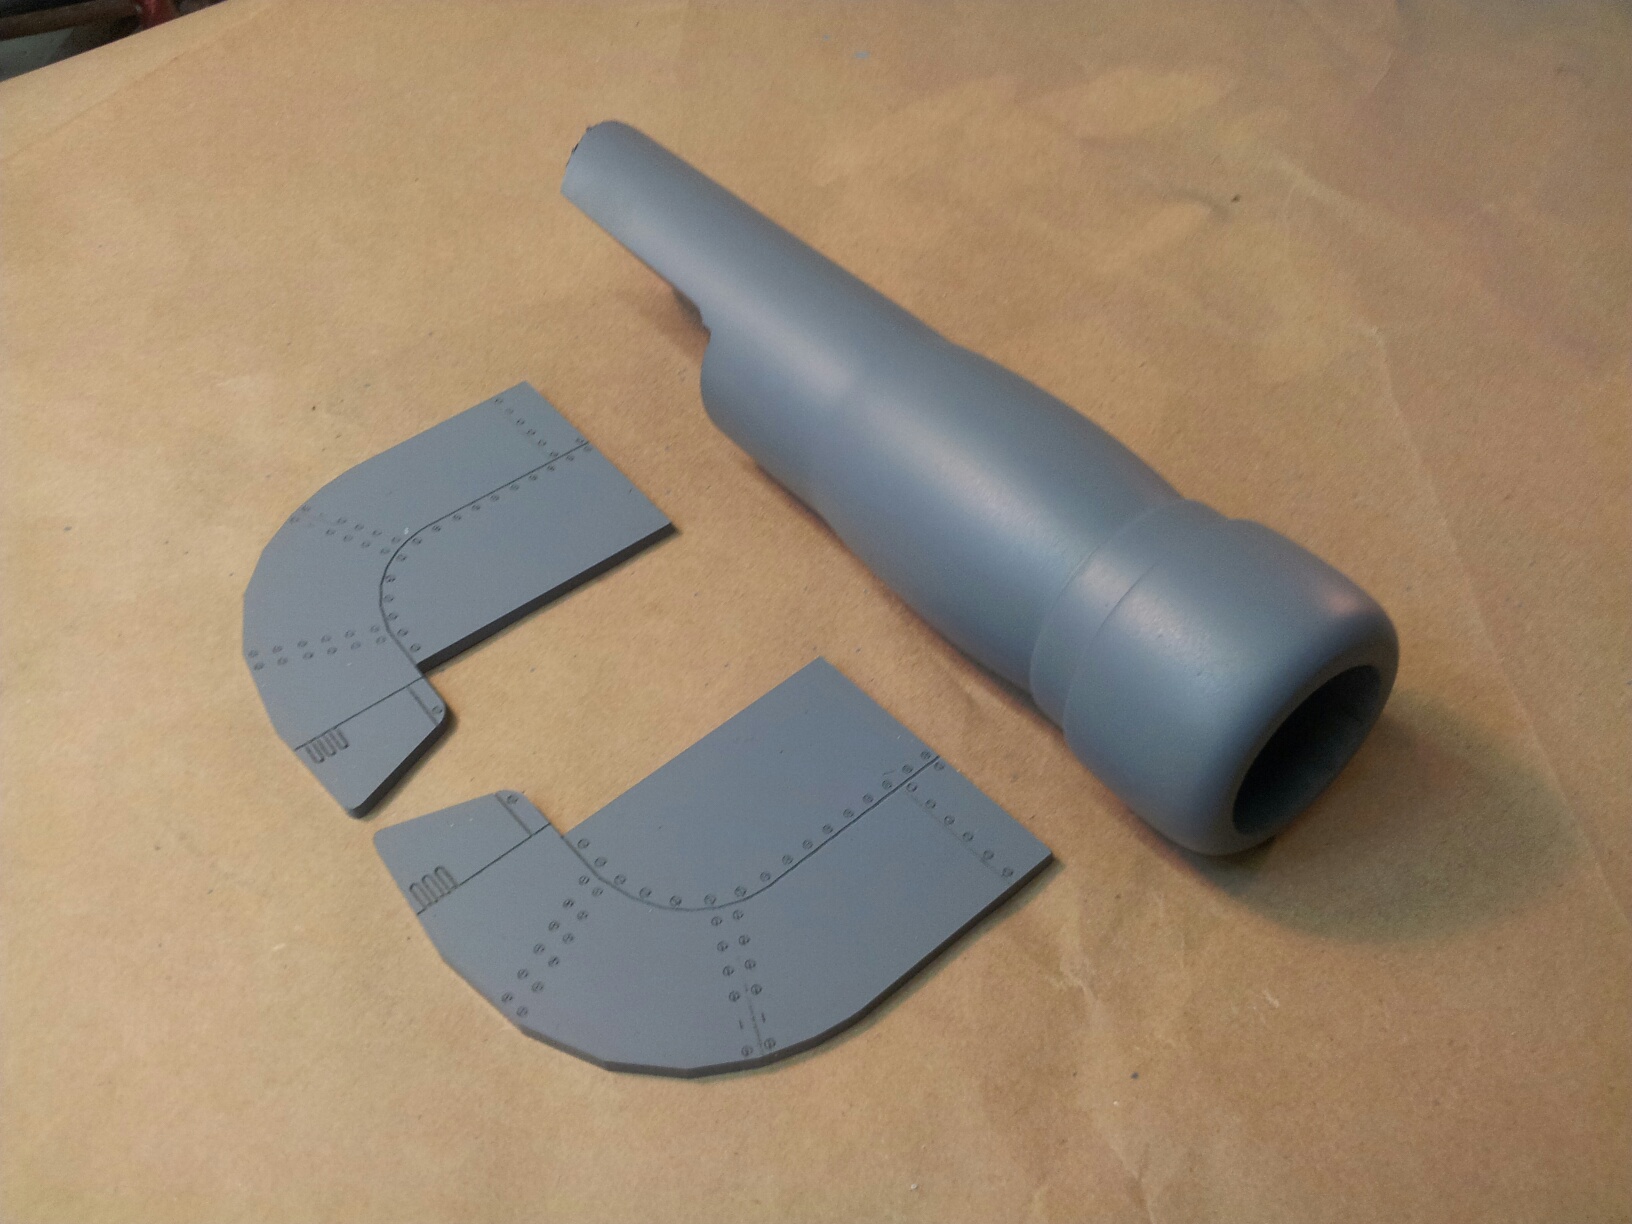
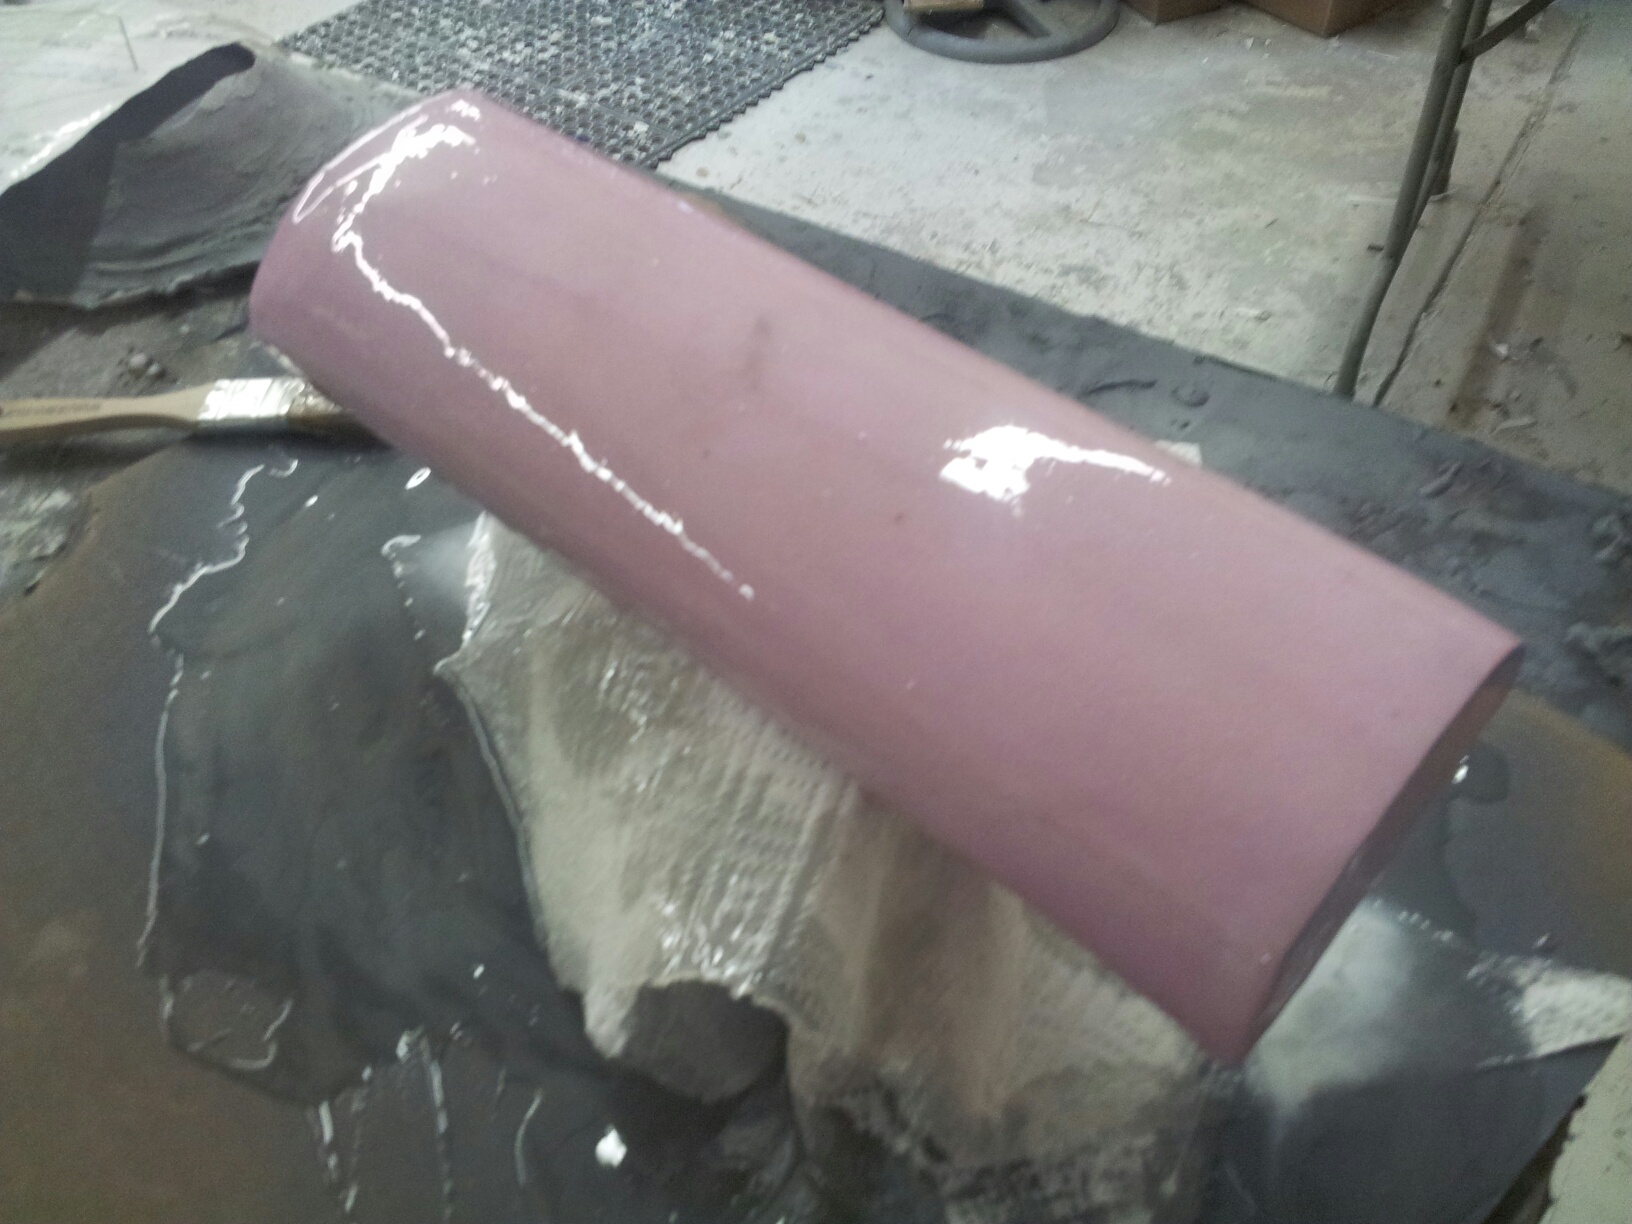
Final CAD layout for the rudder:
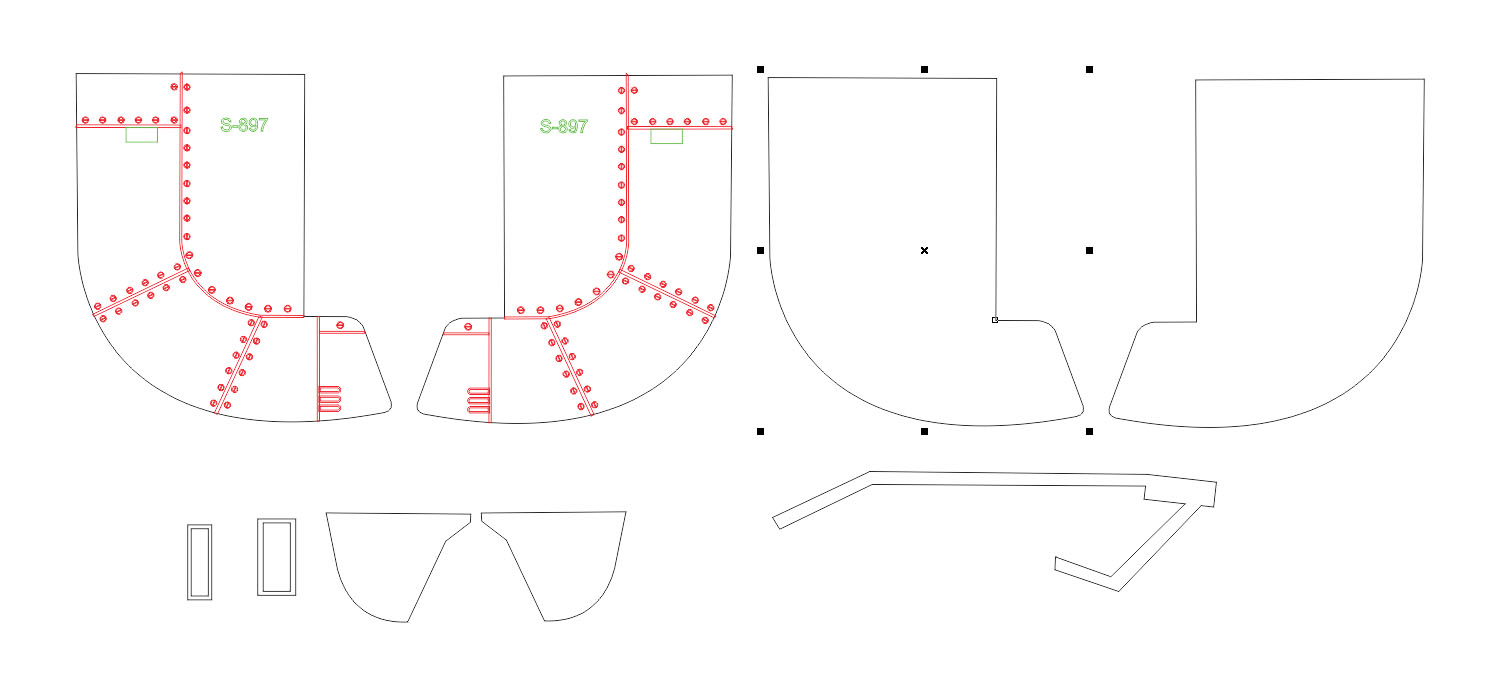
I laser cut the rudder fin using carefully plotted paths of various speed and power settings to achieve panel lines and recessed bolt heads.
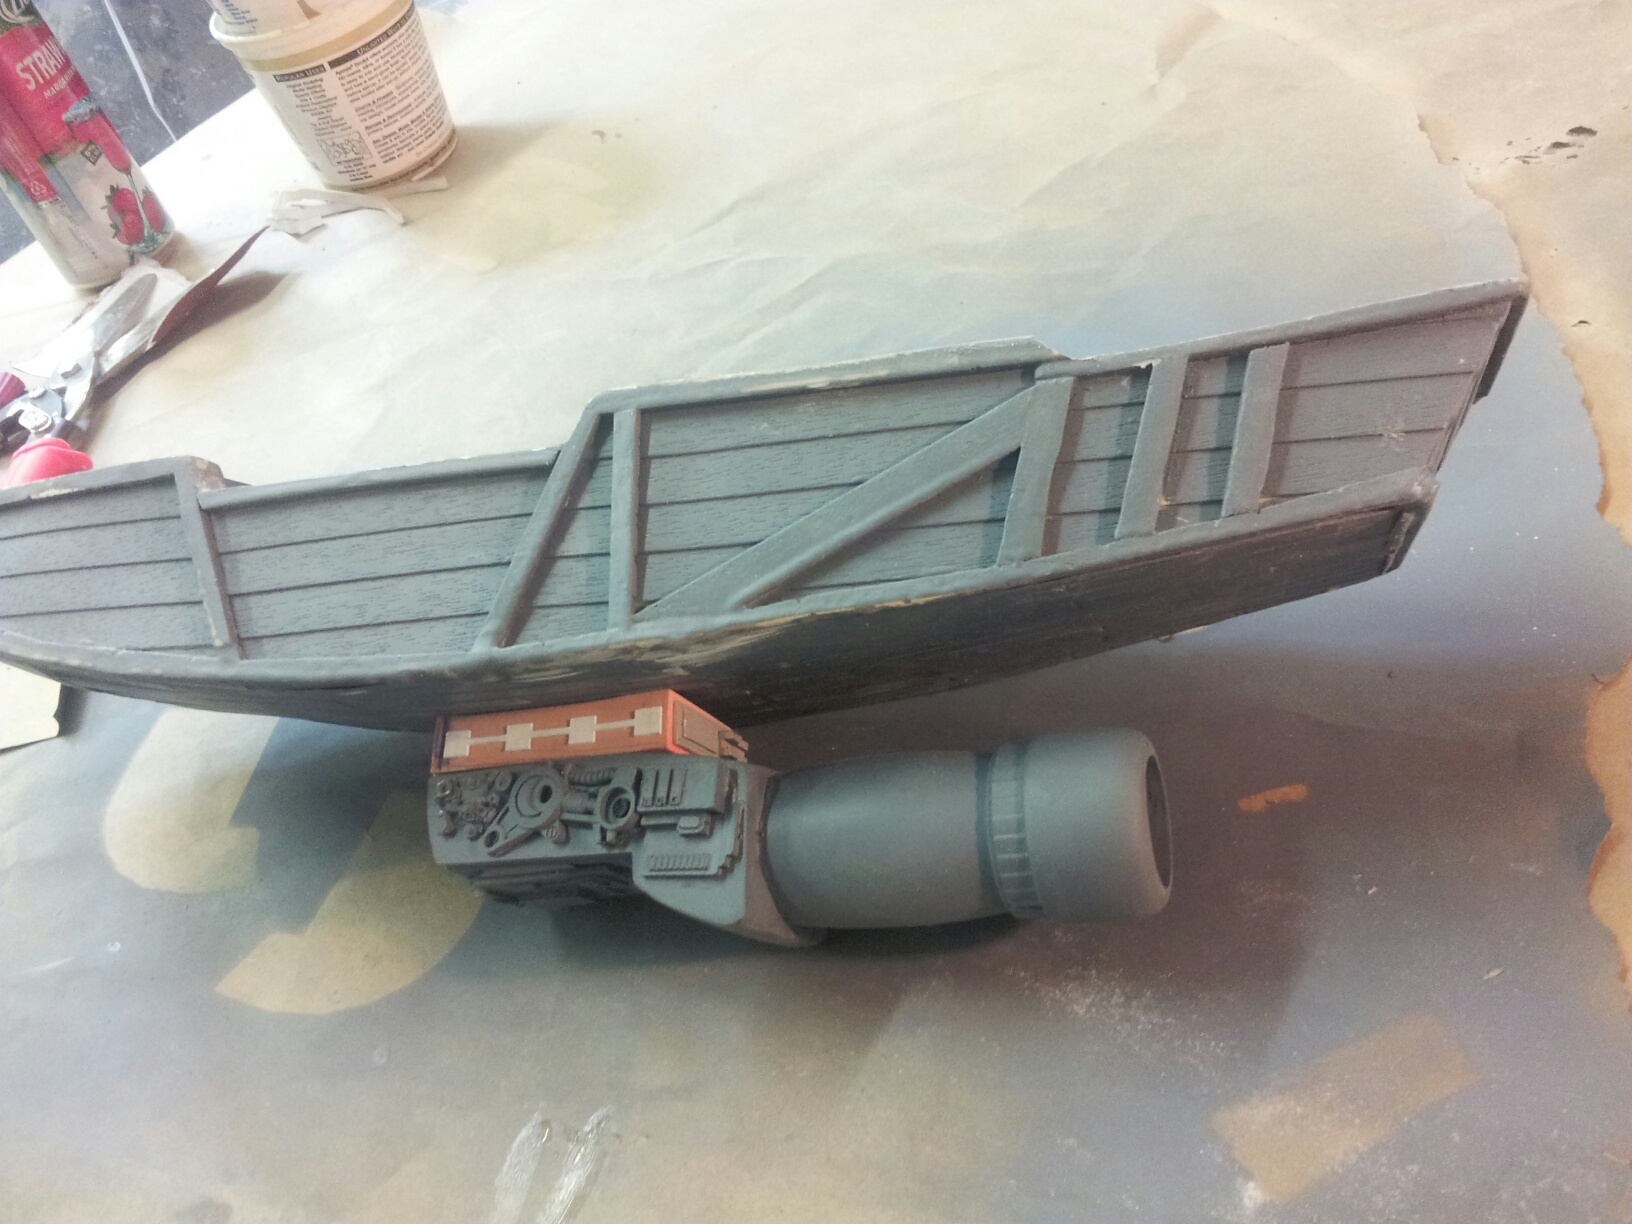
The engine was clad were needed in LEXAN and detailed with greeblies.
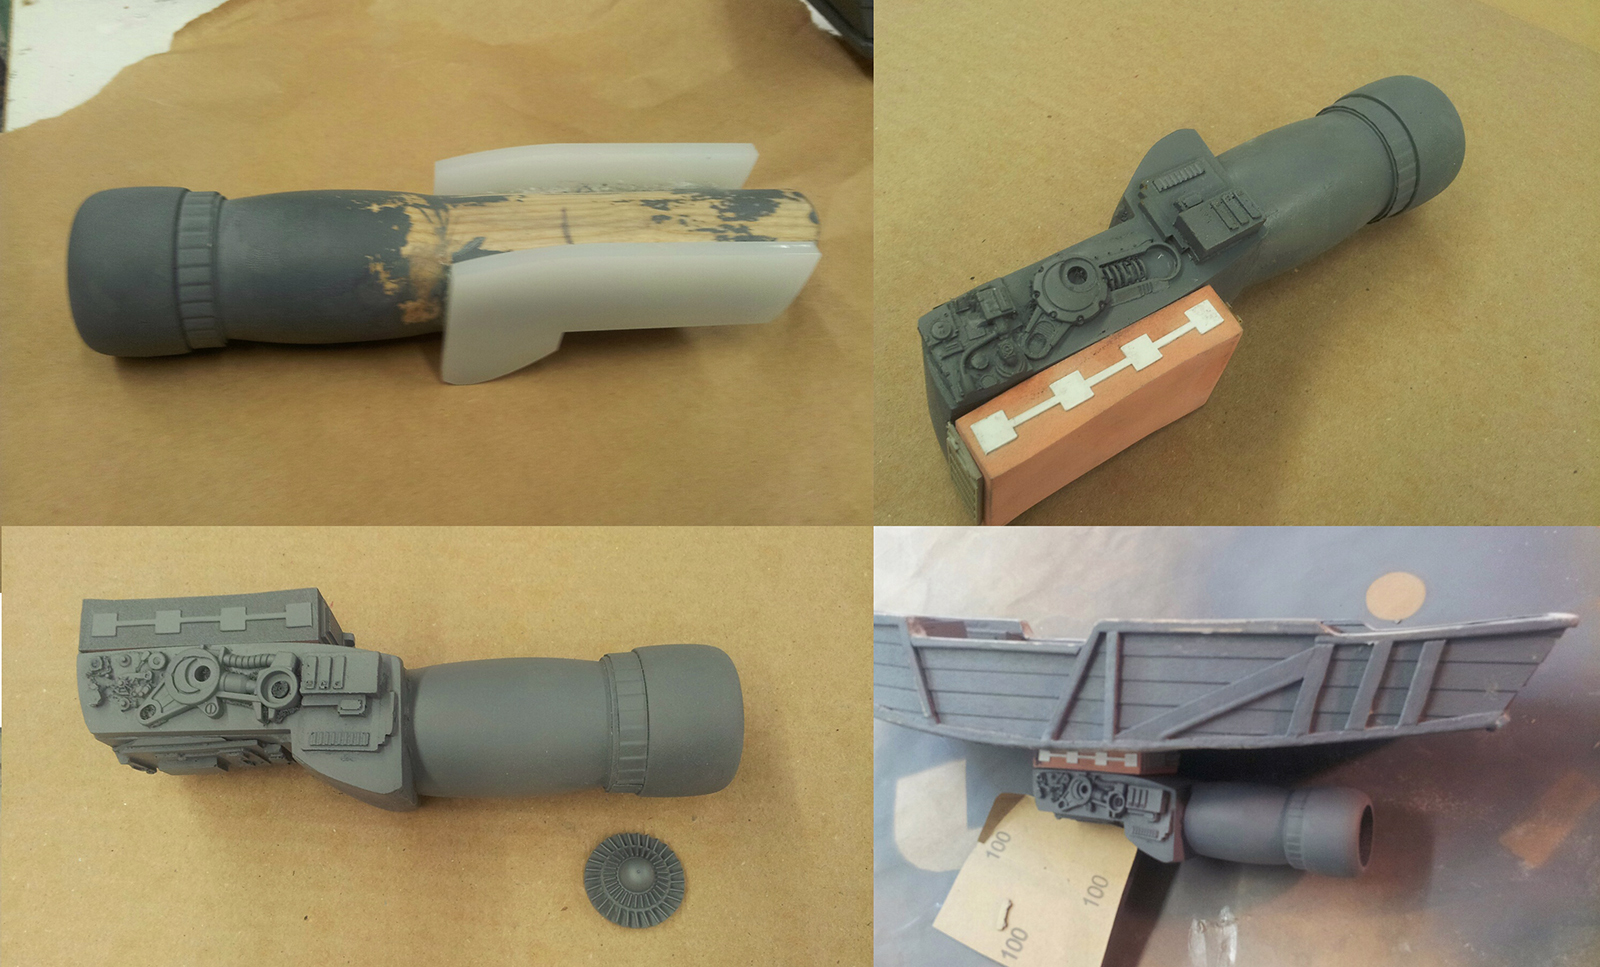
The PINK material you see me building with is TOOLING FOAM. GREAT stuff for building up quick shapes. It's used here to create the mount for the engine.
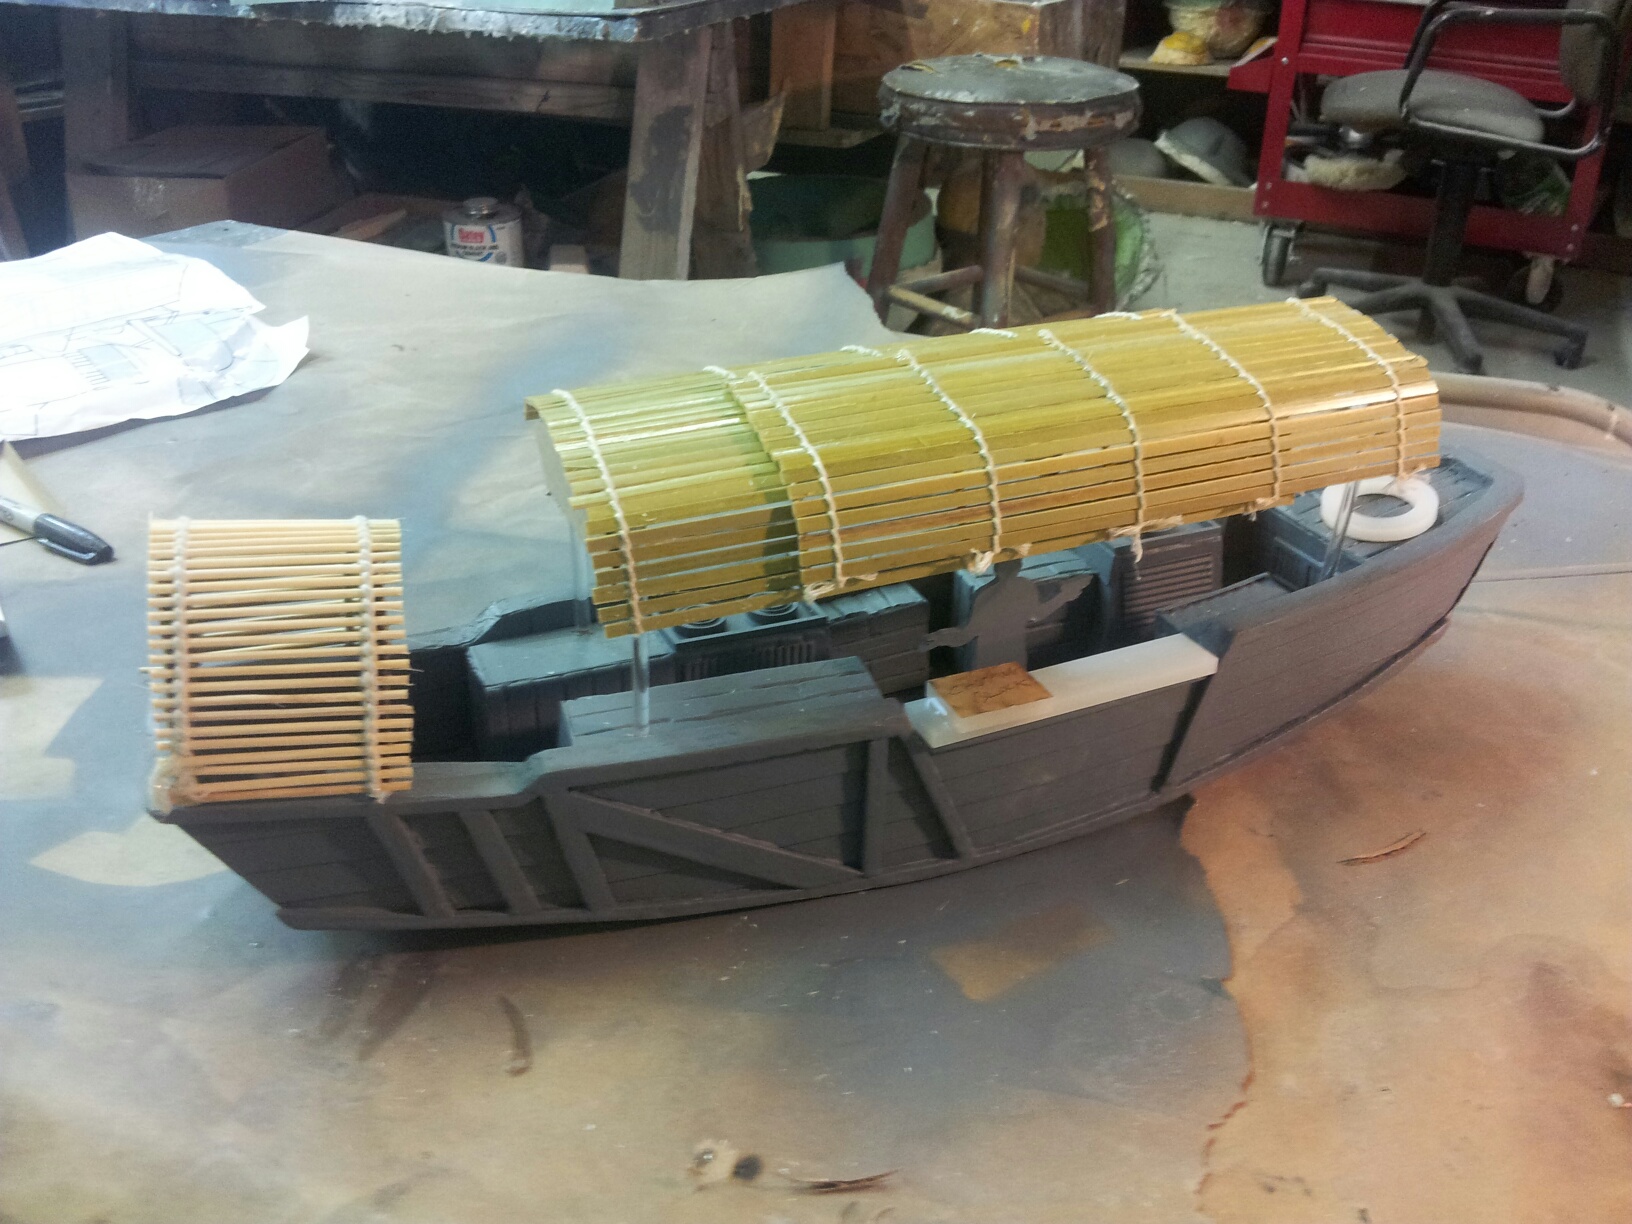
Experimenting with the framework for canopies with sushi matts. The is a stand-in for the main canopy. I haven't quite figured out how that will be made. Possibly saturated canvass over a vacumformed canopy skeleton.
The further I dig into this model the further I need to design more parts. The more you start understanding an object in 3 dimensions the more detail is revealed. It's like peering behind the screen and discovering new fascets you never knew existed.
Here you can see how far 2D design can get you. I come up with ideas for detail, sketch it out, scan it, then draw vectors. The art goes to the laser cutter, and deluxe topography start happening on the model.
Getting Closer!!

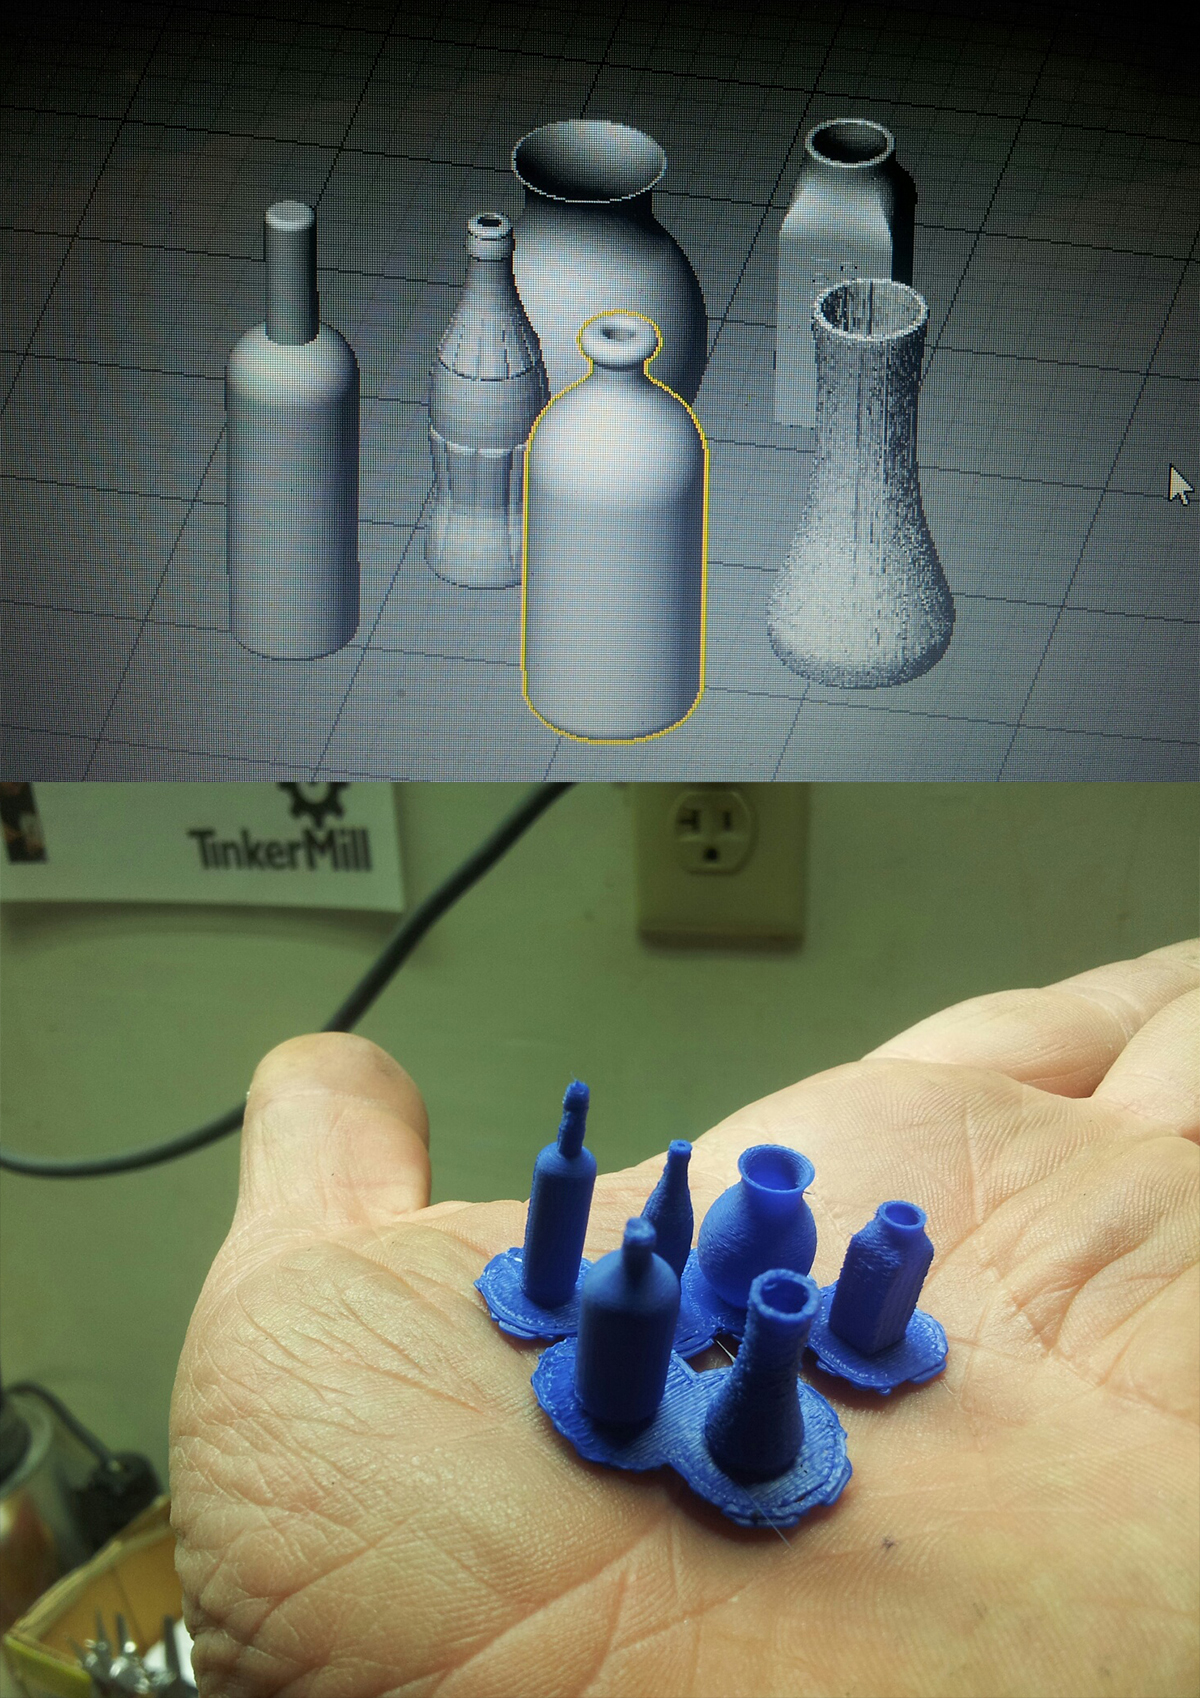
3D PRINTING ACCESSORIES
I utilized my 3d printer to create some of the small accessories:
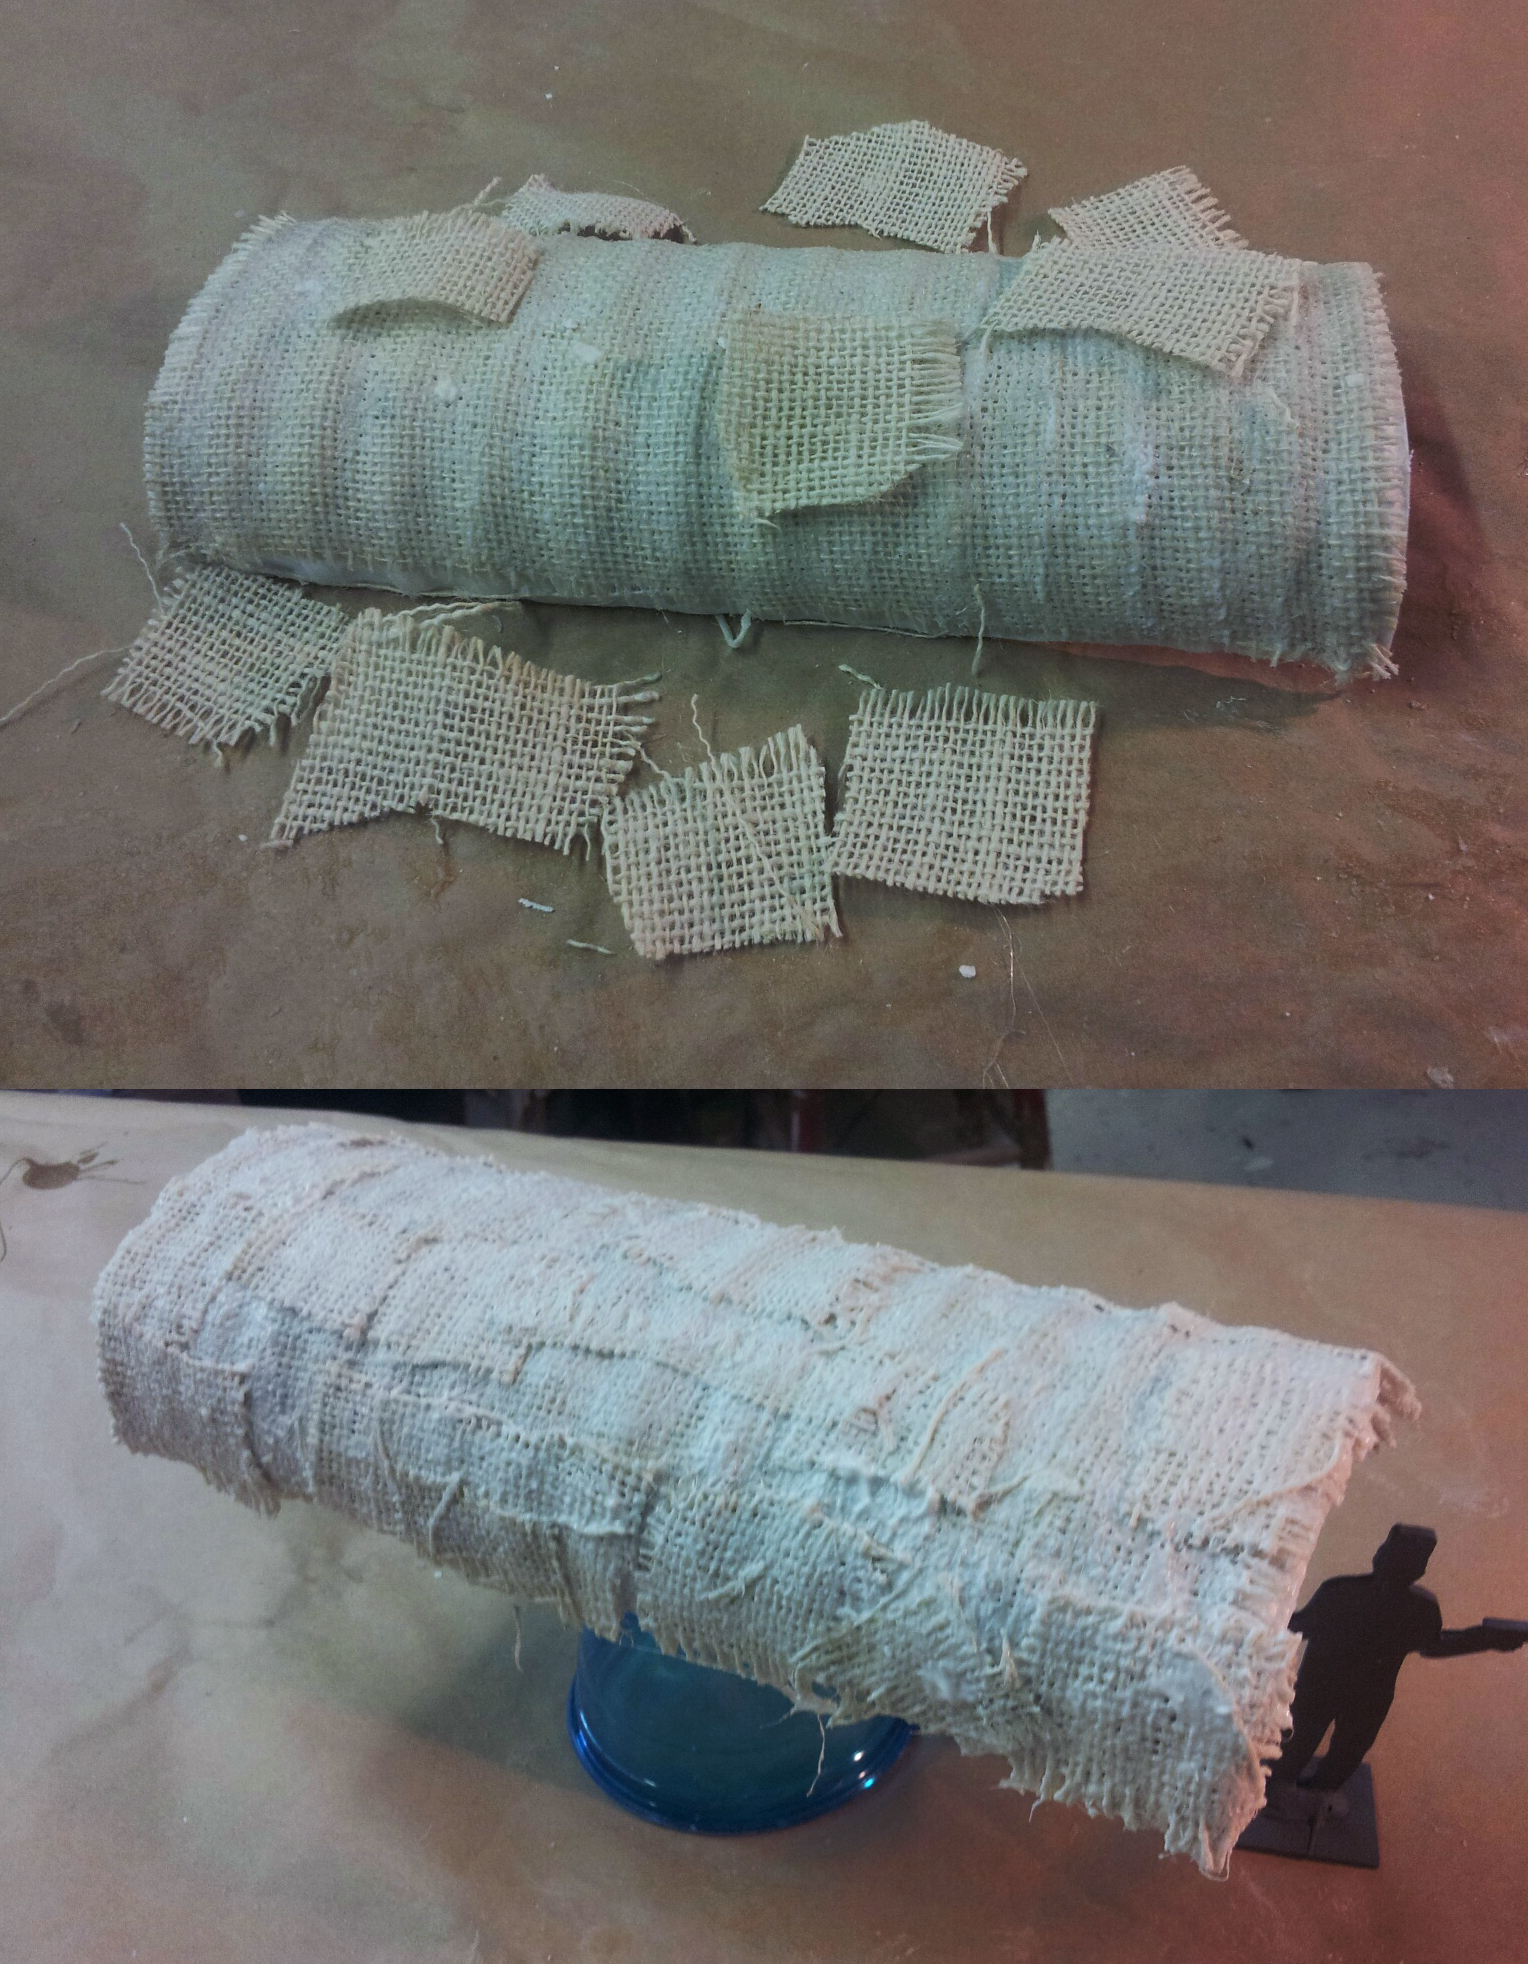
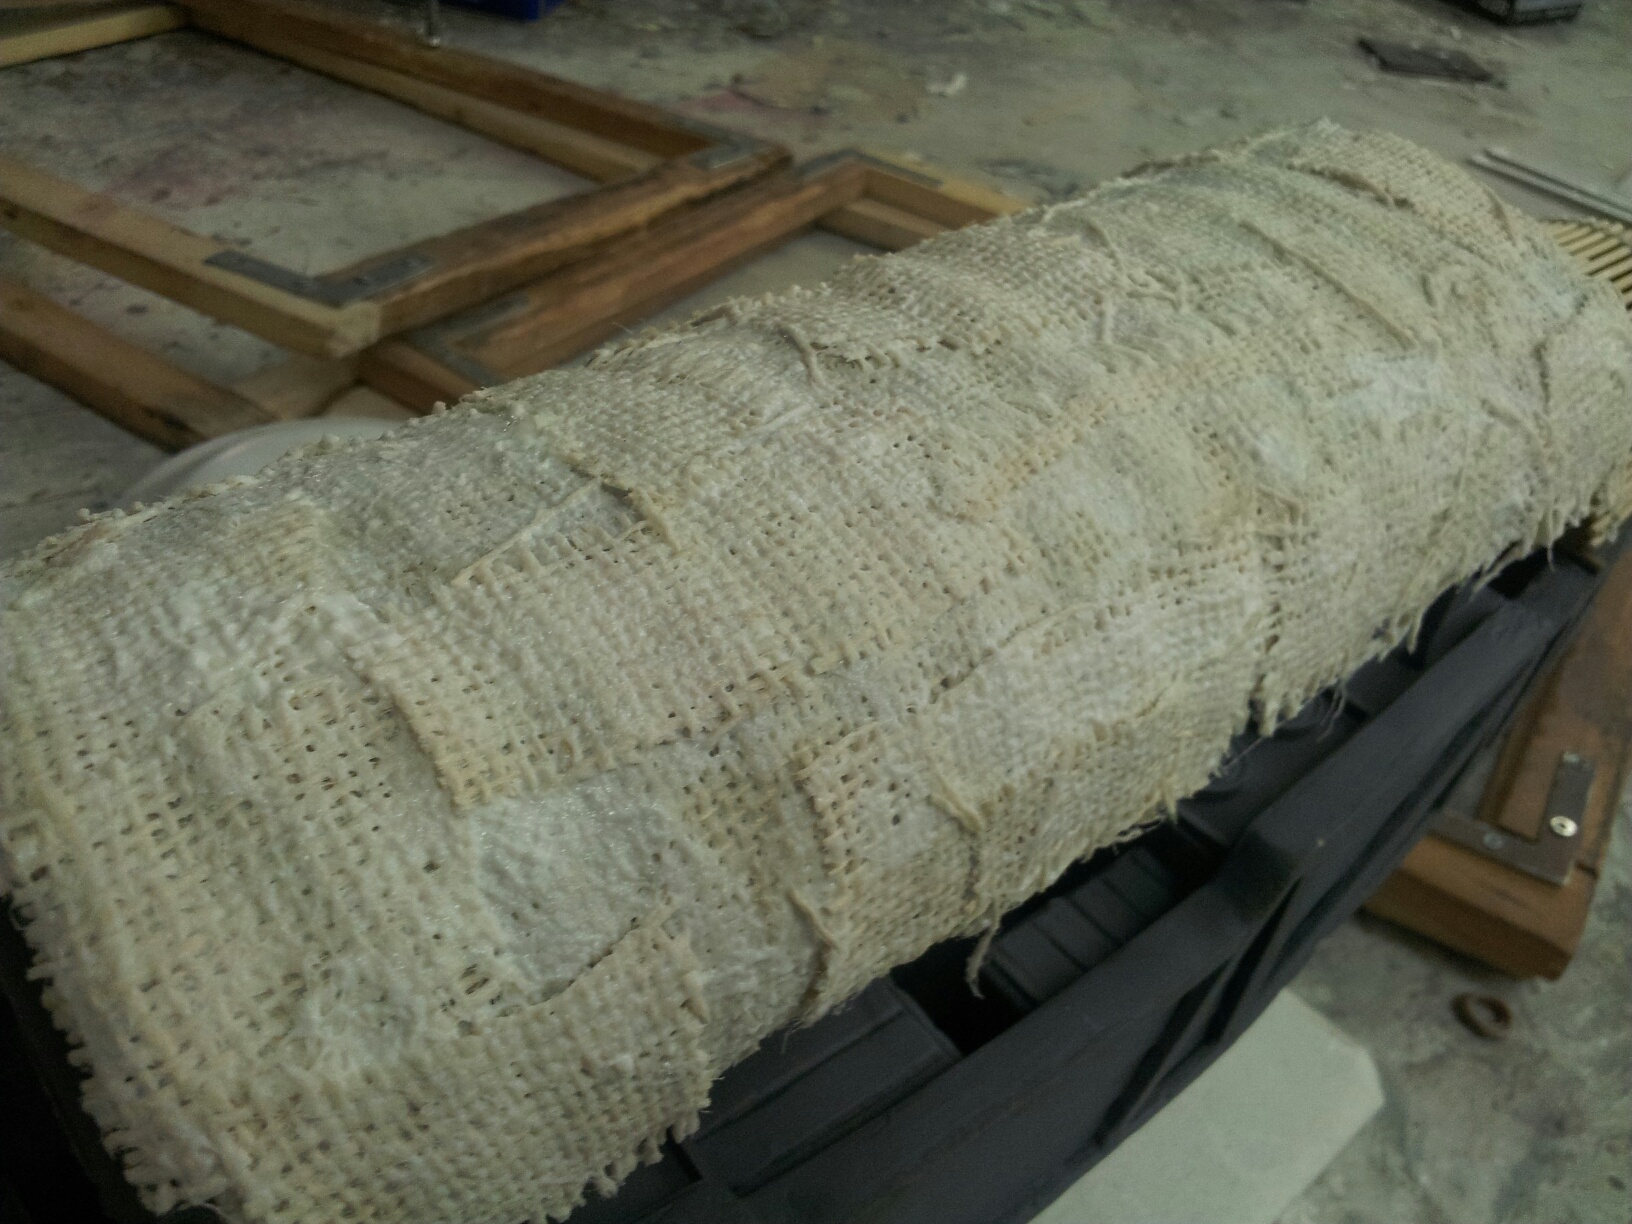
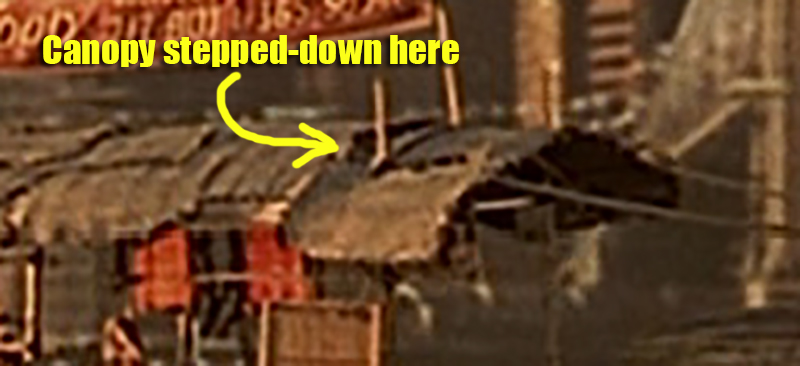
Creating the CANOPY
I decided to create the canopy from a vacuformed shell that has layers of canvas and burlap laminated onto the substructure. I started the whole process by sculpting foam.
The foam was then coated in resin and ribs were sculpted on top. The piece was quickly molded and a vacuforming tool was created from the mold.
This rib detail will be completely covered up but there will be some small indication of a wooded ribbed undertructure once it's laminated in fabrics.
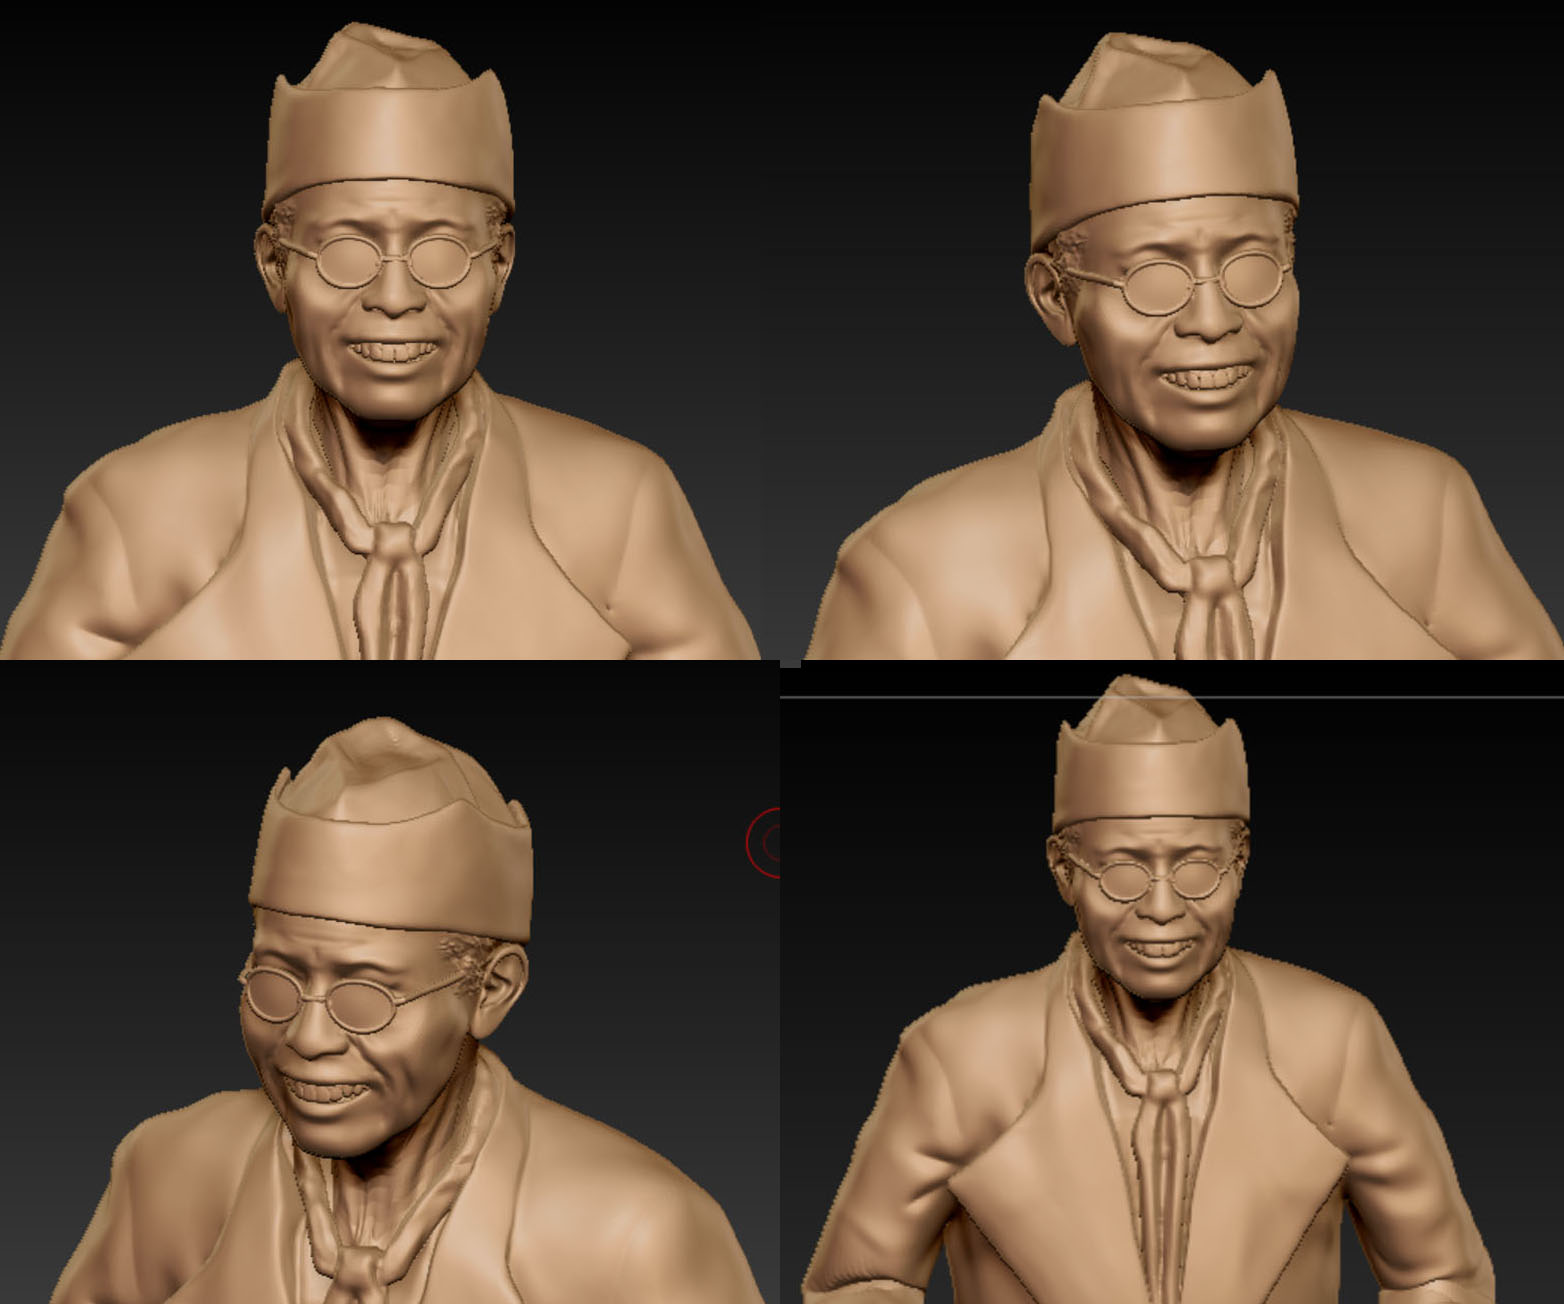
Mr. KIM MODEL
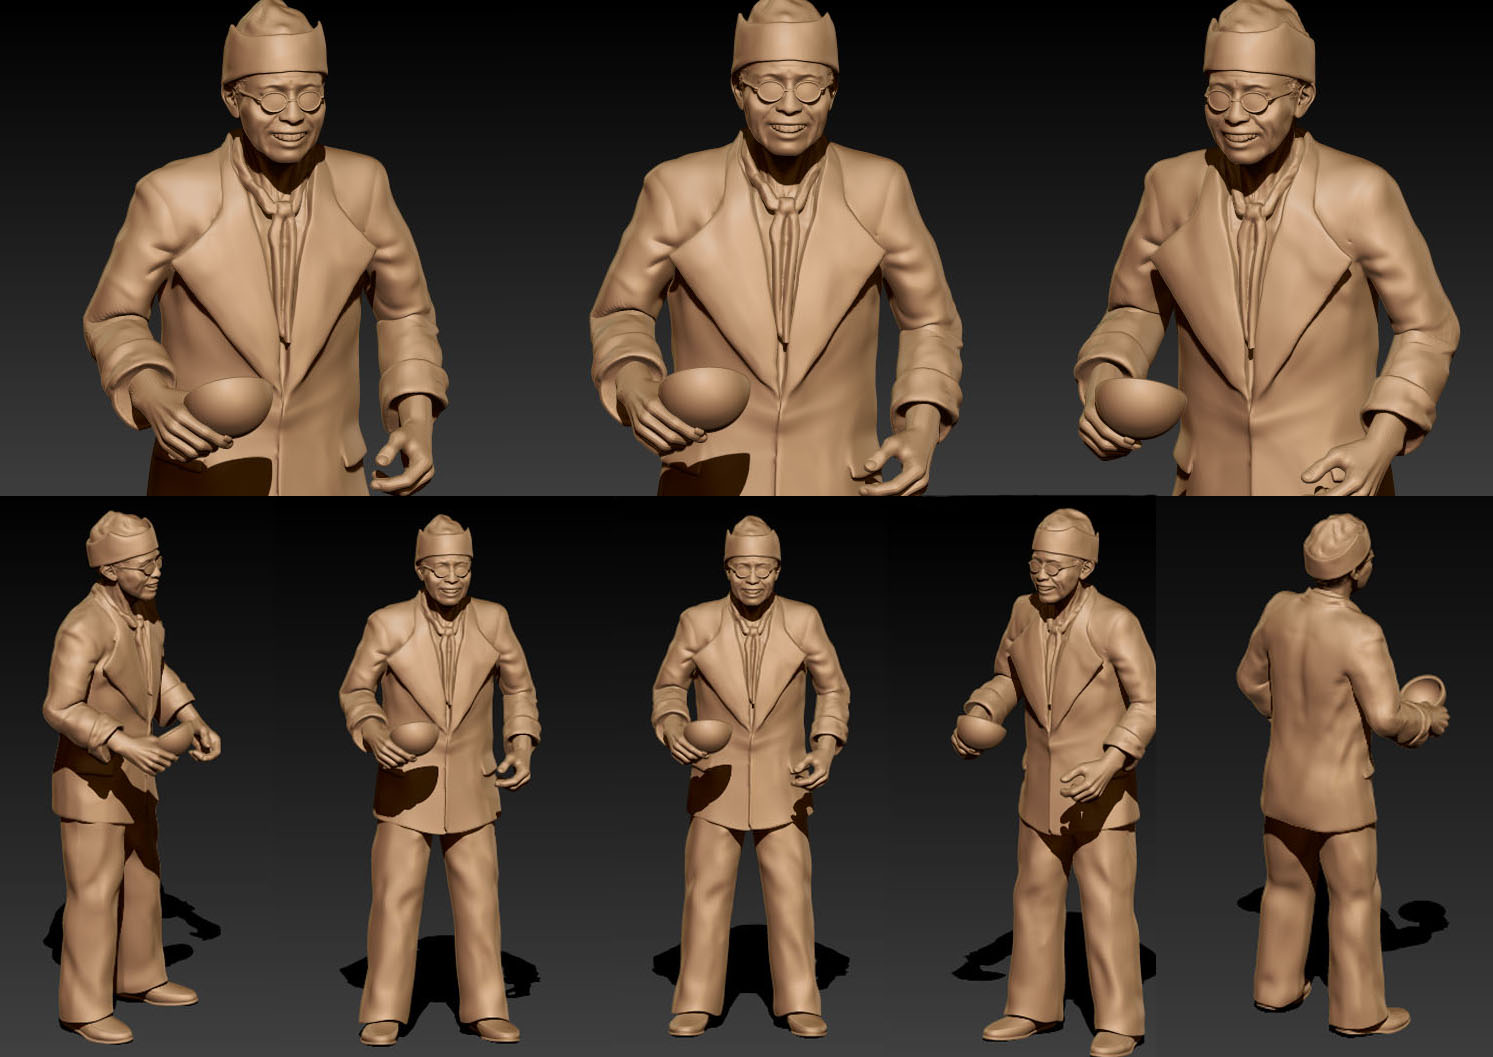

Final Mr. Kim model ready for printing. Special thanks go out to Scott Willis and Danny Lancelot for their help with the Mr. Kim model mesh.
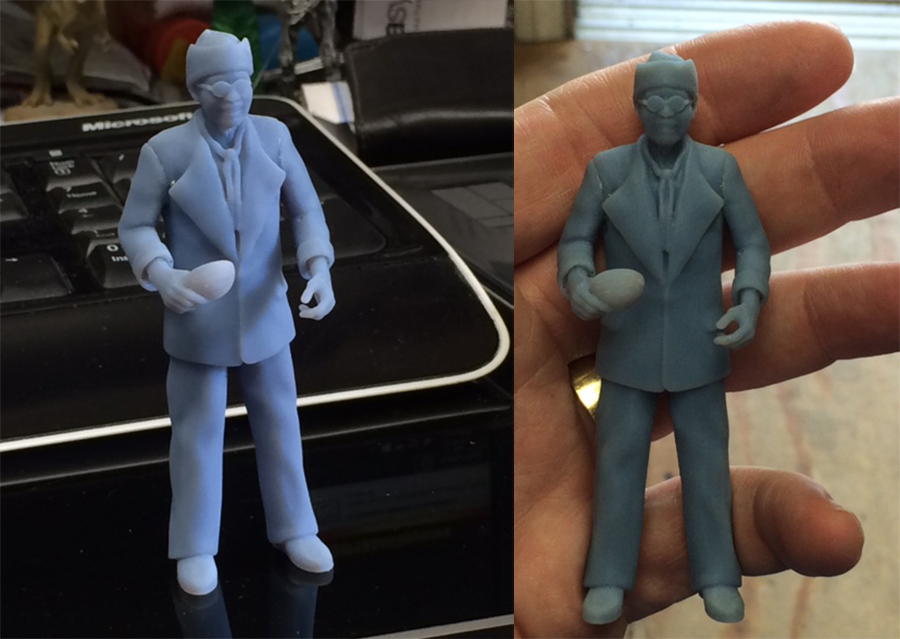
The resulting 3d printed model of Mr. Kim:
The resulting castings:
ACCESSORIES/INTERIOR DRESSING
MOLD-MAKING
Here's the first attempt at a buildup using the cast kit parts. You can see a 3D printed tire (purple) resting on the base.
Refinements on the Canopy:
The intial canopy was too curved so I retooled it and completed this newer more accurate version:
Experimenting with bamboo sticks to create some detailing:
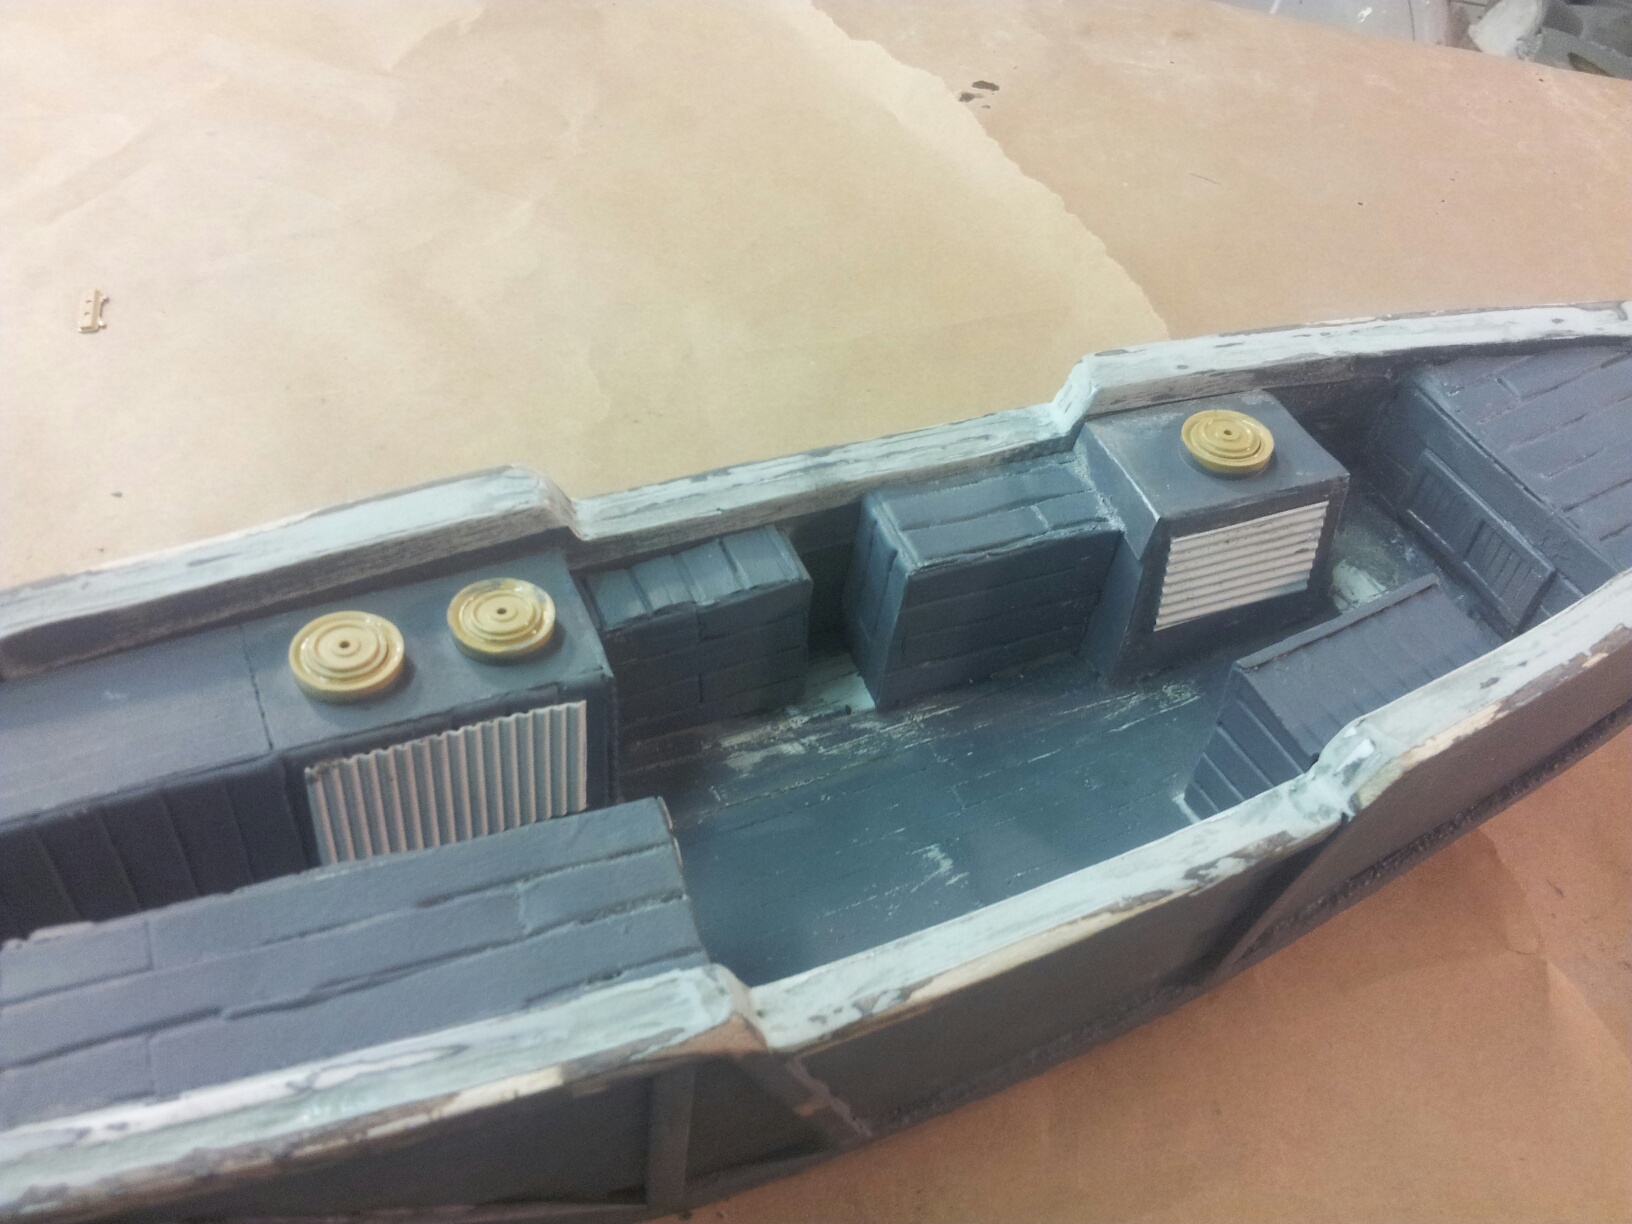
Dressing the INTERIOR:
Dressing the INTERIOR:
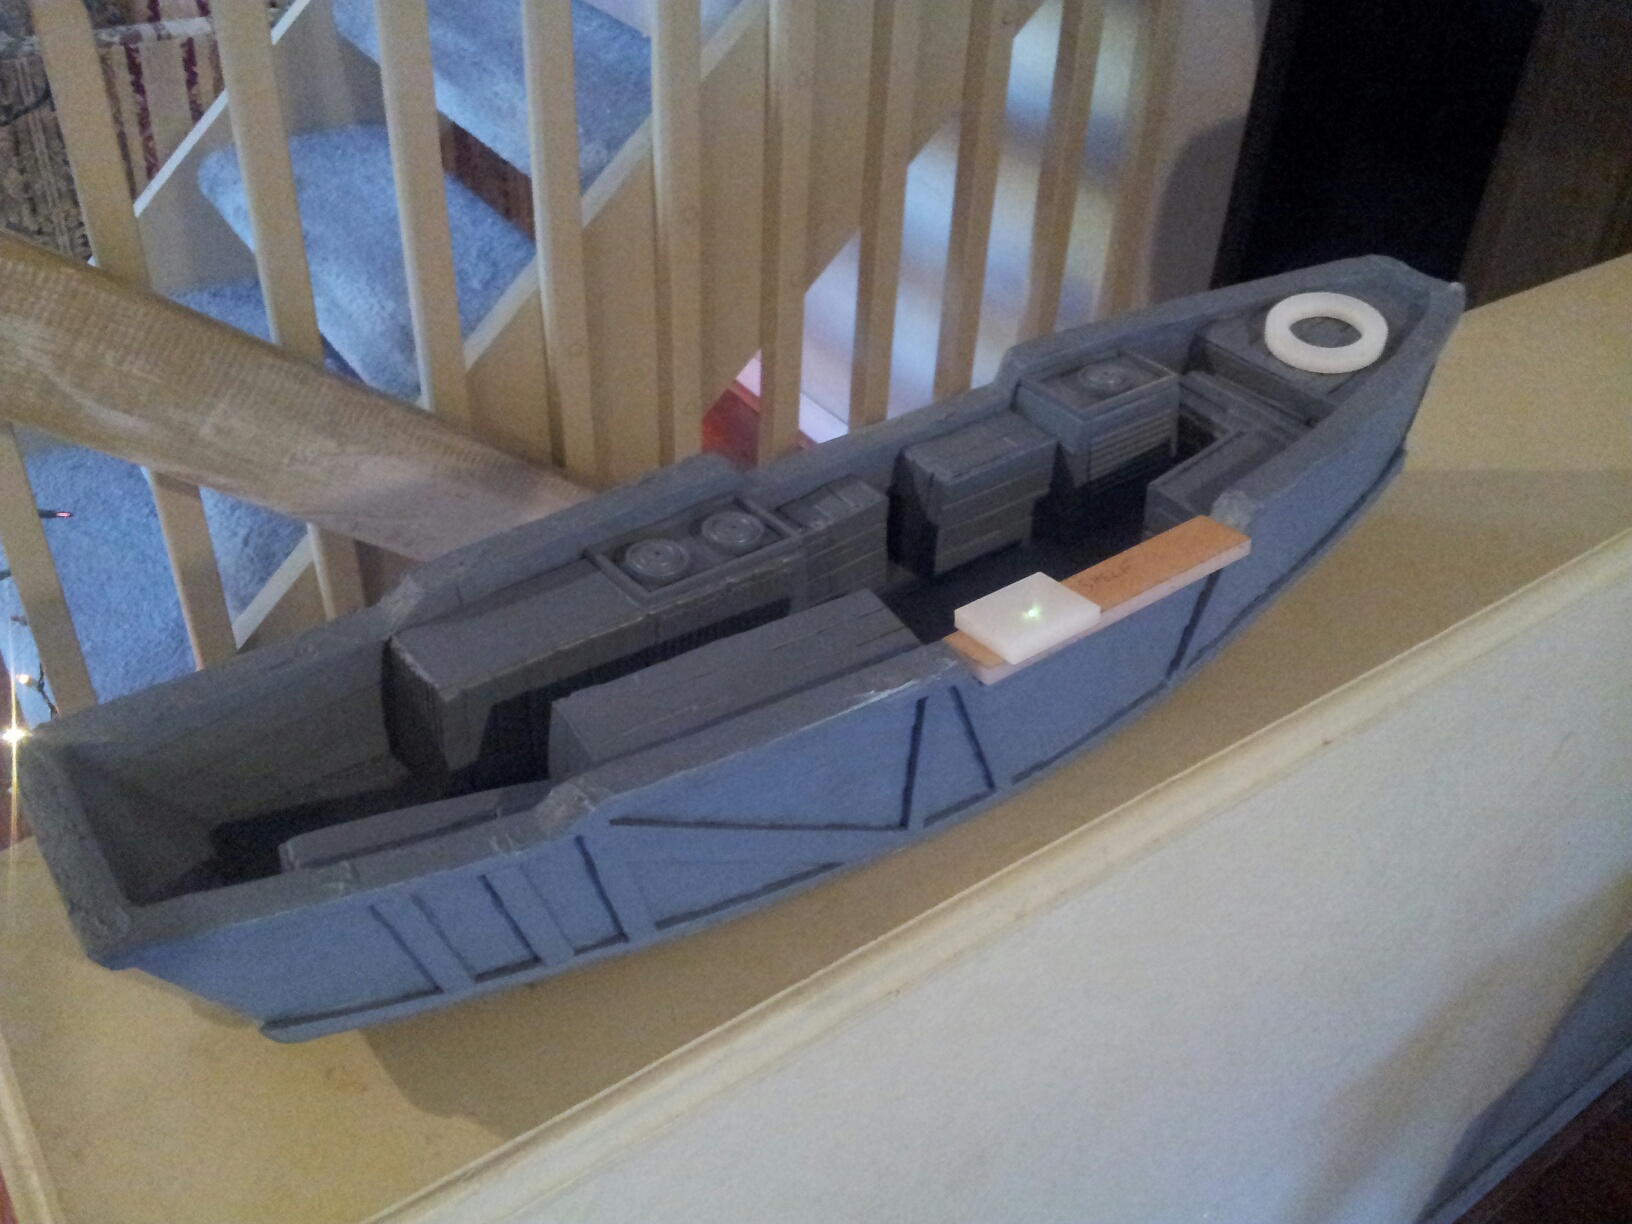
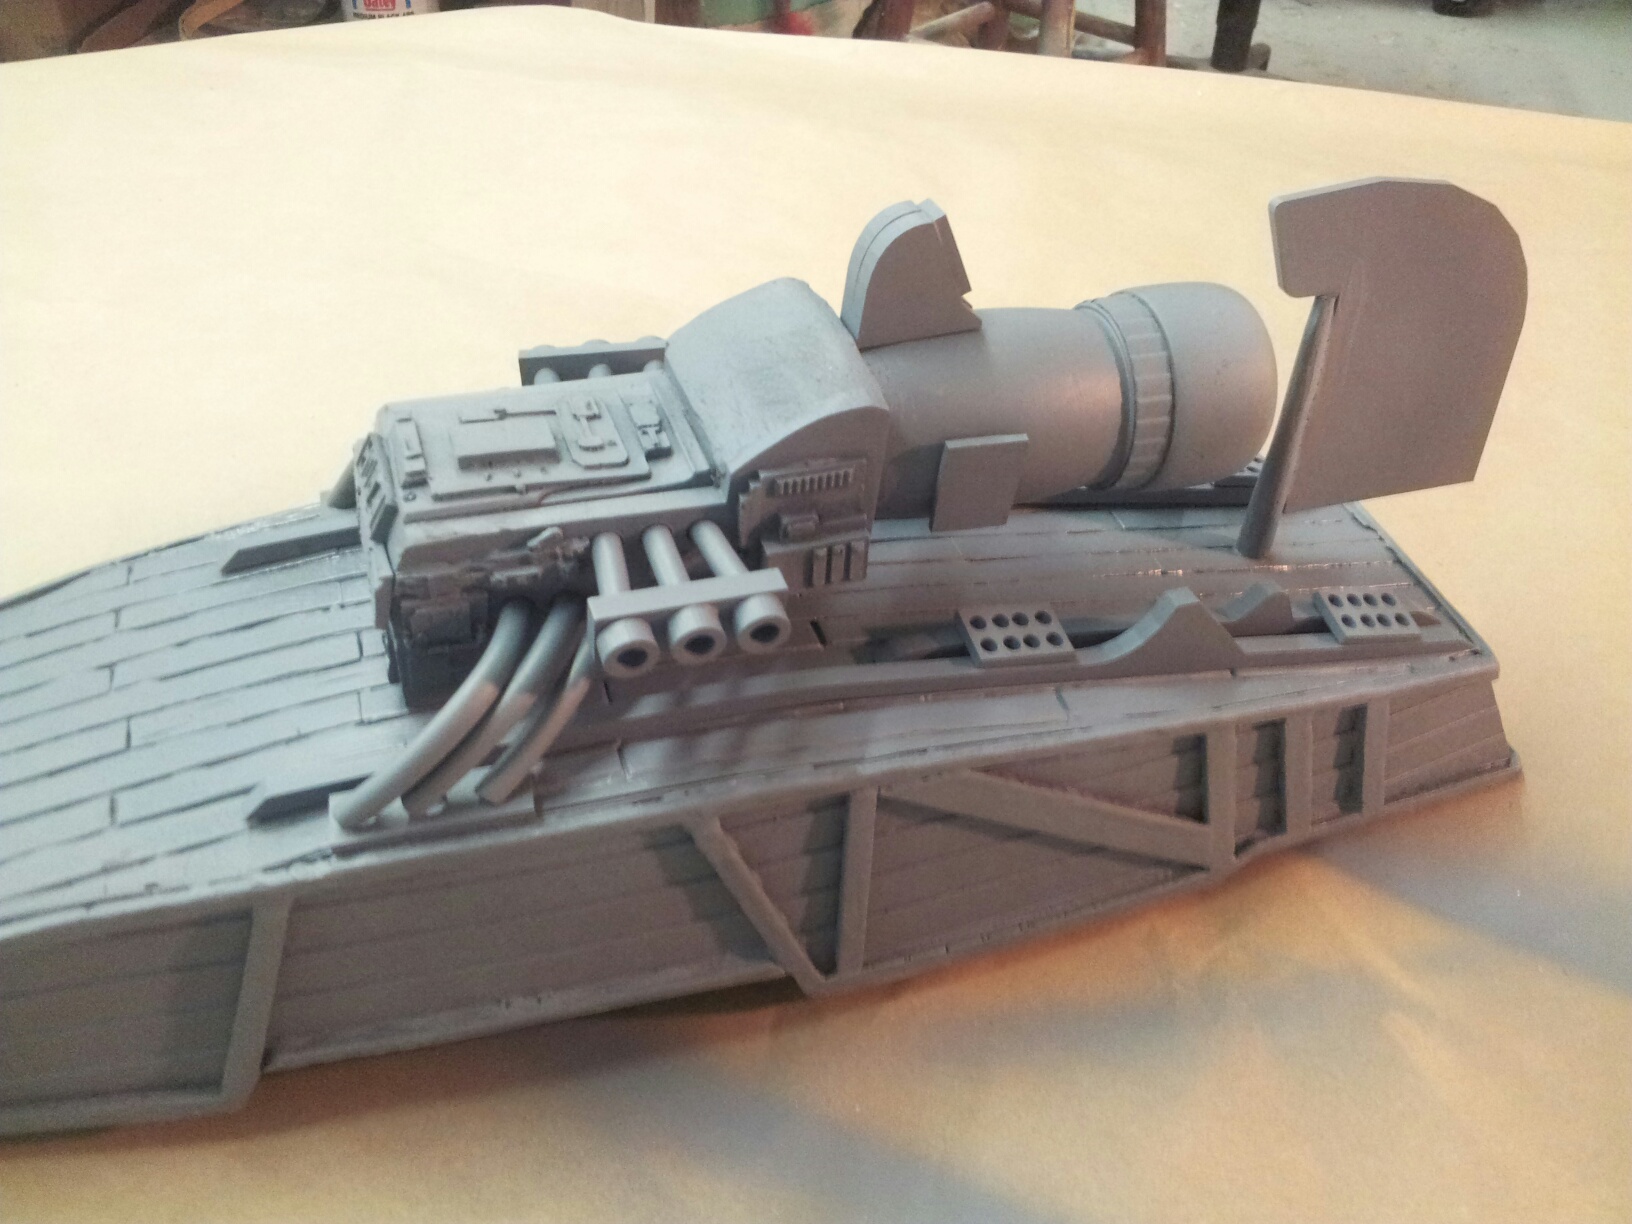
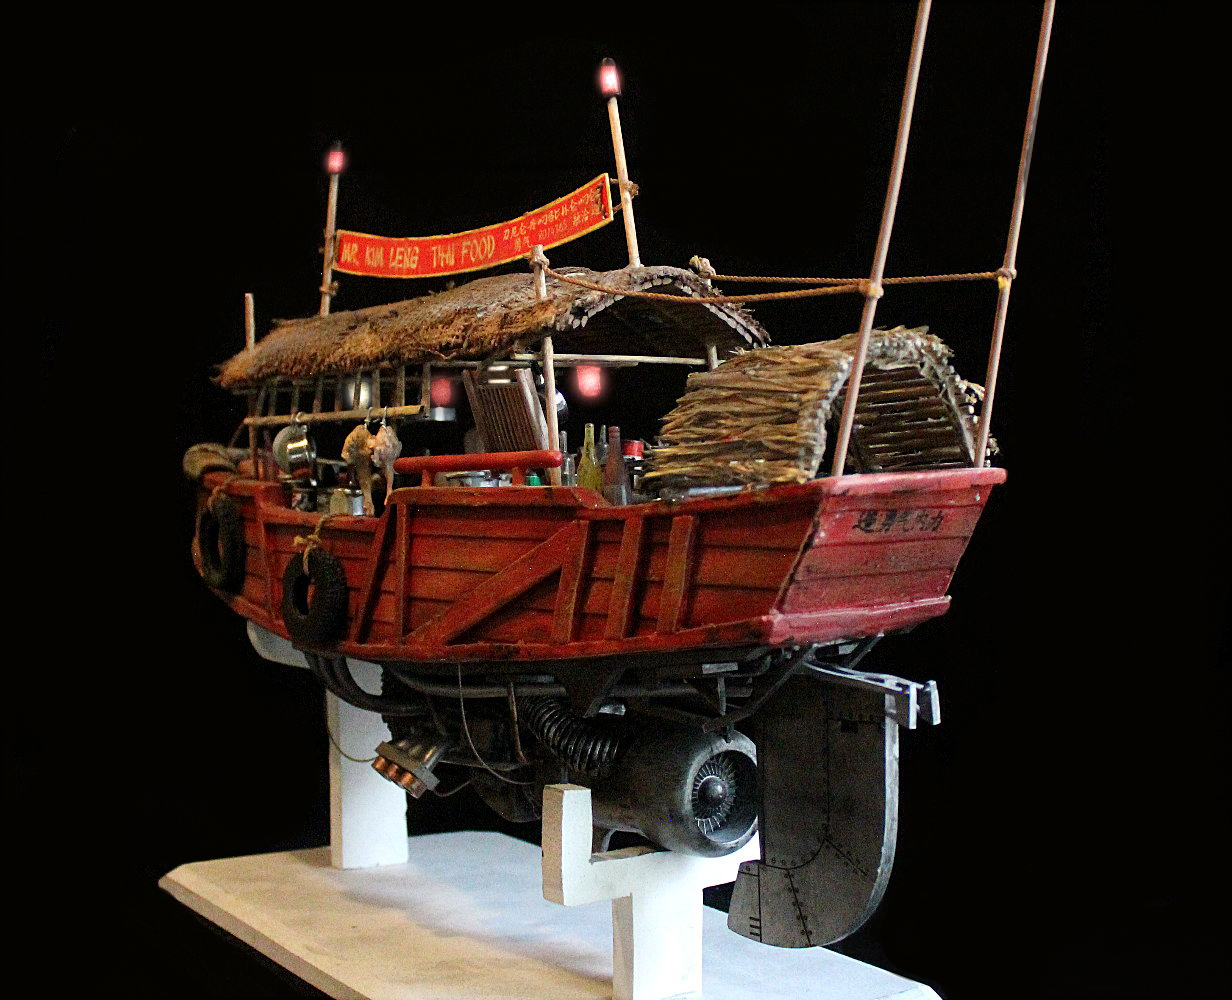
Finished model:

Special shout out to Randy Neubert, JOHNNY 5 and Monica Mireles for their contributions to this project!
VISIT THE FIFTH ELEMENT PROPS!

KORBEN'S CAB AND COP CAR!!

RETURN TO THE MODELS PAGE!!!